
Macro photography is an fascinating way to get a close-up look at everyday items. Photographers will oftentimes use a tripod to create their photos, but in some cases it is necessary, and also more convenient, to hand-hold the camera to create these images. However with hand-held macro photography you will also face certain challenges along the way. Here are some tips to help get you started creating your own beautiful macro photographs.
Camera gear used in this article:
Add More Light
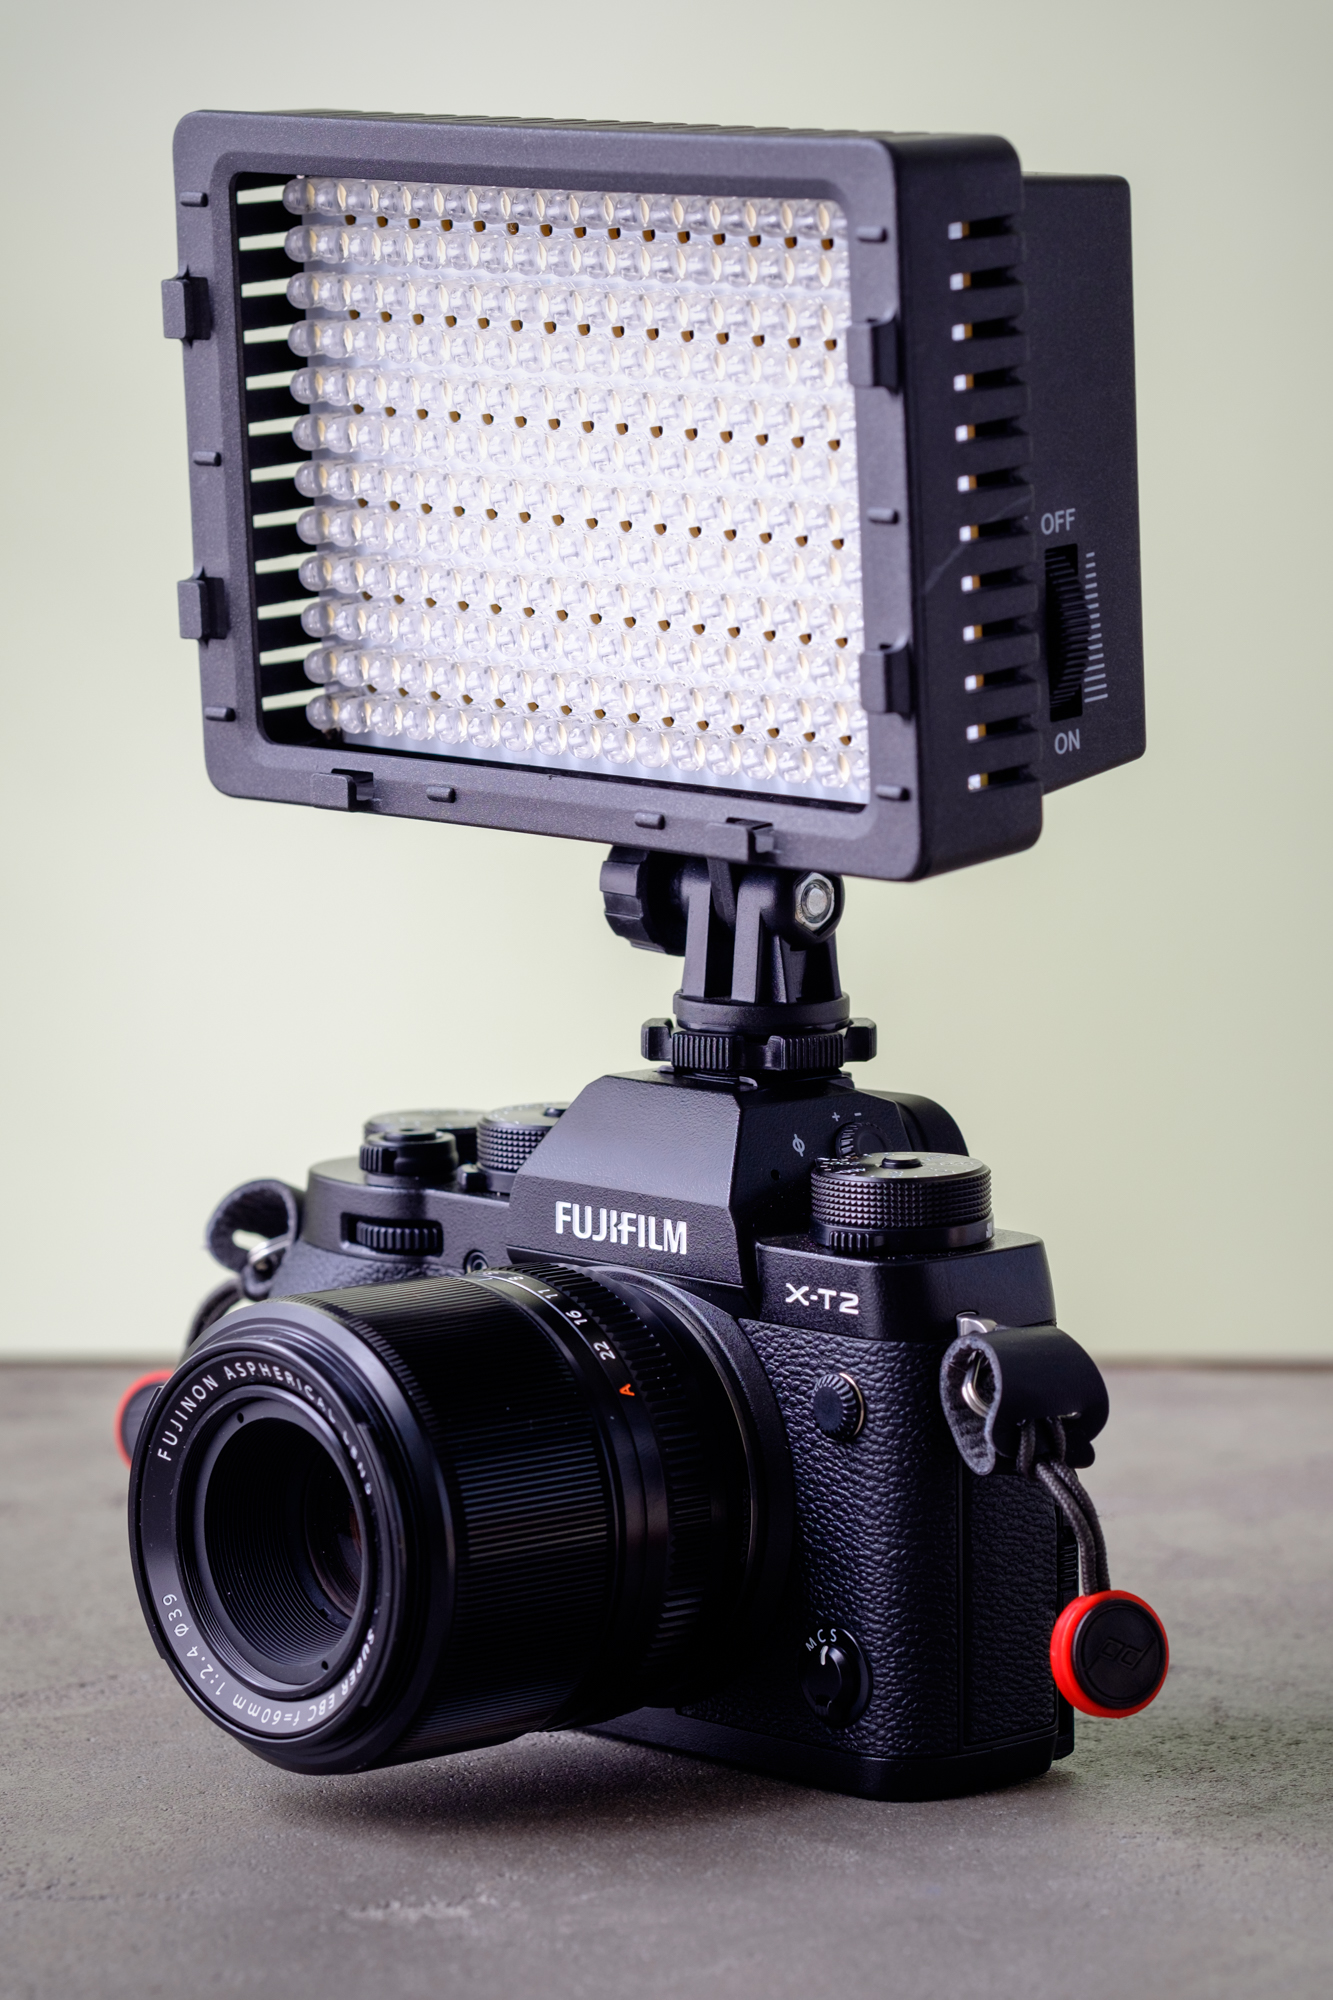
The Neewer CN-216 Dimmable LED Panel adds a nice fill-light to a macro photo without being too harsh.
I like to photograph macro images in the shade or on cloudy days so that I have a nice even light spread across the scene. However sometimes the existing light is not quite enough for the camera settings required to get a good image (a high shutter speed and lower ISO). To compensate, I will oftentimes use a simple and inexpensive LED light that can either be attached to the hot-shoe of the camera, or held off to the side. This not only adds a good amount of fill light, but it also will help add catchlights to whatever you are photographing.
Focus Manually
When photographing something that is moving, just like I did with these images of bees, it was very difficult to use auto-focus. The bees were moving to quickly and positioned themselves out of focus before I could even press the shutter. To work around this challenge, I decided to pre-focus the lens and moved the camera back-and-forth until I could see the bee in focus, and then I pressed the shutter and fire off several consecutive frames. You will end up with a lot of throwaway images with this technique, but you will also have a higher chance of getting one of the images from that set in focus.
Here’s a step-by-step on how I performed this technique:
- First, I pre-focused the lens so that the focus point was an appropriate distance from the lens for the subject (in this case, a bee on a flower).
- Next, I set my drive mode to “continuous high”.
- Once I found a good subject (a bee on a flower), I moved the camera back and forth on the bee until I could see it come into focus on the preview on the back of my camera. As I saw it pop into focus, I pressed the shutter and created several images (with the hopes that one of them is in focus).
This video demonstrates the focus technique of pre-focusing and then moving the camera to achieve focus:
Focus on the Eyes
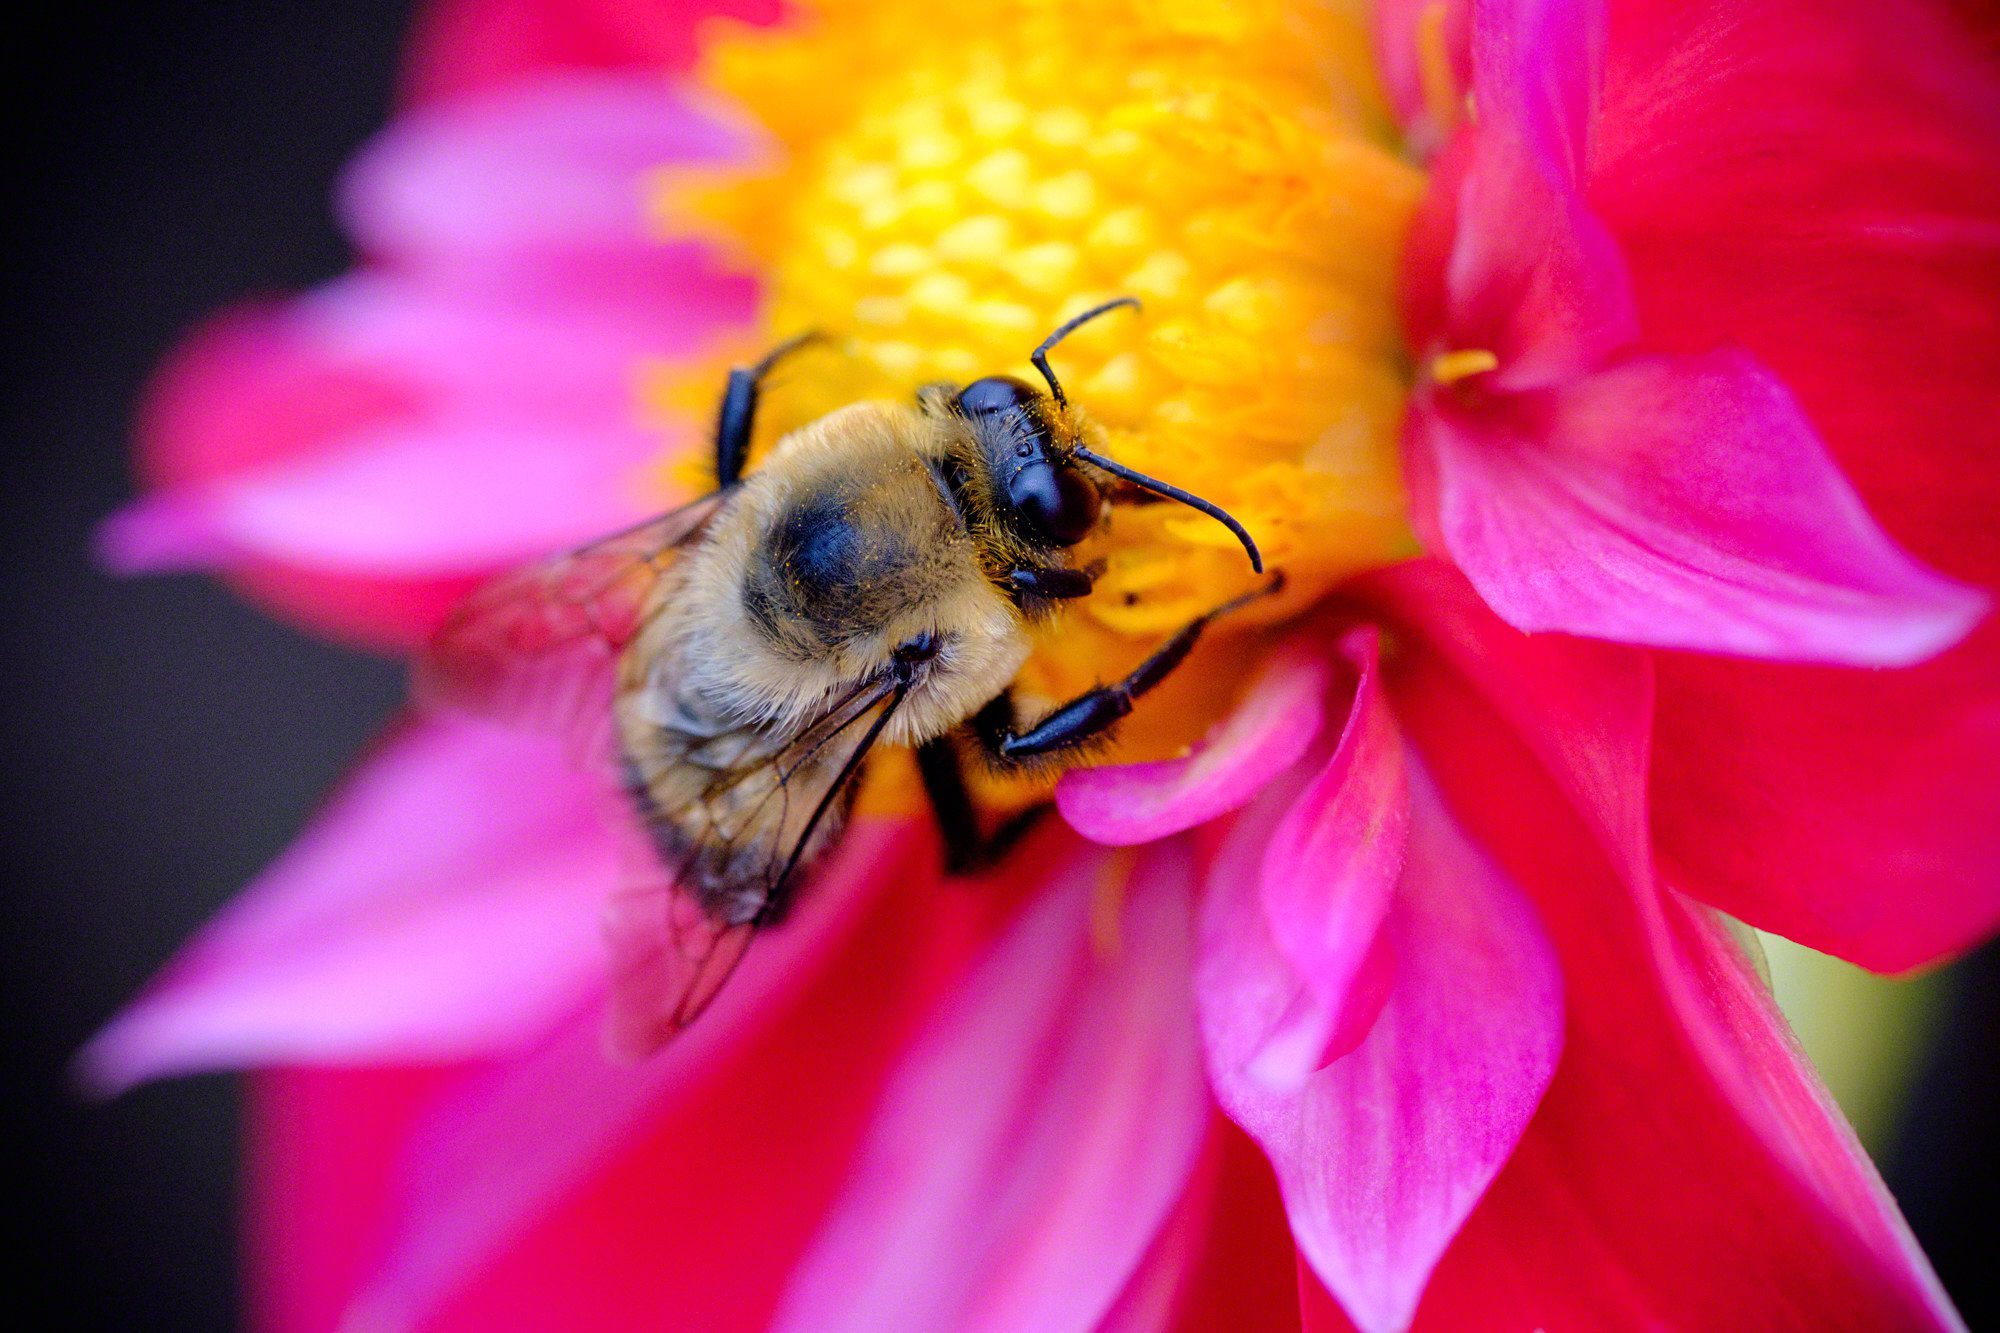
If photographing a bug or small animal, it’s important that you focus on the eyes. Small bugs can move around quickly, and so it can be tempting to feel like you are getting a good photo if the creature is facing away from you. While it won’t hurt anything to fire off a few photos (pixel are cheap, after all), a photo of the eyes of a bee, for example, is much more compelling than a bee butt. Have some patience and position yourself so that you can create the best creature portrait as possible.
-
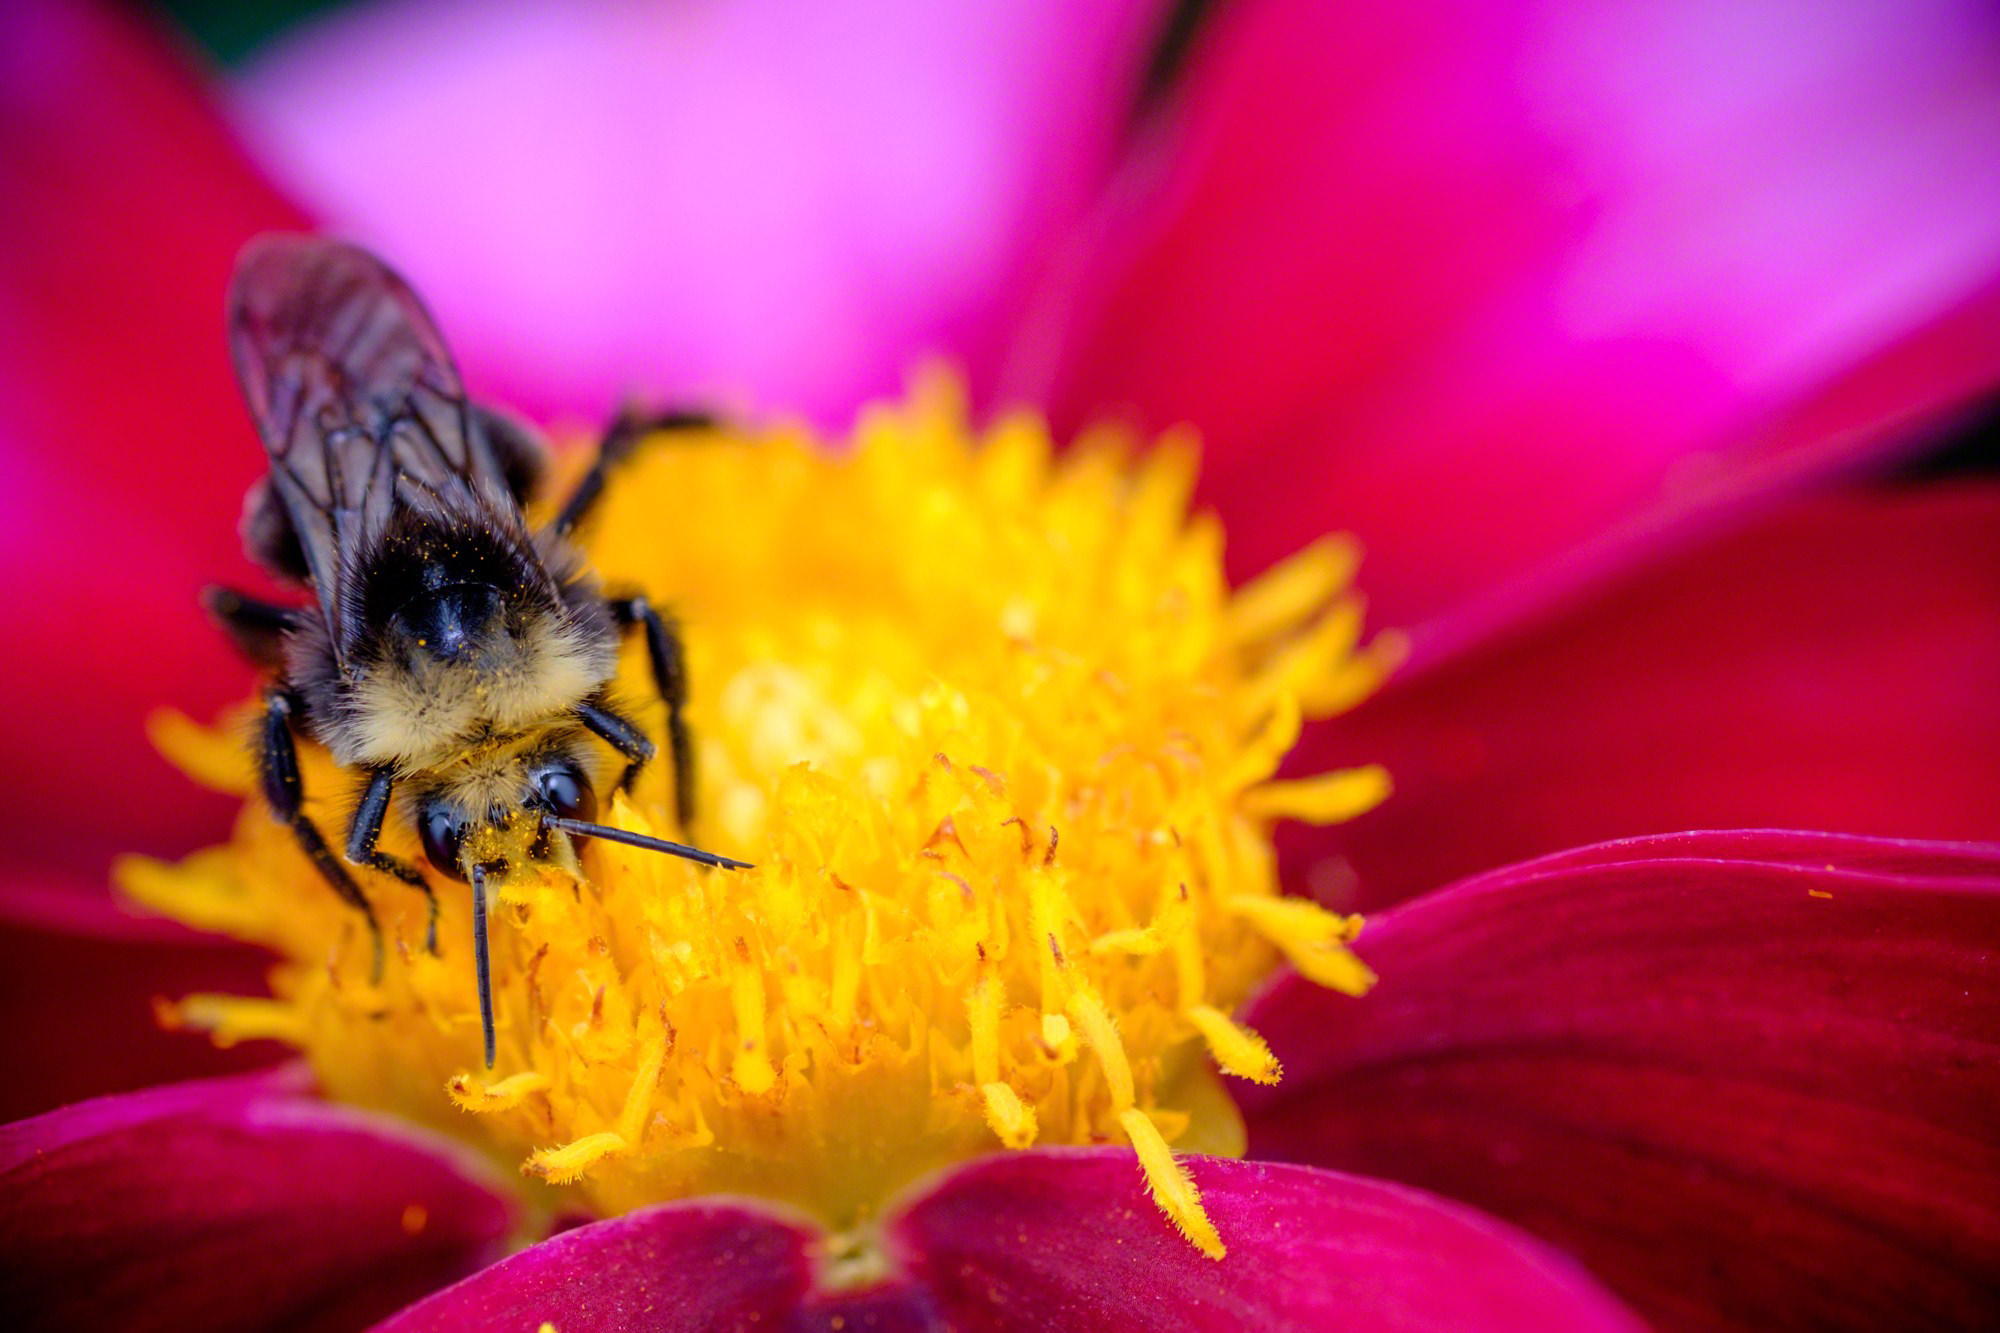
- This photo is in focus, but it’s also the wrong end of the bee! (Fujifilm X-T2, Fujinon 60mm lens, 1/680 sec at f/2.4, ISO 400) (© Nicole S. Young — nicolesy.com)

-
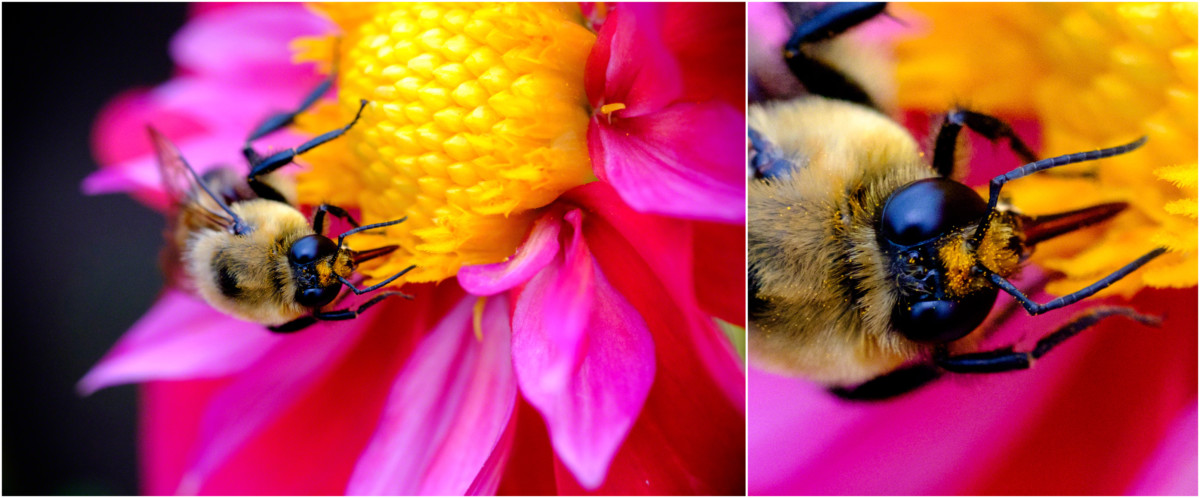
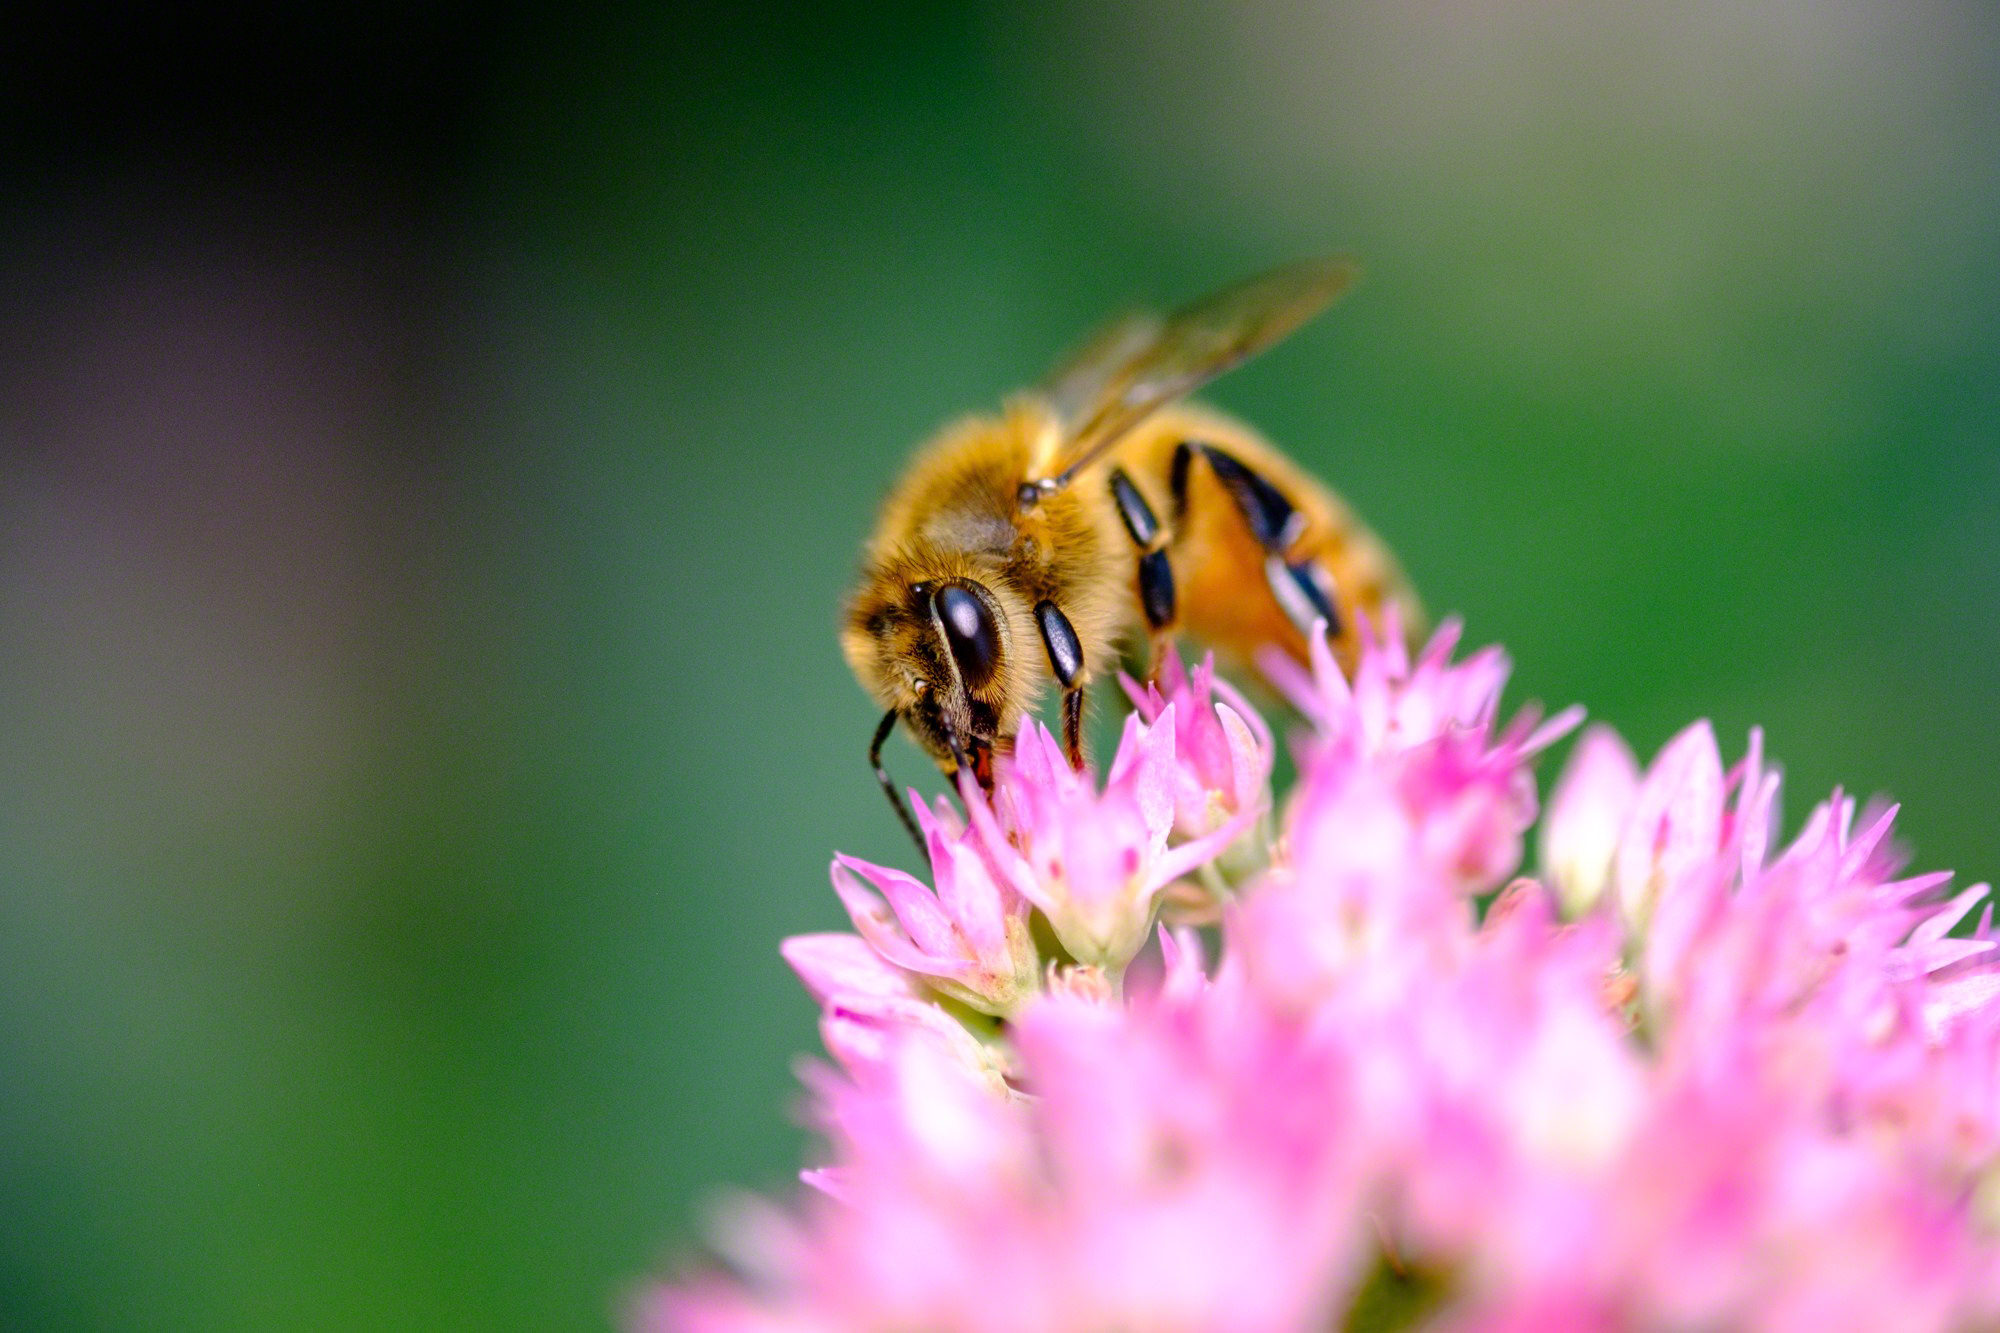
- Your best bet is to position yourself so that you can photograph the eyes of your subject. This image shows just how detailed the eyes of a bumblebee can be when zoomed in close. (Fujifilm X-T1, Fujinon 60mm lens, 1/1000 sec at f/5, ISO 3200) (© Nicole S. Young — nicolesy.com)

Find a Clean Background
Creatively speaking, the composition of your photo is going to be one of the most important aspects. You might have a “technically perfect” photo, but if it does not look good compositionally then it it loses its appeal. I find that one of the easiest ways to get a good composition is to angle myself so that the background is clean and not busy. There are a few different ways you can accomplish this:
- Move your camera (or yourself) lower to position the frame at eye-level (instead of shooting down). This will help create a blurred background to separate the subject from its surroundings.
- Find a subject that has contrasting elements behind it so that it stands out.
- Use a wide aperture to add more blur to the background.
-

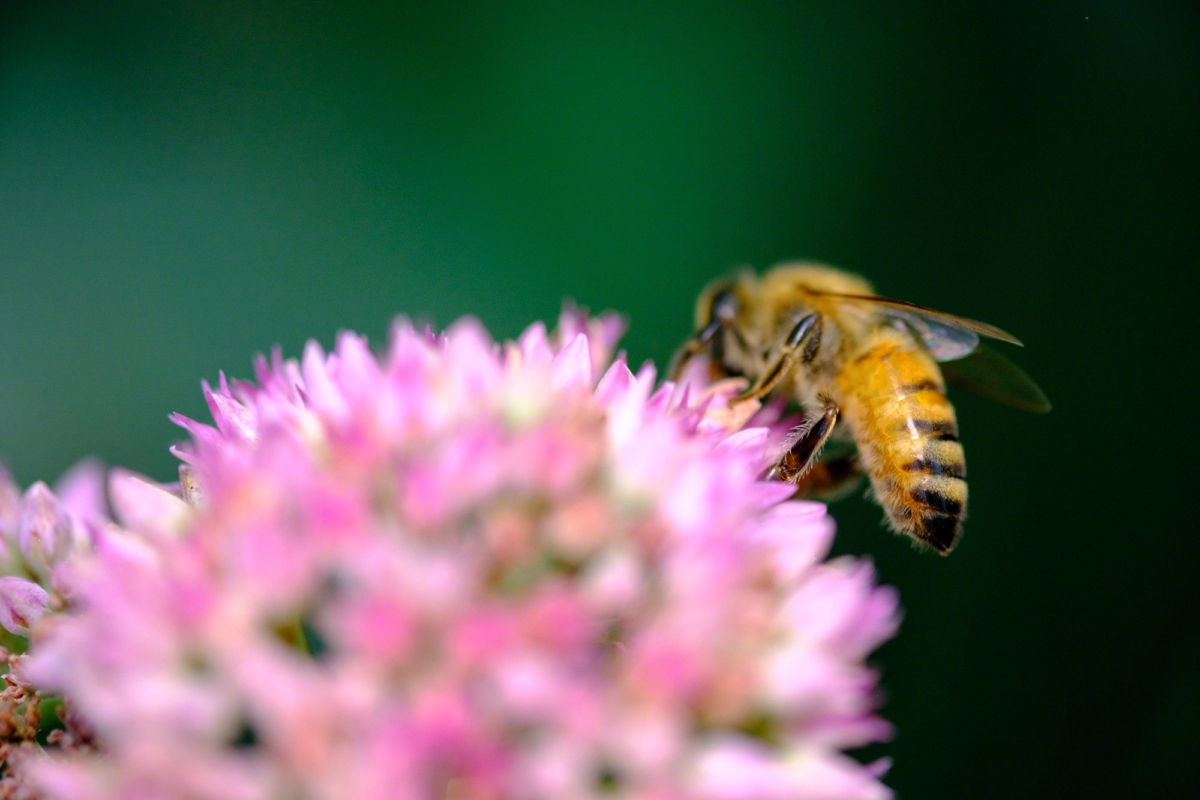
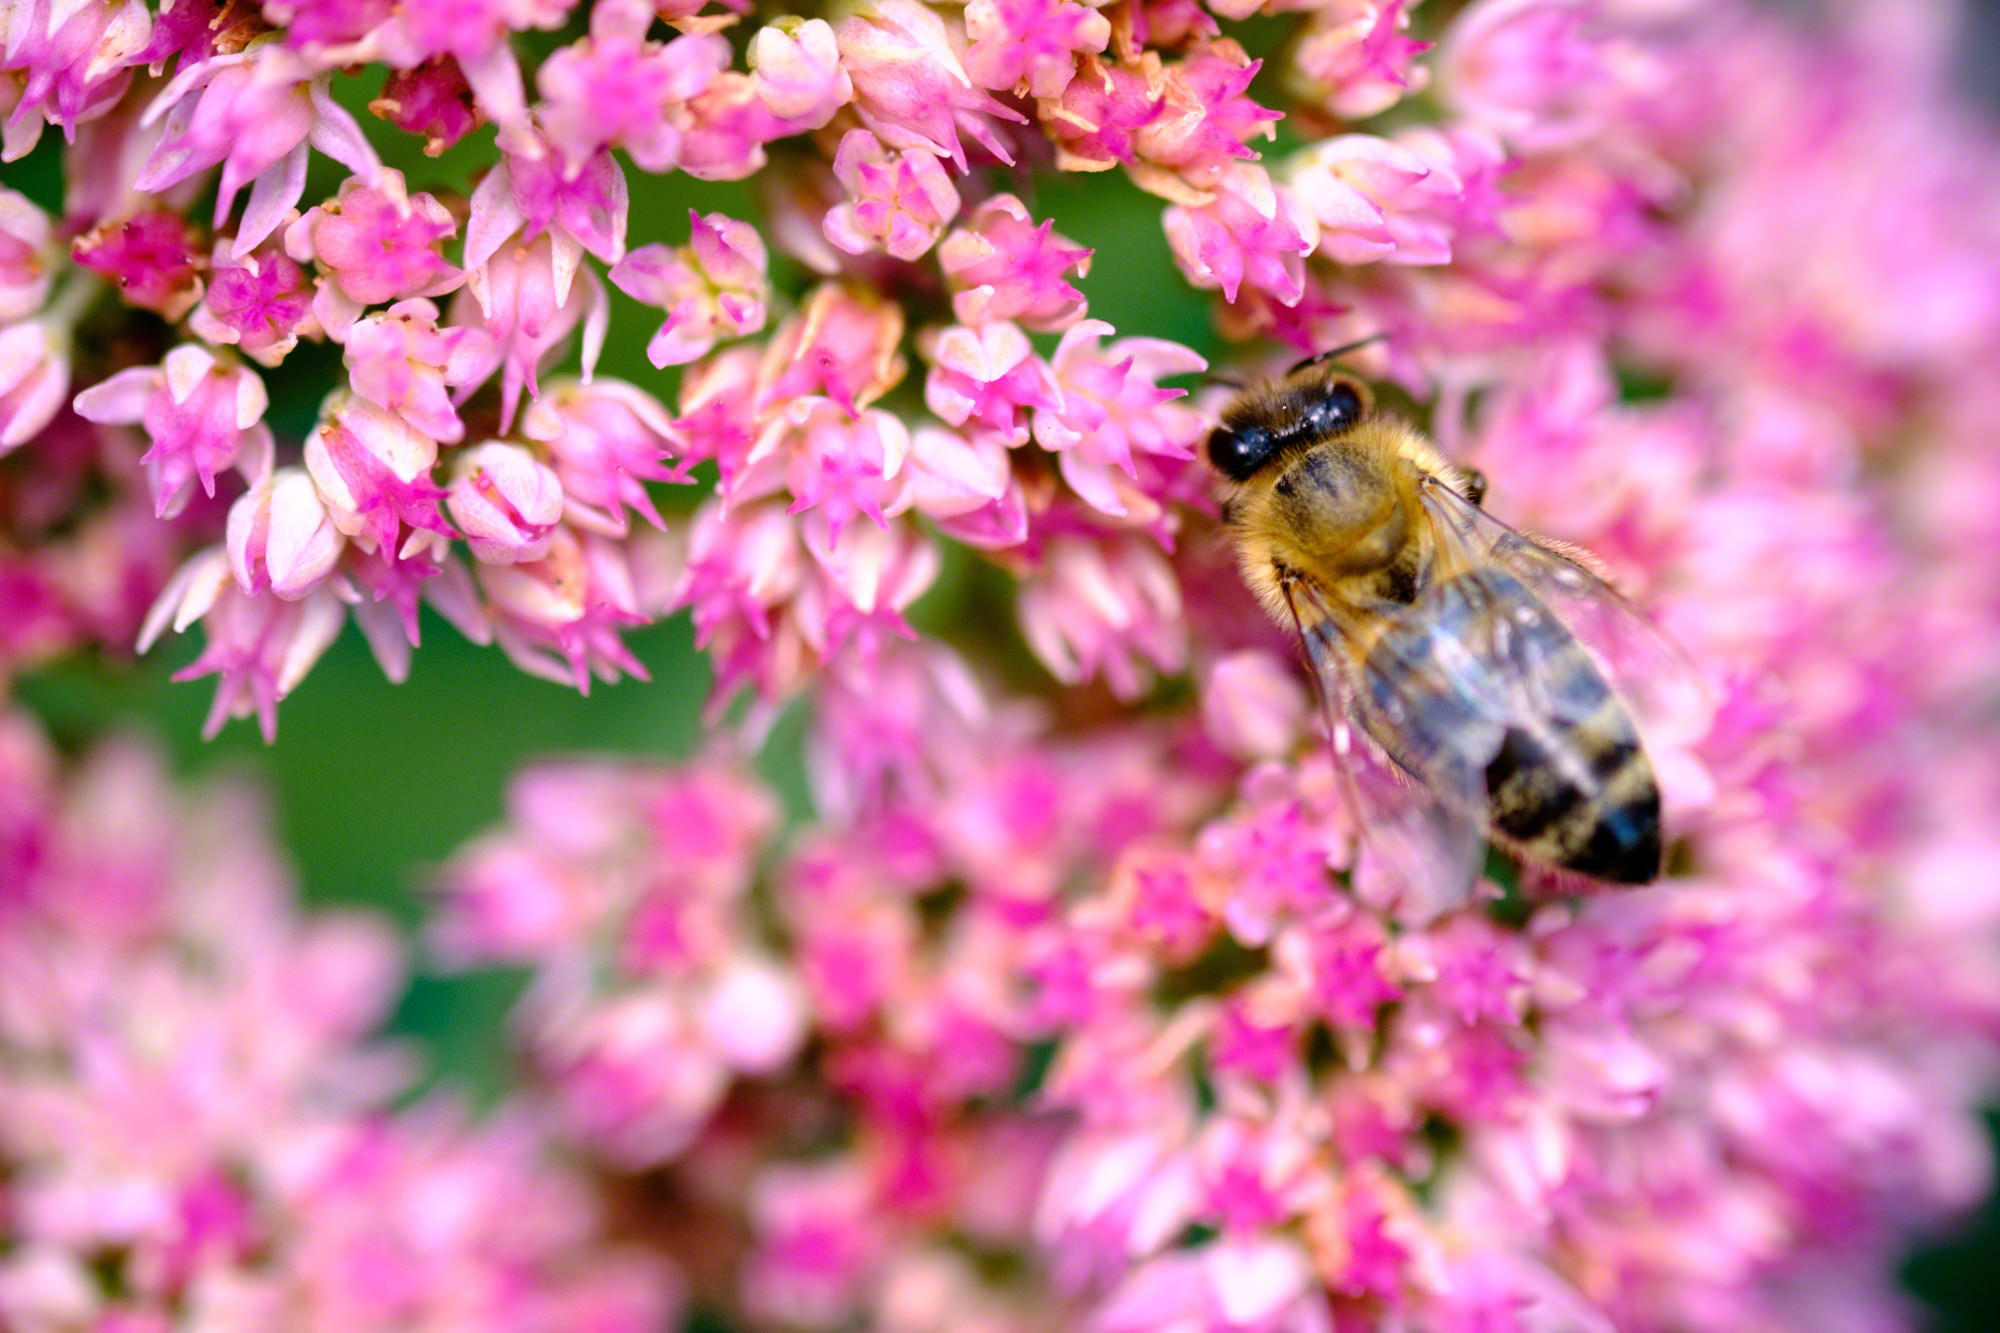
- The bee in this photo is on a very distracting background, and makes the image less pleasing. (Fujifilm X-T2, Fujinon 60mm lens, 1/420 sec at f/2.4, ISO 400) (© Nicole S. Young — nicolesy.com)
-

- To get a better photo, I waited for the bee to move and positioned myself so that the background behind the bee was less busy. (Fujifilm X-T2, Fujinon 60mm lens, 1/320 sec at f/2.4, ISO 400) (© Nicole S. Young — nicolesy.com)
Use a Fast Shutter Speed
With hand-held photography it’s important to make sure that the shutter speed is set fast enough to prevent camera shake. A good rule of thumb is to set the speed to at least the same number as the focal length of your lens. For example, I was using a 60mm lens for these photos, so I would want to be sure that the shutter speed was set to no slower than 1/60th of a second to make sure that I don’t add motion blur to the photos. However I also needed to make sure that the shutter speed was fast enough to freeze the action of the bees as they moved around. For these photos I found that a shutter speed of 1/250 (and typically higher) was a safe setting.
-

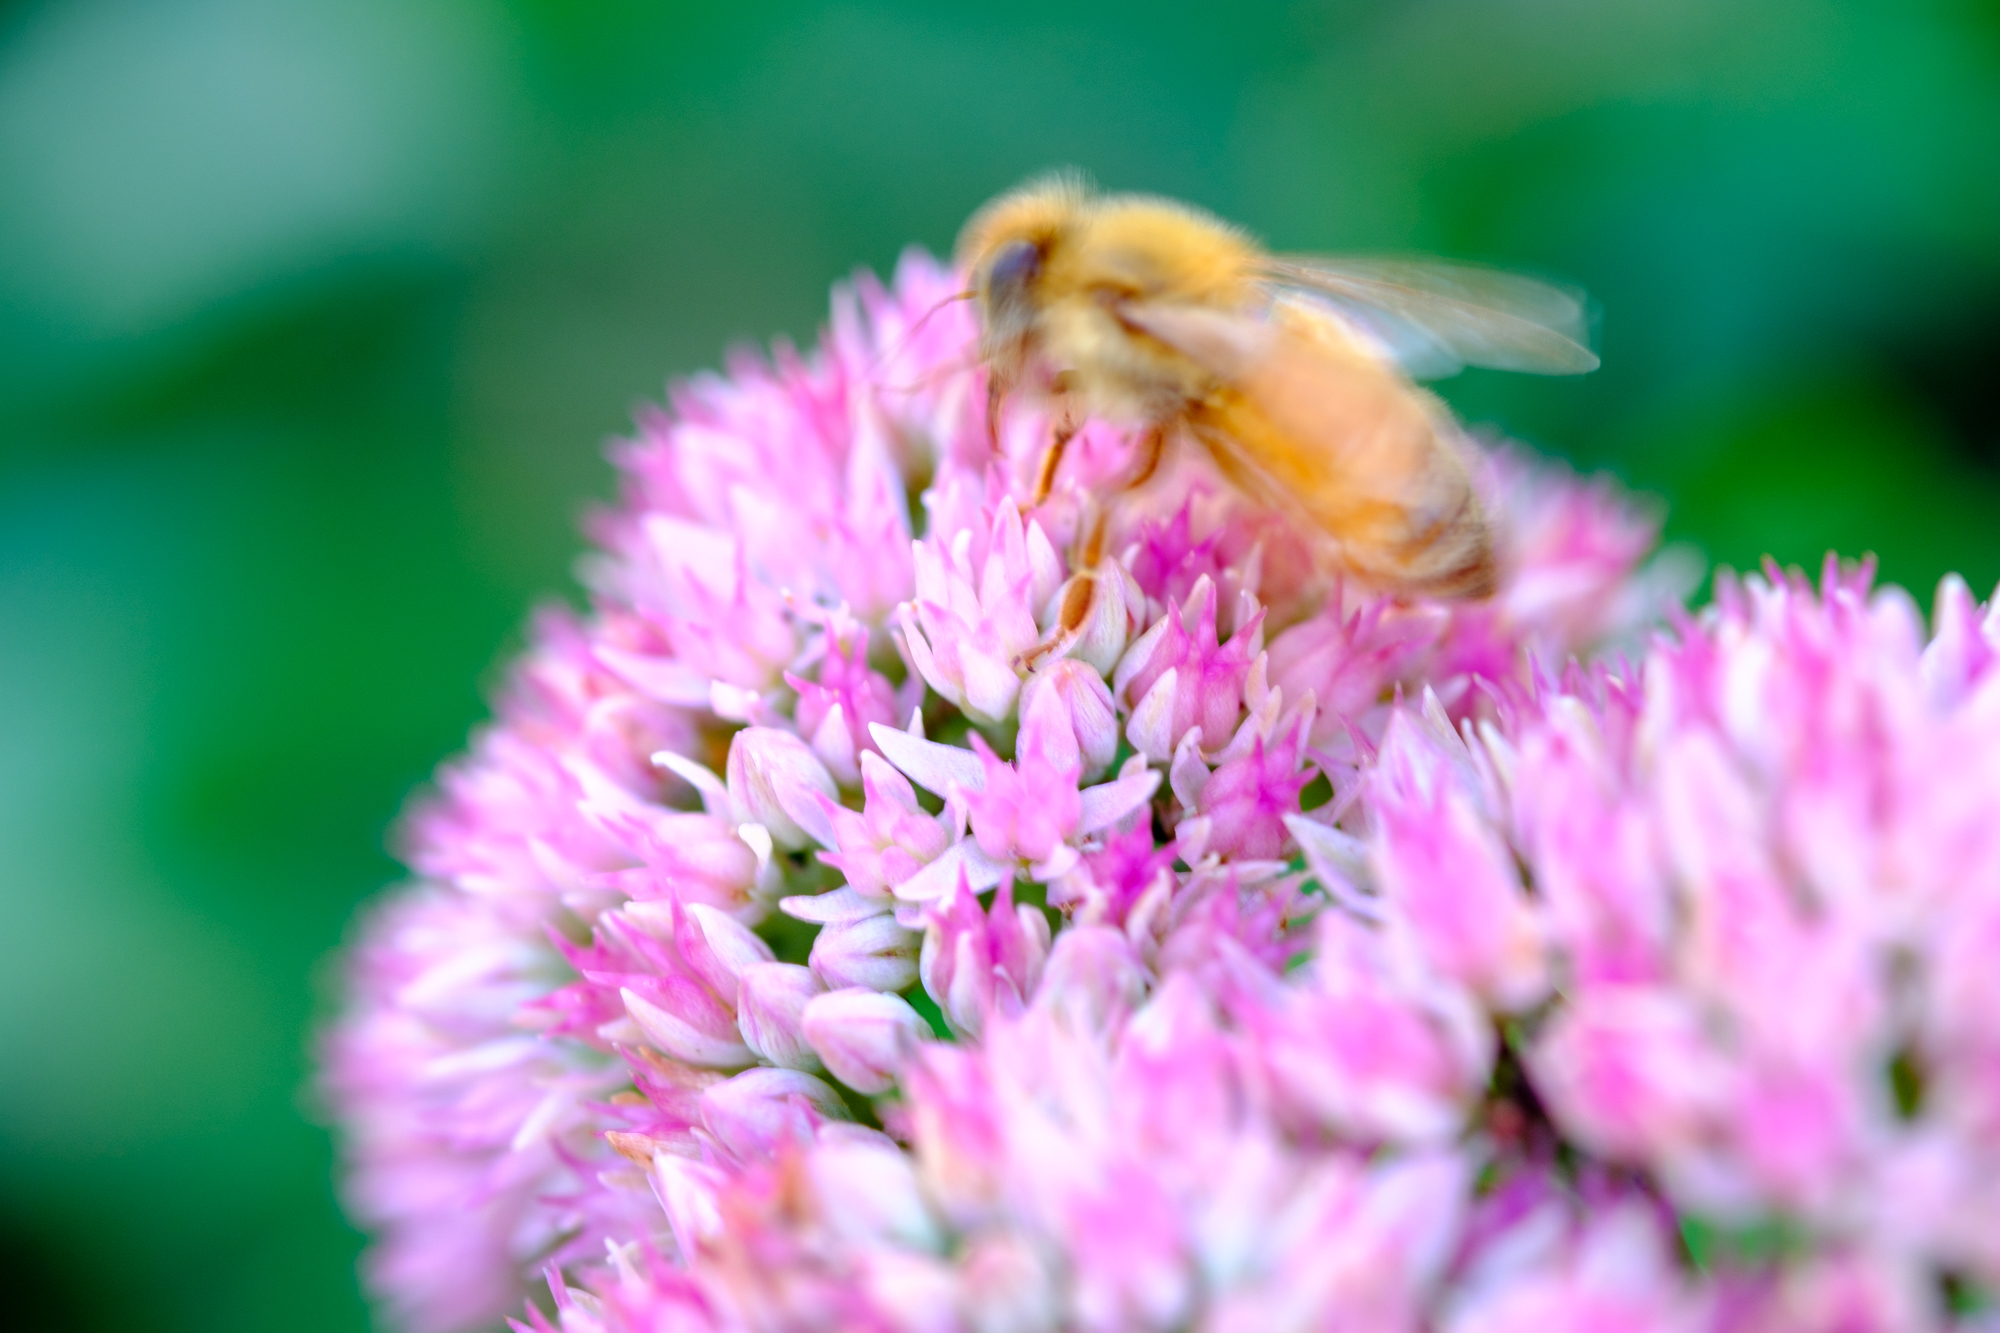
- At 1/30th of a second the shutter speed is WAY too slow to both hand-hold the bee and photograph it without moving. As a result there is a significant amount of motion blur in this image. (Fujifilm X-T2, Fujinon 60mm lens, 1/30 sec at f/4, ISO 200) (© Nicole S. Young — nicolesy.com)
-

- Using a faster shutter speed, such as 1/500th of a second, gives you a better chance of getting a photo without any movement. (Fujifilm X-T1, Fujinon 60mm lens, 1/500 sec at f/4, ISO 640) (© Nicole S. Young — nicolesy.com)
The intensity of the light in the environment you are photographing will determine if this is going to be an issue. If there is a lot of sunshine or it is very bright (even in a shaded area), then you may be in the clear. However if you do need to increase the shutter speed, here are some tips to help you add more light to the scene:
- Try adding an additional light source (similar to what I mentioned at the beginning of the article).
- Increase the ISO setting, or set it to “auto” and let the camera decide for you.
- Use a wide aperture, such as ƒ/2.8 or wider. Doing this will allow more light to the sensor, but it will also increase the blur and narrow your depth of field (the area that is in focus), so it may be more difficult to get an in-focus photograph.
Macro photography is an fascinating way to get a close-up look at everyday items. Photographers will oftentimes use a tripod to create their photos, but in some cases it is necessary, and also more convenient, to hand-hold the camera to create these images. However with hand-held macro photography you will also face certain challenges along the way. Here are some tips to help get you started creating your own beautiful macro photographs.
Camera gear used in this article:
Add More Light
The Neewer CN-216 Dimmable LED Panel adds a nice fill-light to a macro photo without being too harsh.
I like to photograph macro images in the shade or on cloudy days so that I have a nice even light spread across the scene. However sometimes the existing light is not quite enough for the camera settings required to get a good image (a high shutter speed and lower ISO). To compensate, I will oftentimes use a simple and inexpensive LED light that can either be attached to the hot-shoe of the camera, or held off to the side. This not only adds a good amount of fill light, but it also will help add catchlights to whatever you are photographing.
Focus Manually
When photographing something that is moving, just like I did with these images of bees, it was very difficult to use auto-focus. The bees were moving to quickly and positioned themselves out of focus before I could even press the shutter. To work around this challenge, I decided to pre-focus the lens and moved the camera back-and-forth until I could see the bee in focus, and then I pressed the shutter and fire off several consecutive frames. You will end up with a lot of throwaway images with this technique, but you will also have a higher chance of getting one of the images from that set in focus.
Here’s a step-by-step on how I performed this technique:
- First, I pre-focused the lens so that the focus point was an appropriate distance from the lens for the subject (in this case, a bee on a flower).
- Next, I set my drive mode to “continuous high”.
- Once I found a good subject (a bee on a flower), I moved the camera back and forth on the bee until I could see it come into focus on the preview on the back of my camera. As I saw it pop into focus, I pressed the shutter and created several images (with the hopes that one of them is in focus).
This video demonstrates the focus technique of pre-focusing and then moving the camera to achieve focus:
Focus on the Eyes
If photographing a bug or small animal, it’s important that you focus on the eyes. Small bugs can move around quickly, and so it can be tempting to feel like you are getting a good photo if the creature is facing away from you. While it won’t hurt anything to fire off a few photos (pixel are cheap, after all), a photo of the eyes of a bee, for example, is much more compelling than a bee butt. Have some patience and position yourself so that you can create the best creature portrait as possible.
-
- This photo is in focus, but it’s also the wrong end of the bee! (Fujifilm X-T2, Fujinon 60mm lens, 1/680 sec at f/2.4, ISO 400) (© Nicole S. Young — nicolesy.com)
-
- Your best bet is to position yourself so that you can photograph the eyes of your subject. This image shows just how detailed the eyes of a bumblebee can be when zoomed in close. (Fujifilm X-T1, Fujinon 60mm lens, 1/1000 sec at f/5, ISO 3200) (© Nicole S. Young — nicolesy.com)
Find a Clean Background
Creatively speaking, the composition of your photo is going to be one of the most important aspects. You might have a “technically perfect” photo, but if it does not look good compositionally then it it loses its appeal. I find that one of the easiest ways to get a good composition is to angle myself so that the background is clean and not busy. There are a few different ways you can accomplish this:
- Move your camera (or yourself) lower to position the frame at eye-level (instead of shooting down). This will help create a blurred background to separate the subject from its surroundings.
- Find a subject that has contrasting elements behind it so that it stands out.
- Use a wide aperture to add more blur to the background.
-
- The bee in this photo is on a very distracting background, and makes the image less pleasing. (Fujifilm X-T2, Fujinon 60mm lens, 1/420 sec at f/2.4, ISO 400) (© Nicole S. Young — nicolesy.com)
-
- To get a better photo, I waited for the bee to move and positioned myself so that the background behind the bee was less busy. (Fujifilm X-T2, Fujinon 60mm lens, 1/320 sec at f/2.4, ISO 400) (© Nicole S. Young — nicolesy.com)
Use a Fast Shutter Speed
With hand-held photography it’s important to make sure that the shutter speed is set fast enough to prevent camera shake. A good rule of thumb is to set the speed to at least the same number as the focal length of your lens. For example, I was using a 60mm lens for these photos, so I would want to be sure that the shutter speed was set to no slower than 1/60th of a second to make sure that I don’t add motion blur to the photos. However I also needed to make sure that the shutter speed was fast enough to freeze the action of the bees as they moved around. For these photos I found that a shutter speed of 1/250 (and typically higher) was a safe setting.
-
- At 1/30th of a second the shutter speed is WAY too slow to both hand-hold the bee and photograph it without moving. As a result there is a significant amount of motion blur in this image. (Fujifilm X-T2, Fujinon 60mm lens, 1/30 sec at f/4, ISO 200) (© Nicole S. Young — nicolesy.com)
-
- Using a faster shutter speed, such as 1/500th of a second, gives you a better chance of getting a photo without any movement. (Fujifilm X-T1, Fujinon 60mm lens, 1/500 sec at f/4, ISO 640) (© Nicole S. Young — nicolesy.com)
The intensity of the light in the environment you are photographing will determine if this is going to be an issue. If there is a lot of sunshine or it is very bright (even in a shaded area), then you may be in the clear. However if you do need to increase the shutter speed, here are some tips to help you add more light to the scene:
- Try adding an additional light source (similar to what I mentioned at the beginning of the article).
- Increase the ISO setting, or set it to “auto” and let the camera decide for you.
- Use a wide aperture, such as ƒ/2.8 or wider. Doing this will allow more light to the sensor, but it will also increase the blur and narrow your depth of field (the area that is in focus), so it may be more difficult to get an in-focus photograph.

Nicole is a photographer, published author, and educator specializing in Lightroom, Photoshop, and photography. She is best known for her books on food photography but is widely versed in various photographic genres, including landscape, nature, stock, travel, and experimental imagery.


Nicole, excellent tips for macro photography and thanks for mentioning the LED light. Wonderful photos of the bee!
Wow, amazing macro shoot, sharp detail. I’m sure you put a lot of patient to get the shoot, because you can’t control the bee. Excellent, and keep it up.
hallo Nicole, is cn-216 5600K ? is it possible with a d300 acmera and 105VR 2.8 to have F16 or F22 1/125s (to avoid vibrations without tripod) (iso400 ?) with it as we could have with a sb900 flash or the macro kit of flash from Nikon ? best regards
marc
You can find the details on the CN-216 here: http://amzn.to/2eK0zJL
As for your question about the settings, it might be tough to shoot at a narrow f-stop and have enough light to get a good photo. The Neewer LED acts more like a fill-light, and I don’t believe it is powerful enough to light the scene with such a small aperture.