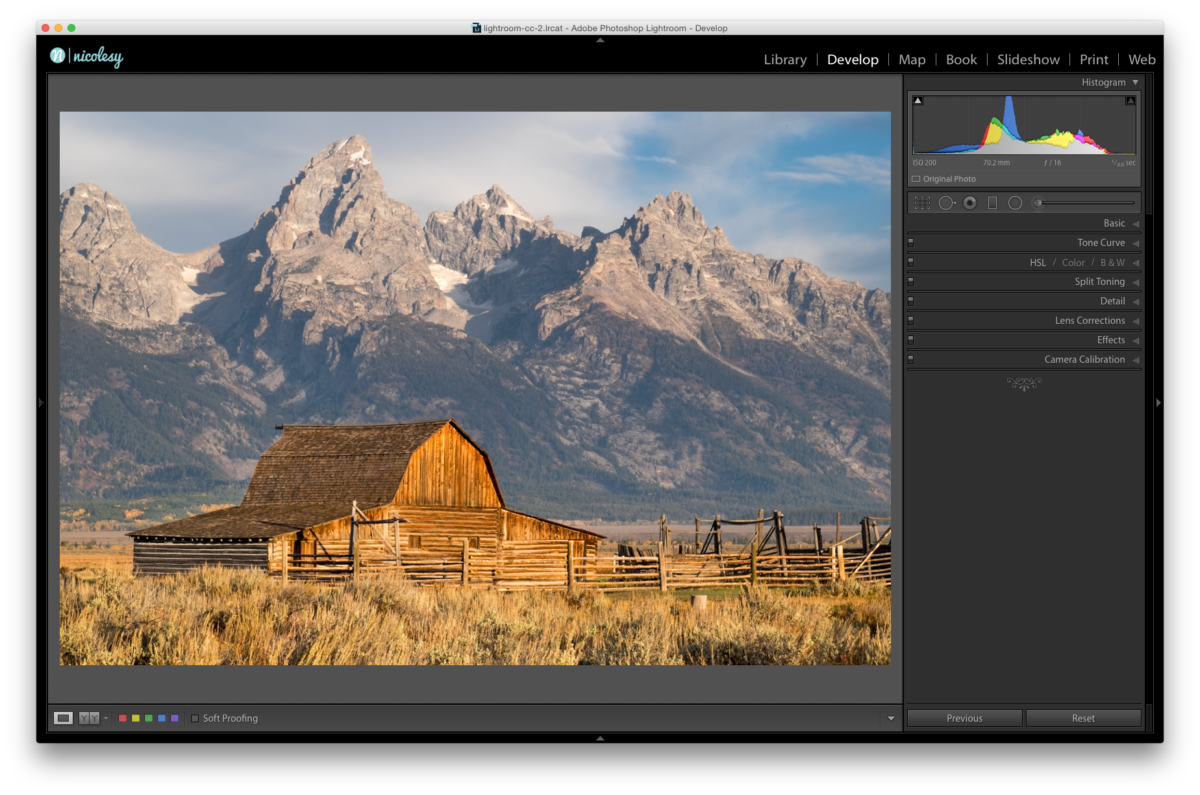
This morning Adobe announced a major update to Lightroom! The new version is called Lightroom CC, and is a part of the Creative Cloud. (For those of you not interested in using the Creative Cloud subscription service, it can still be downloaded as a standalone application, Lightroom 6.)
The new update comes with some very much anticipated improvements, so let’s take a look at some of the most impressive new feature’s inside of Lightroom CC:
HDR Merge
Yes! Finally! We can merge HDR images inside of Lightroom! Photoshop is no longer a requirement, which makes the process faster and easier than having to go back-and-forth between the two programs. Here’s a little bit more about the new HDR merge feature:
- Background processing: Have a lot of HDR files to process? No problem! One of the best parts about HDR merging is that it happens as a process in the background. You select the files you want to work with, run them through the merge process, and as it merges the images together you can either merge more HDR photos, or do other work within Lightroom.
- Headless processing: I know, it sounds silly, but it’s actually very useful. If you don’t want to open up the Merge preview pop-up window each time you process and HDR, just hold the SHIFT key while walking through the steps (Photo > Photo Merge > HDR). This will automatically use the last settings you applied in the window and bypasses the Merge preview window.
- The HDR image saves as a 16-bit DNG file: That’s right, your final HDR image will be a DNG file! How cool is that? Also, because you retain all of that data in your final image, Adobe recommends two (that’s right, TWO) files to get an excellent HDR output. I’ve tested it both ways, and I can say that a 2-bracketed HDR merge does a pretty darn good job. It might take me some time to get used to that, but it is good to know that the option is there.
Here’s a step-by-step on how to use Lightroom CC’s new HDR Merge feature:
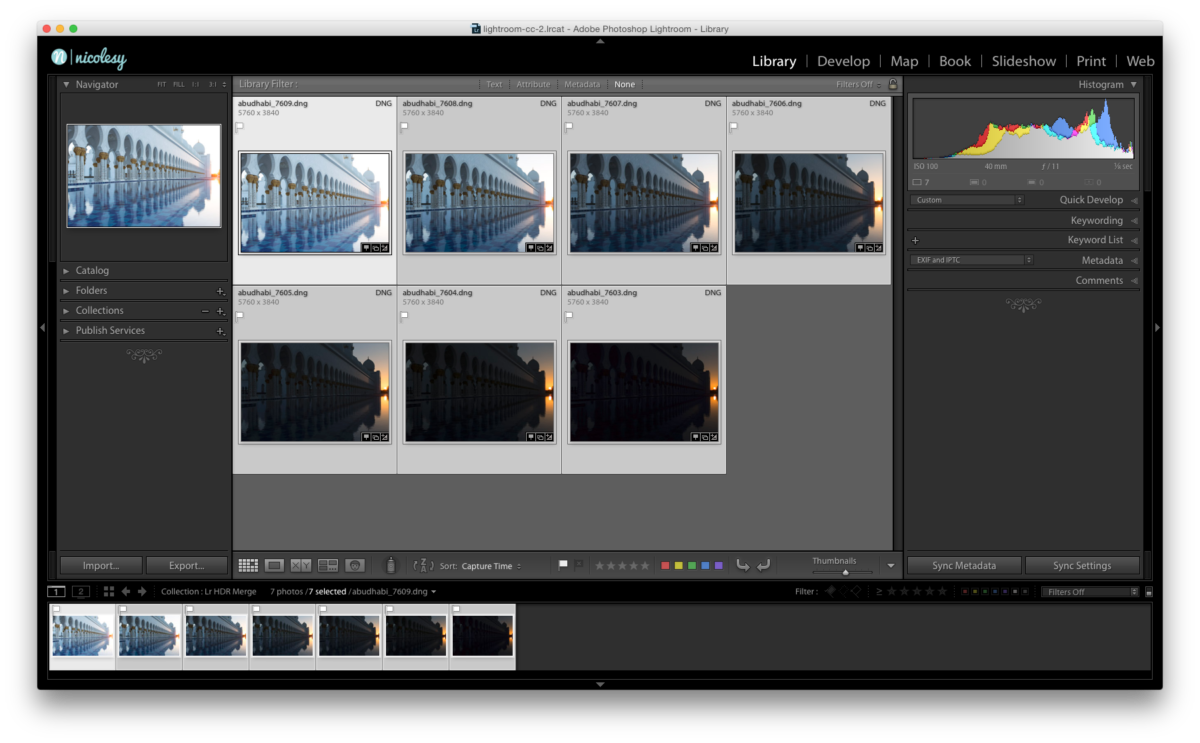
1. First, I highlight a group of bracketed images in Lightroom’s Library module.
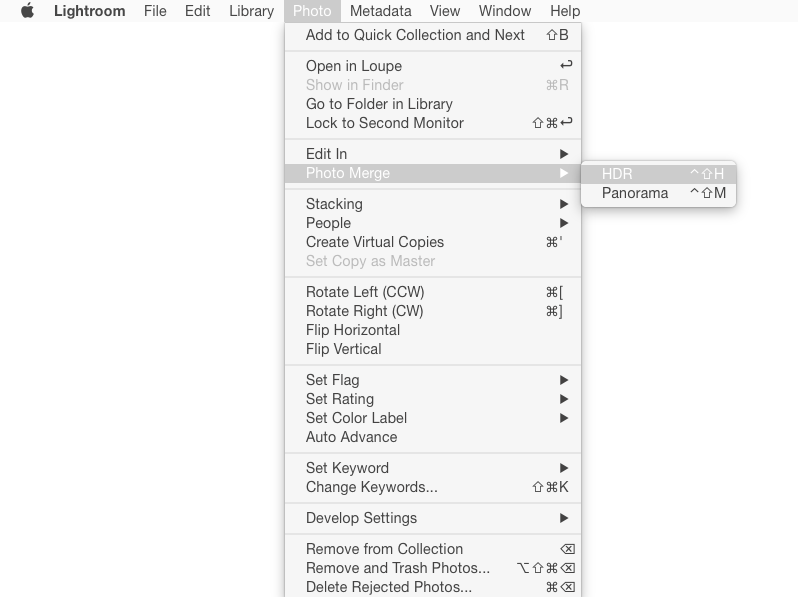
2. Next, I go to Photo > Photo Merge > HDR.
3. A new window pops up where I can make changes to the merged image. You can de-ghost the image if you have a lot of movement, but for this image it is not necessary so I will keep it set to “None”. Then, at the top, I will also keep the “Auto Tone” box checked which will make basic edits to the photo (Exposure, Highlights, etc.) that can easily be changed in the Develop module. When I’m ready, I click on the Merge button on the bottom-right.
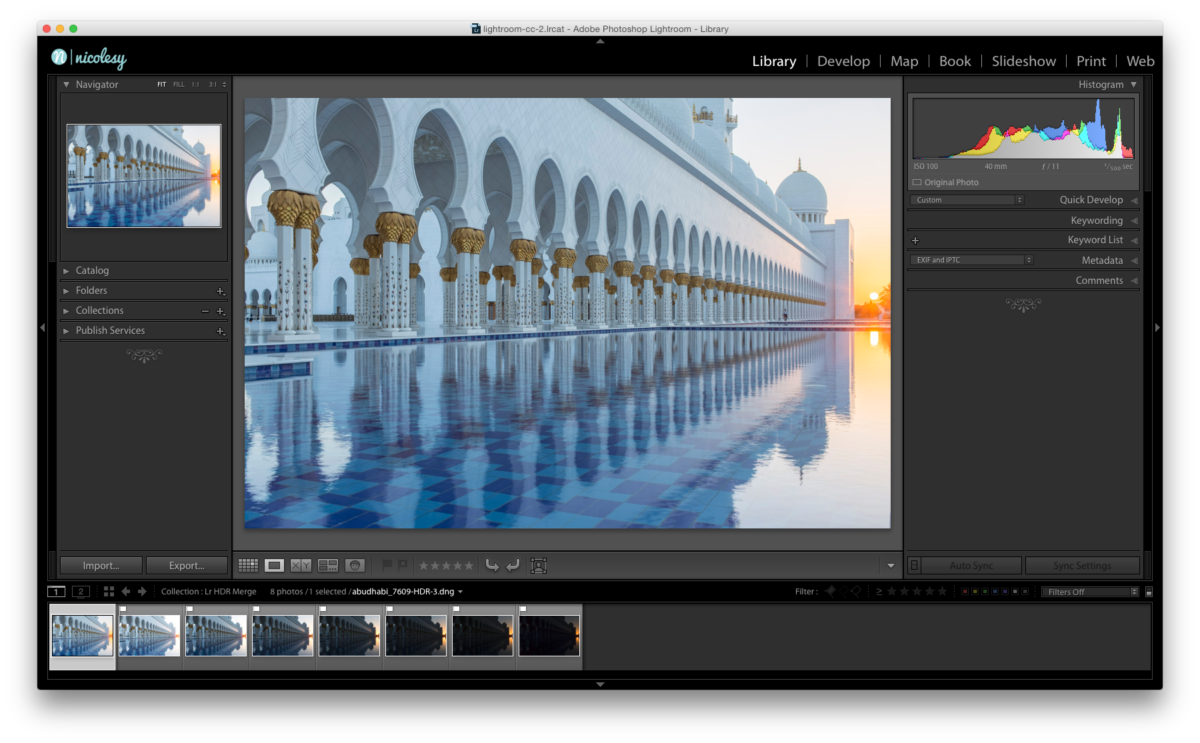
 4. The final image is a 16-bit DNG file with a TON of data. For those wondering, this file is 79.2 MB in size.
Click here to learn more about the HDR Merge feature over on Adobe’s website.
Panorama Merge
Just like with the new HDR merge feature, you can now merge panorama images completely inside of Lightroom. You can stitch RAW files together, and the final image ends up being a DNG file (just like with the HDR merge). This is extremely useful as it allows you to continue working non-destructively after the panorama is stitched together.
Here’s a step-by-step on how to use Lightroom CC’s new Panorama Merge feature:
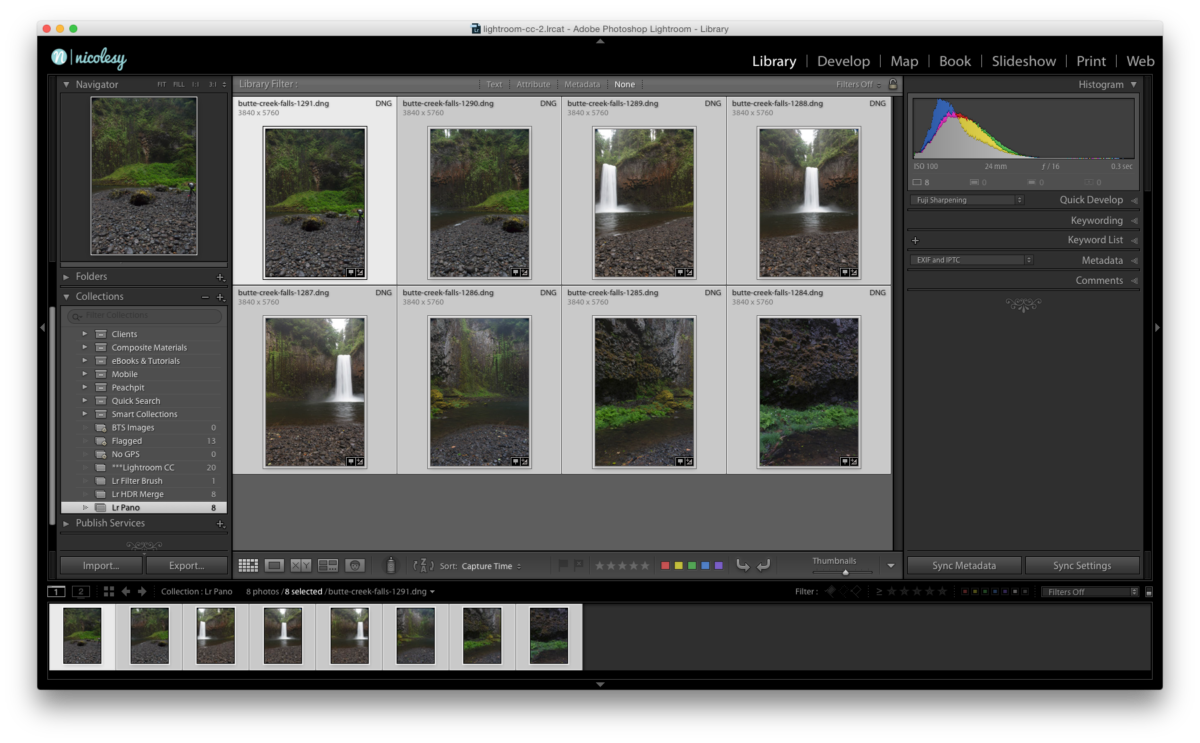
1. First, I locate and highlight the photos I want to merge together.
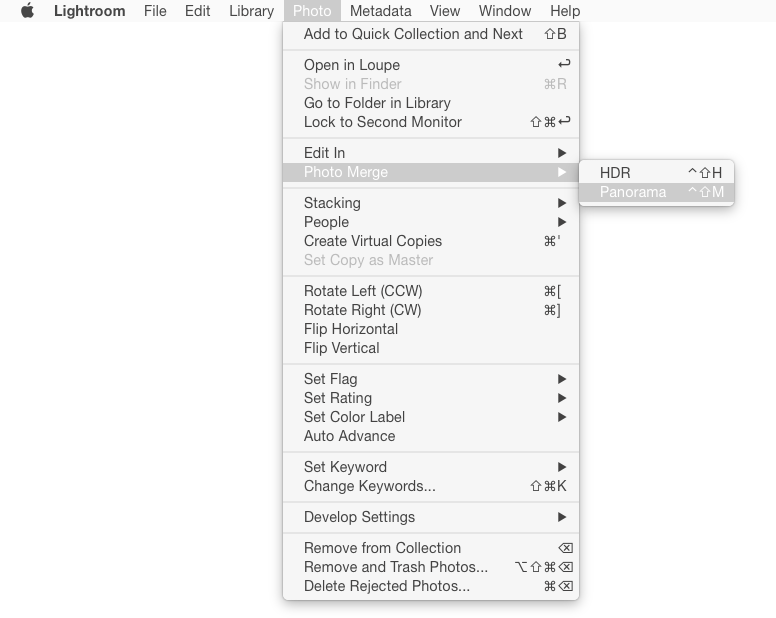
2. Then, I go to Photo > Photo Merge > Panorama.
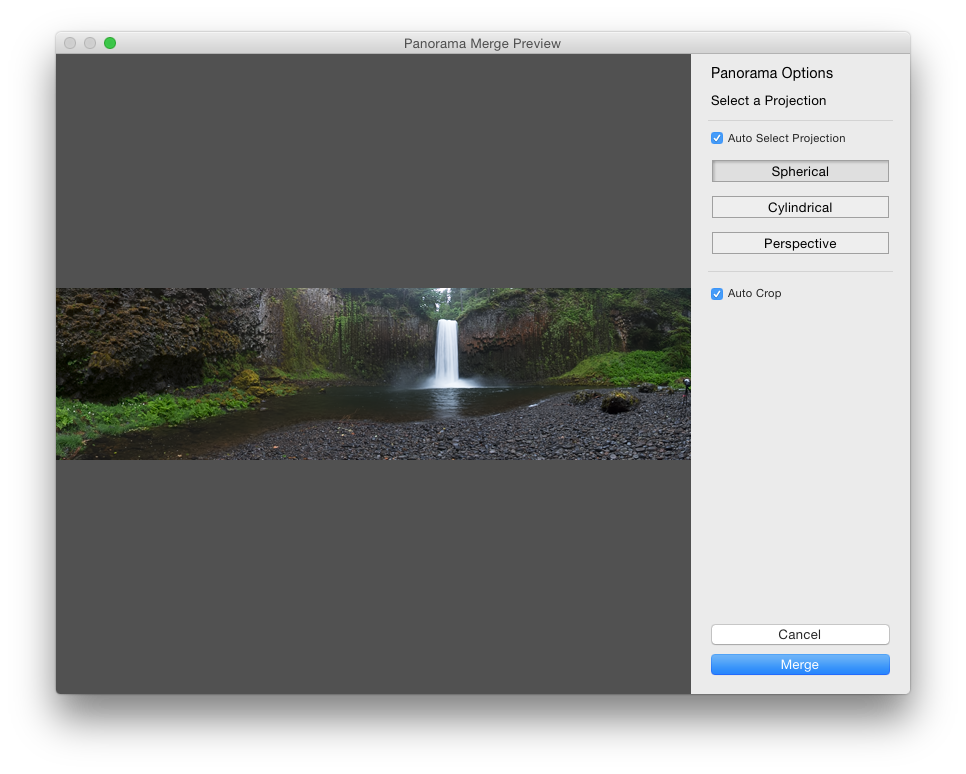
3. Lightroom analyzes the image and automatically selects the projection type (but you can move through each of them to see if there is one that works a little bit better for your photos). Then, I click Merge to merge the images.
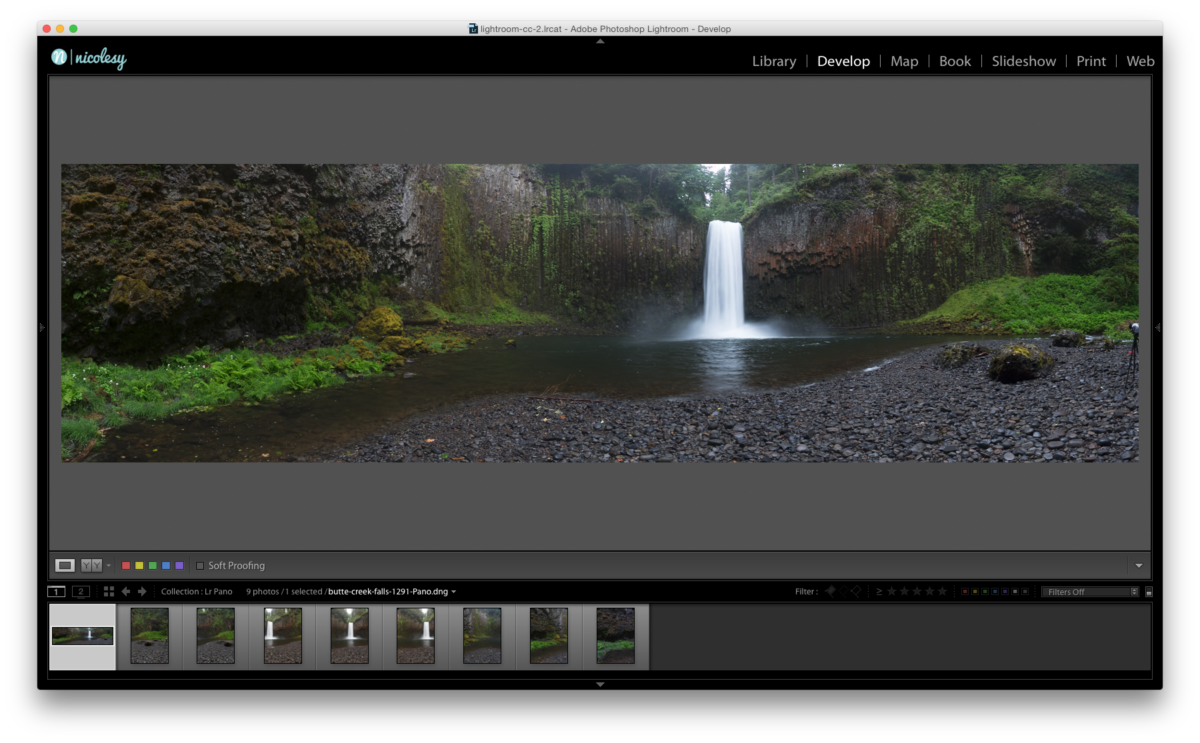
4. The merged DNG (274.1 MB) is saved back inside of Lightroom where I can process it just like any other RAW file.
Click here to learn more about the Panorama Merge feature over on Adobe’s website.
Face Tagging (Facial Recognition)
Face tagging is now available inside of Lightroom! This is such a wonderful feature if you photograph people, or have a lot of photos of people in your life. On several occasions my husband has asked if I have a photo of him he could use, and I would have to search through my folders to find him one. Now, with the face tagging, Lightroom will automatically index your entire catalog (or just a group of them, if you prefer), and locate the faces. Then, you can click on a button in the toolbar to access “People view” and it will stack together the photos based on who is in the photograph. Then you can go through and name the stacks so that Lightroom knows which face belongs to which name.
For me, I think it will be interesting to see how much I end up using this in my own work. I see it as a fun addition, that will end up saving some time in the long run when having to search for photos of people. I have also found it to have some trouble finding faces if their face is slightly turned; if they are facing the camera head-on with every feature showing then they show up. However, if one of their eyes is hidden or obstructed by glasses, then it does not see the face. You can add them manually using the “Draw Face Region” box, so that is helpful when that happens.
Also, you’ll notice the question marks (“?”) over some of the faces. That is because I have not yet told Lightroom who that person is. Once I do that, it will index all of the other faces and pull in that info for that specific person. Overall the facial recognition feature is a pretty neat addition to Lightroom.
Here are a few photos of the face tagging feature and how it appears inside of Lightroom CC:
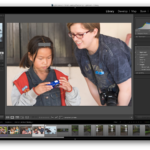
- Lightroom will find several faces in a group, but as you can see here it still had difficulty locating a large number of the people in the scene.
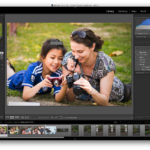
- It found the little girl on the left, but because the woman on the right’s face is slightly obstructed, it was not able to find her face.
- It found the little girl on the left, but because the woman on the right’s face is slightly obstructed, it was not able to find her face.
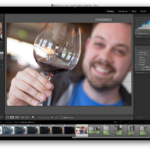
- Lightroom easily found my husband’s face, even though it was slightly out of focus.
Click here to learn more about Facial Recognition over on Adobe’s website.
Filter Brush
The Filter Brush allows you to make adjustments to your mask when using the Graduated and Radial Filters. For example, let’s say you have a photo where you would like to quickly darken the background with a Graduated filter:
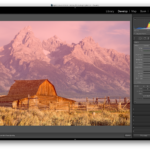
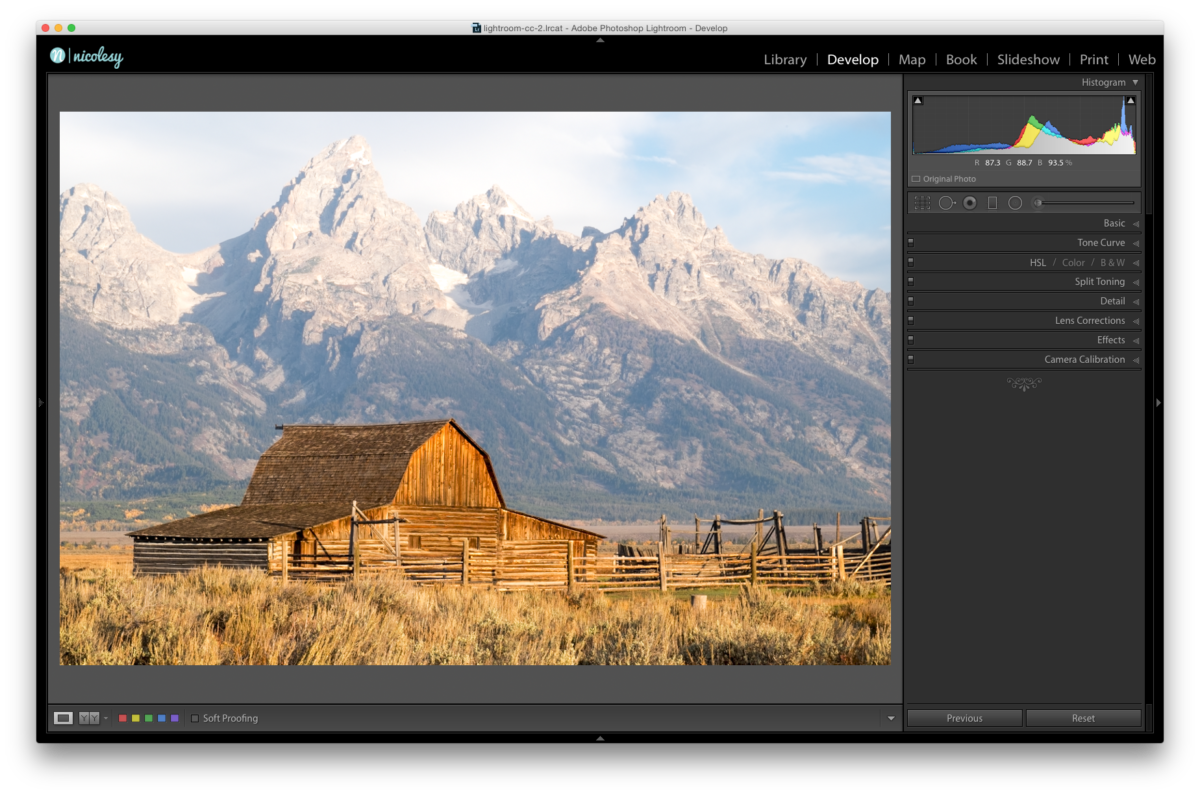 Then, if you add the Graduated filter, it also darkens other areas of the scene as well. In this case, the barn in the foreground is being affected, but I don’t want to change anything about the barn:
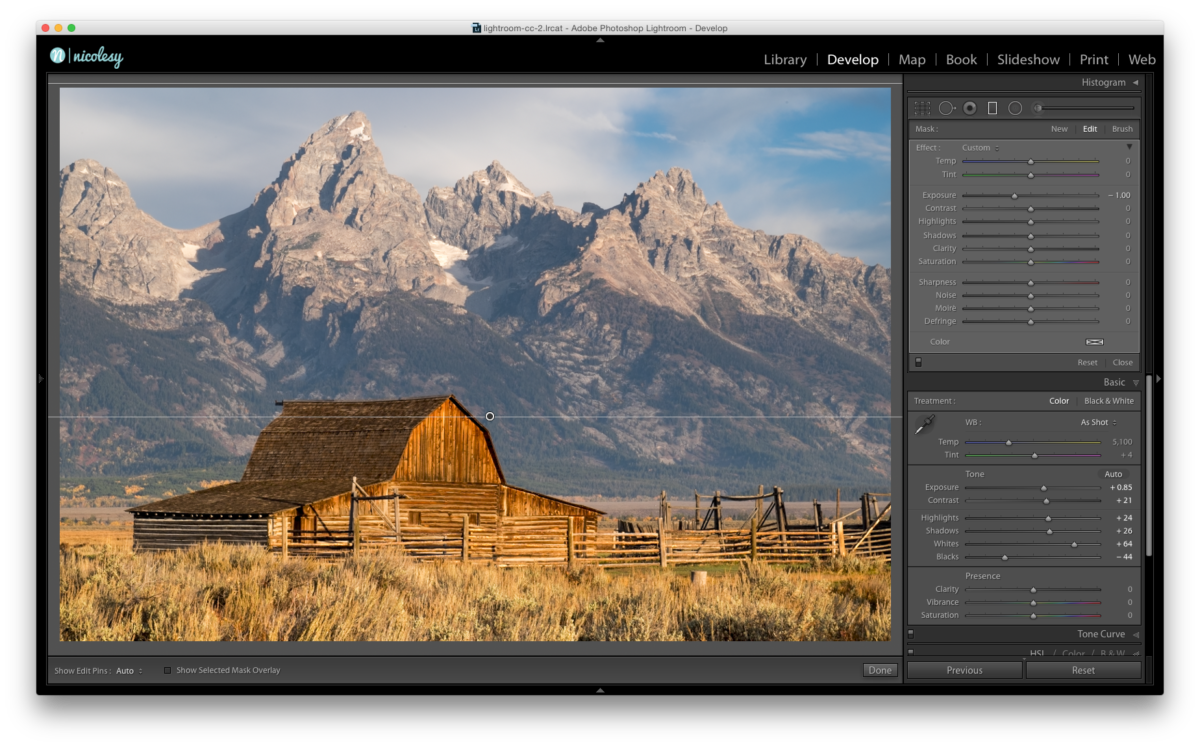 So to fix this, I click on the Brush setting, set the brush to Erase, and check the Auto Mask option as well. Then, I painted over the roof of the barn to erase the gradient on that portion of the image. Here is a view of the mask before and after using the Filter Brush:
And this is the final image:
Click here to learn more about the Filter Brush over on Adobe’s website.
Overall Performance Enhancements
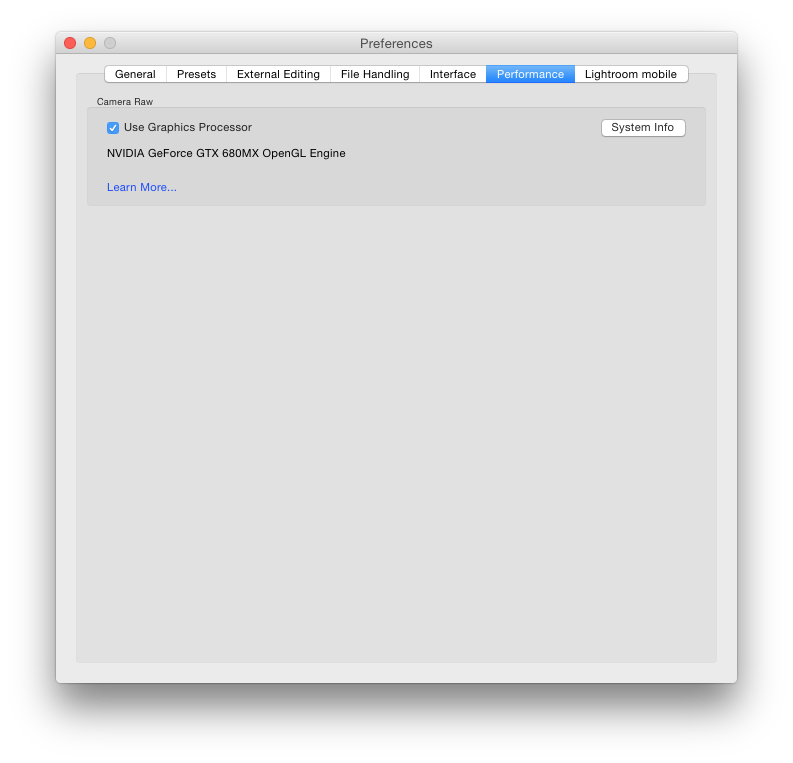
One of the less “exciting” features of the new update was the ability to use your Graphics Processing Unit (GPU) to speed up interactive image editing inside of Lightroom. This is a really big deal, especially for photographers working on 4k or 5k displays. Basically, Lightroom is now going to work a lot faster.
Here are the requirements to use the GPU in Lightroom CC:
- 64-bit only
- OpenGL 3.3 and up
- Mac OS 10.9 and higher
- Windows 7 and higher
Other Improvements:
Here are some of the worth-mentioning improvements to Lightroom CC:
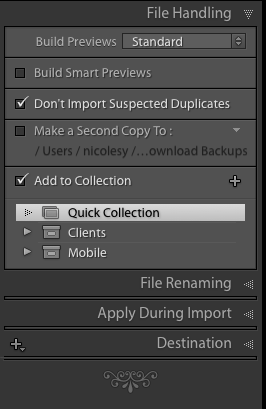
- Add to Collection on Import: If you are a collection user, then you will find this one useful. Now you can add your images directly to a collection on import!
- Slideshow updates: If you use the Slideshow panel at all, then you will find these improvements quite useful. First, they added the ability to pan-and-zoom over your photos when playing the slideshow. You can now add more than one song (instead of just one that repeated over and over). There are a few other improvements, please click here to learn more about the slideshow improvements over on Adobe’s website.
- CMYK supported in soft-proofing: In previous versions, Lightroom was only able to soft-proof in RGB. Now, for those of you who print in CMYK, you can soft-proof your images before exporting them! This is great, as it reduces the need to resort to Photoshop to preview the photos.
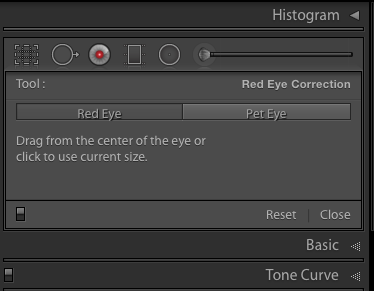
- Pet eye removal: Do you have a fur-baby? Now you can remove that pesky green-eye from your babies! This works similarly to the red-eye removal feature for humans.
For all other features and additions to the new Lightroom CC, please CLICK HERE to view them on Adobe’s website.
This morning Adobe announced a major update to Lightroom! The new version is called Lightroom CC, and is a part of the Creative Cloud. (For those of you not interested in using the Creative Cloud subscription service, it can still be downloaded as a standalone application, Lightroom 6.)
The new update comes with some very much anticipated improvements, so let’s take a look at some of the most impressive new feature’s inside of Lightroom CC:
HDR Merge
Yes! Finally! We can merge HDR images inside of Lightroom! Photoshop is no longer a requirement, which makes the process faster and easier than having to go back-and-forth between the two programs. Here’s a little bit more about the new HDR merge feature:
- Background processing: Have a lot of HDR files to process? No problem! One of the best parts about HDR merging is that it happens as a process in the background. You select the files you want to work with, run them through the merge process, and as it merges the images together you can either merge more HDR photos, or do other work within Lightroom.
- Headless processing: I know, it sounds silly, but it’s actually very useful. If you don’t want to open up the Merge preview pop-up window each time you process and HDR, just hold the SHIFT key while walking through the steps (Photo > Photo Merge > HDR). This will automatically use the last settings you applied in the window and bypasses the Merge preview window.
- The HDR image saves as a 16-bit DNG file: That’s right, your final HDR image will be a DNG file! How cool is that? Also, because you retain all of that data in your final image, Adobe recommends two (that’s right, TWO) files to get an excellent HDR output. I’ve tested it both ways, and I can say that a 2-bracketed HDR merge does a pretty darn good job. It might take me some time to get used to that, but it is good to know that the option is there.
Here’s a step-by-step on how to use Lightroom CC’s new HDR Merge feature:
1. First, I highlight a group of bracketed images in Lightroom’s Library module.
2. Next, I go to Photo > Photo Merge > HDR.
3. A new window pops up where I can make changes to the merged image. You can de-ghost the image if you have a lot of movement, but for this image it is not necessary so I will keep it set to “None”. Then, at the top, I will also keep the “Auto Tone” box checked which will make basic edits to the photo (Exposure, Highlights, etc.) that can easily be changed in the Develop module. When I’m ready, I click on the Merge button on the bottom-right.
 4. The final image is a 16-bit DNG file with a TON of data. For those wondering, this file is 79.2 MB in size.
Click here to learn more about the HDR Merge feature over on Adobe’s website.
Panorama Merge
Just like with the new HDR merge feature, you can now merge panorama images completely inside of Lightroom. You can stitch RAW files together, and the final image ends up being a DNG file (just like with the HDR merge). This is extremely useful as it allows you to continue working non-destructively after the panorama is stitched together.
Here’s a step-by-step on how to use Lightroom CC’s new Panorama Merge feature:
1. First, I locate and highlight the photos I want to merge together.
2. Then, I go to Photo > Photo Merge > Panorama.
3. Lightroom analyzes the image and automatically selects the projection type (but you can move through each of them to see if there is one that works a little bit better for your photos). Then, I click Merge to merge the images.
4. The merged DNG (274.1 MB) is saved back inside of Lightroom where I can process it just like any other RAW file.
Click here to learn more about the Panorama Merge feature over on Adobe’s website.
Face Tagging (Facial Recognition)
Face tagging is now available inside of Lightroom! This is such a wonderful feature if you photograph people, or have a lot of photos of people in your life. On several occasions my husband has asked if I have a photo of him he could use, and I would have to search through my folders to find him one. Now, with the face tagging, Lightroom will automatically index your entire catalog (or just a group of them, if you prefer), and locate the faces. Then, you can click on a button in the toolbar to access “People view” and it will stack together the photos based on who is in the photograph. Then you can go through and name the stacks so that Lightroom knows which face belongs to which name.
For me, I think it will be interesting to see how much I end up using this in my own work. I see it as a fun addition, that will end up saving some time in the long run when having to search for photos of people. I have also found it to have some trouble finding faces if their face is slightly turned; if they are facing the camera head-on with every feature showing then they show up. However, if one of their eyes is hidden or obstructed by glasses, then it does not see the face. You can add them manually using the “Draw Face Region” box, so that is helpful when that happens.
Also, you’ll notice the question marks (“?”) over some of the faces. That is because I have not yet told Lightroom who that person is. Once I do that, it will index all of the other faces and pull in that info for that specific person. Overall the facial recognition feature is a pretty neat addition to Lightroom.
Here are a few photos of the face tagging feature and how it appears inside of Lightroom CC:
- Lightroom will find several faces in a group, but as you can see here it still had difficulty locating a large number of the people in the scene.
- It found the little girl on the left, but because the woman on the right’s face is slightly obstructed, it was not able to find her face.
- It found the little girl on the left, but because the woman on the right’s face is slightly obstructed, it was not able to find her face.
- Lightroom easily found my husband’s face, even though it was slightly out of focus.
Click here to learn more about Facial Recognition over on Adobe’s website.
Filter Brush
The Filter Brush allows you to make adjustments to your mask when using the Graduated and Radial Filters. For example, let’s say you have a photo where you would like to quickly darken the background with a Graduated filter:
 Then, if you add the Graduated filter, it also darkens other areas of the scene as well. In this case, the barn in the foreground is being affected, but I don’t want to change anything about the barn:
 So to fix this, I click on the Brush setting, set the brush to Erase, and check the Auto Mask option as well. Then, I painted over the roof of the barn to erase the gradient on that portion of the image. Here is a view of the mask before and after using the Filter Brush:
And this is the final image:
Click here to learn more about the Filter Brush over on Adobe’s website.
Overall Performance Enhancements
One of the less “exciting” features of the new update was the ability to use your Graphics Processing Unit (GPU) to speed up interactive image editing inside of Lightroom. This is a really big deal, especially for photographers working on 4k or 5k displays. Basically, Lightroom is now going to work a lot faster.
Here are the requirements to use the GPU in Lightroom CC:
- 64-bit only
- OpenGL 3.3 and up
- Mac OS 10.9 and higher
- Windows 7 and higher
Other Improvements:
Here are some of the worth-mentioning improvements to Lightroom CC:
- Add to Collection on Import: If you are a collection user, then you will find this one useful. Now you can add your images directly to a collection on import!

- Slideshow updates: If you use the Slideshow panel at all, then you will find these improvements quite useful. First, they added the ability to pan-and-zoom over your photos when playing the slideshow. You can now add more than one song (instead of just one that repeated over and over). There are a few other improvements, please click here to learn more about the slideshow improvements over on Adobe’s website.
- CMYK supported in soft-proofing: In previous versions, Lightroom was only able to soft-proof in RGB. Now, for those of you who print in CMYK, you can soft-proof your images before exporting them! This is great, as it reduces the need to resort to Photoshop to preview the photos.
- Pet eye removal: Do you have a fur-baby? Now you can remove that pesky green-eye from your babies! This works similarly to the red-eye removal feature for humans.

For all other features and additions to the new Lightroom CC, please CLICK HERE to view them on Adobe’s website.

Nicole is a photographer, published author, and educator specializing in Lightroom, Photoshop, and photography. She is best known for her books on food photography but is widely versed in various photographic genres, including landscape, nature, stock, travel, and experimental imagery.


