Installing & Applying Nicolesy Presets
 Luminar
 Aurora
 Lightroom
Installing Lightroom (mobile) presets & profiles
These instructions show you how to install presets and profiles into Lightroom (mobile) (.xmp or .zip files).
Click to expand each step for more information.
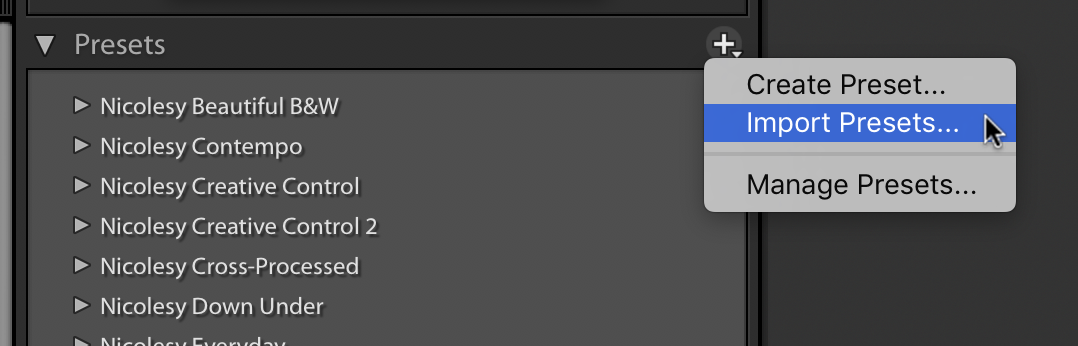
Open Lightroom and access the Presets panel.
Note: The Presets panel is located at the bottom of the Edit section.
Next, click on the “…” drop down and select Import Presets.
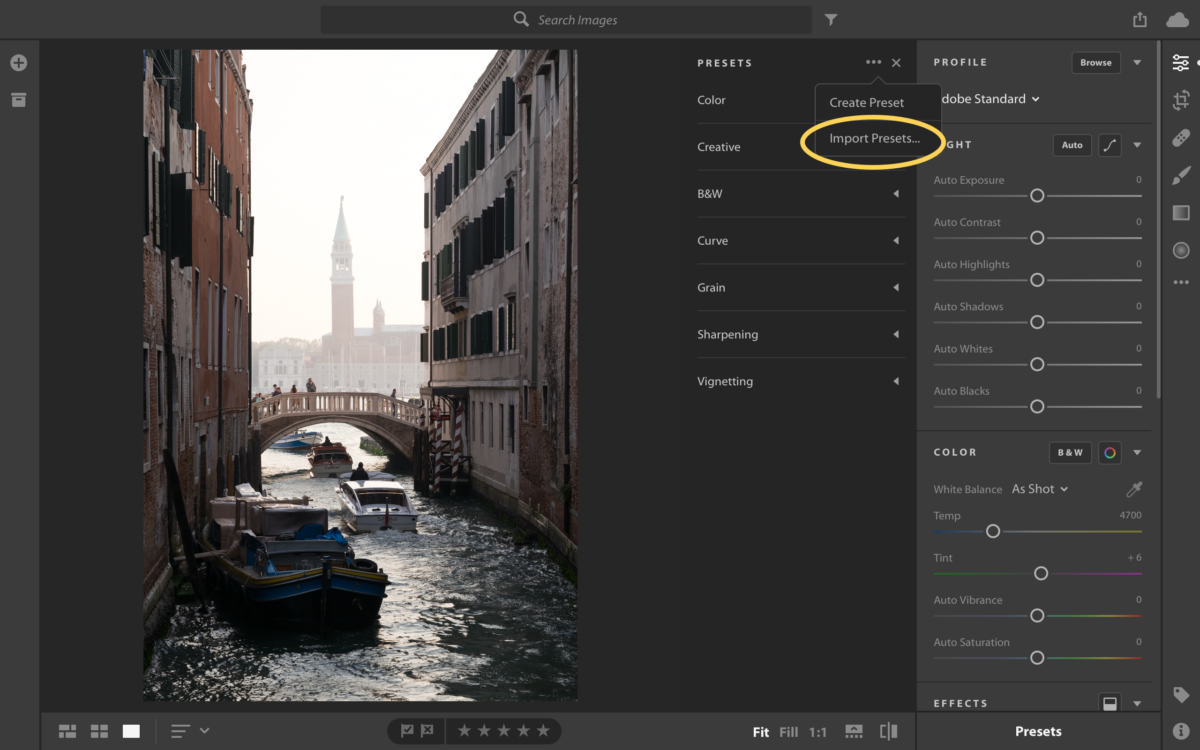
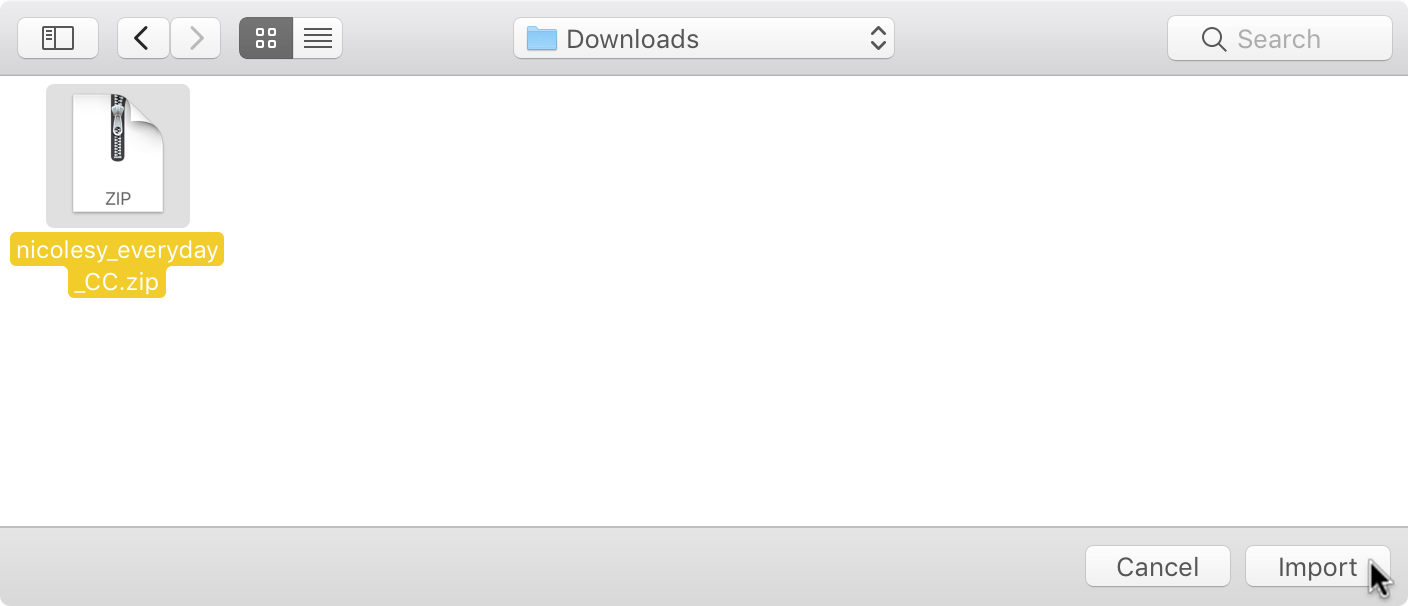
Navigate to the Nicolesy preset pack and select it to import into Lightroom CC. You can either import the .xmp files, or use the the .zip file that was included with your download. Your presets/profiles will then install and can be located in either the Presets panel, or the Profile Browser.
Installing Lightroom Classic presets & profiles
These instructions show you how to install presets & profiles into Lightroom CC Classic (.xmp or .zip files).
Click to expand each step for more information.
First, open Lightroom and go to the Develop module. On the left, make sure you can see the Presets panel.
In the Presets panel, click on the ![]() icon and select Import Presets.
icon and select Import Presets.
Now, locate the download files for the Nicolesy Lightroom CC presets you downloaded from your order. You can either import the .xmp files, or use the the .zip file that was included with your download. Select your file(s) and click “Import”.
Now it’s time to locate the presets to make sure that they installed properly:
- In some cases, you may need to quit and re-open Lightroom for the presets to appear.
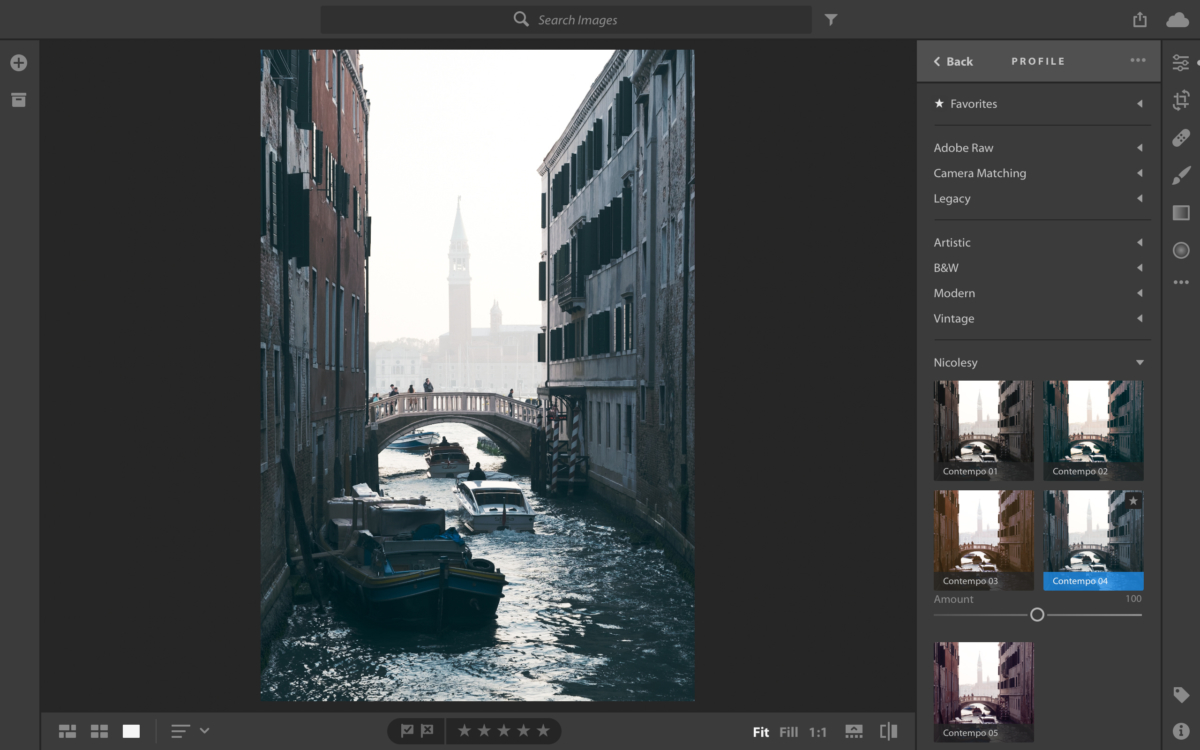
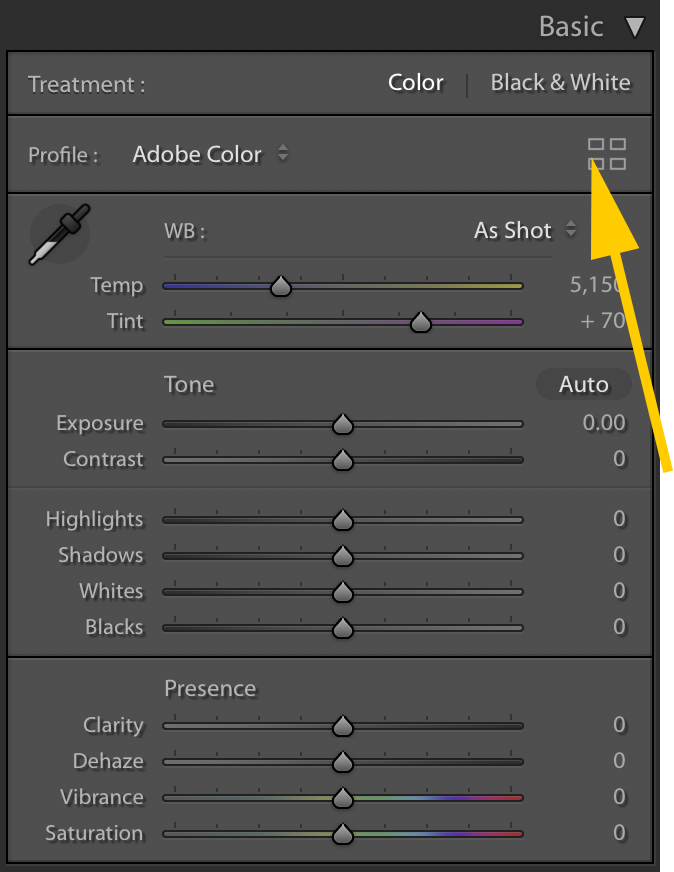
- If you followed the instructions properly but still don’t see your preset pack, it’s possible that they are located in the Profiles browser. (Some Nicolesy presets will not appear in the Presets panel.) To locate this, access the Basic panel in the Develop module, and click on the small grid next to “Profiles”. Scroll down to look for your new Nicolesy preset pack.
Still don't see your newly-installed preset pack?
It’s possible that the preset pack is hidden. Try this:
- Access the Presets panel in the Develop module
- Right-click over any preset pack and select “Manage Presets”
- Scroll through the list and see if the Nicolesy presets you just installed are there; place a check next to the box if they are hidden.
Another option is that the pack you installed contains Profiles, which are in a different location (not within the Presets panel). To look for these files, go into the Basic panel and click on the grid icon next to Profiles:
Installing Lightroom CS6 (and older) presets
This tutorial shows you how to install presets into older versions of Lightroom (CS6 and older; .lrtemplate files).
Installing Lightroom Classic print templates
These instructions show you how to install print templates into Lightroom Classic (.lrtemplate files).
Click to expand each step for more information.
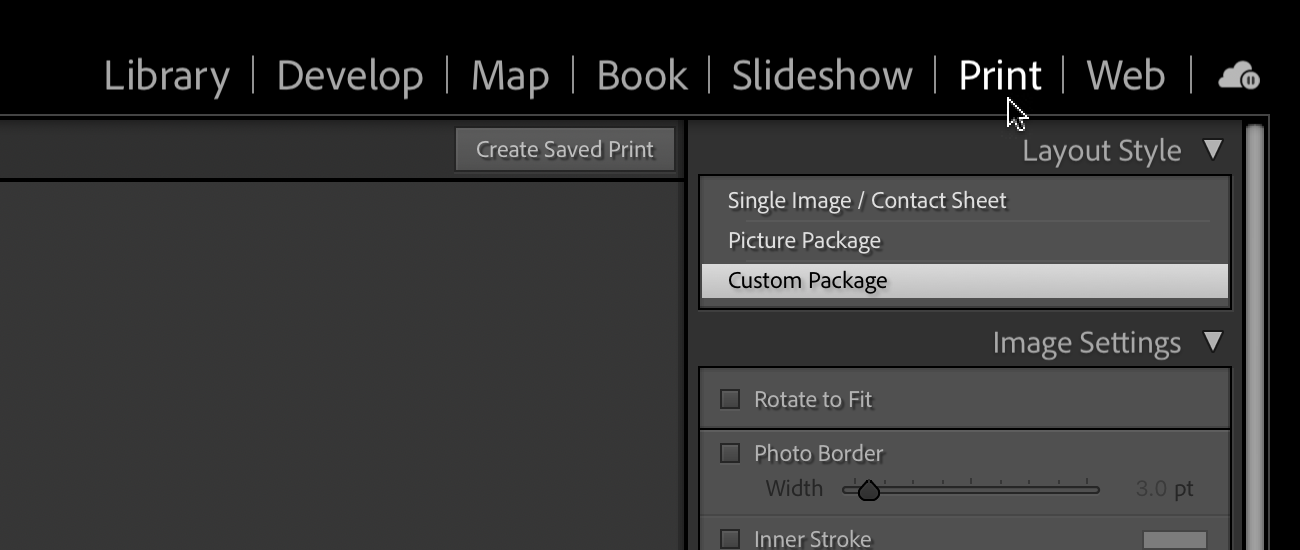
Open Lightroom Classic and access the Print module.
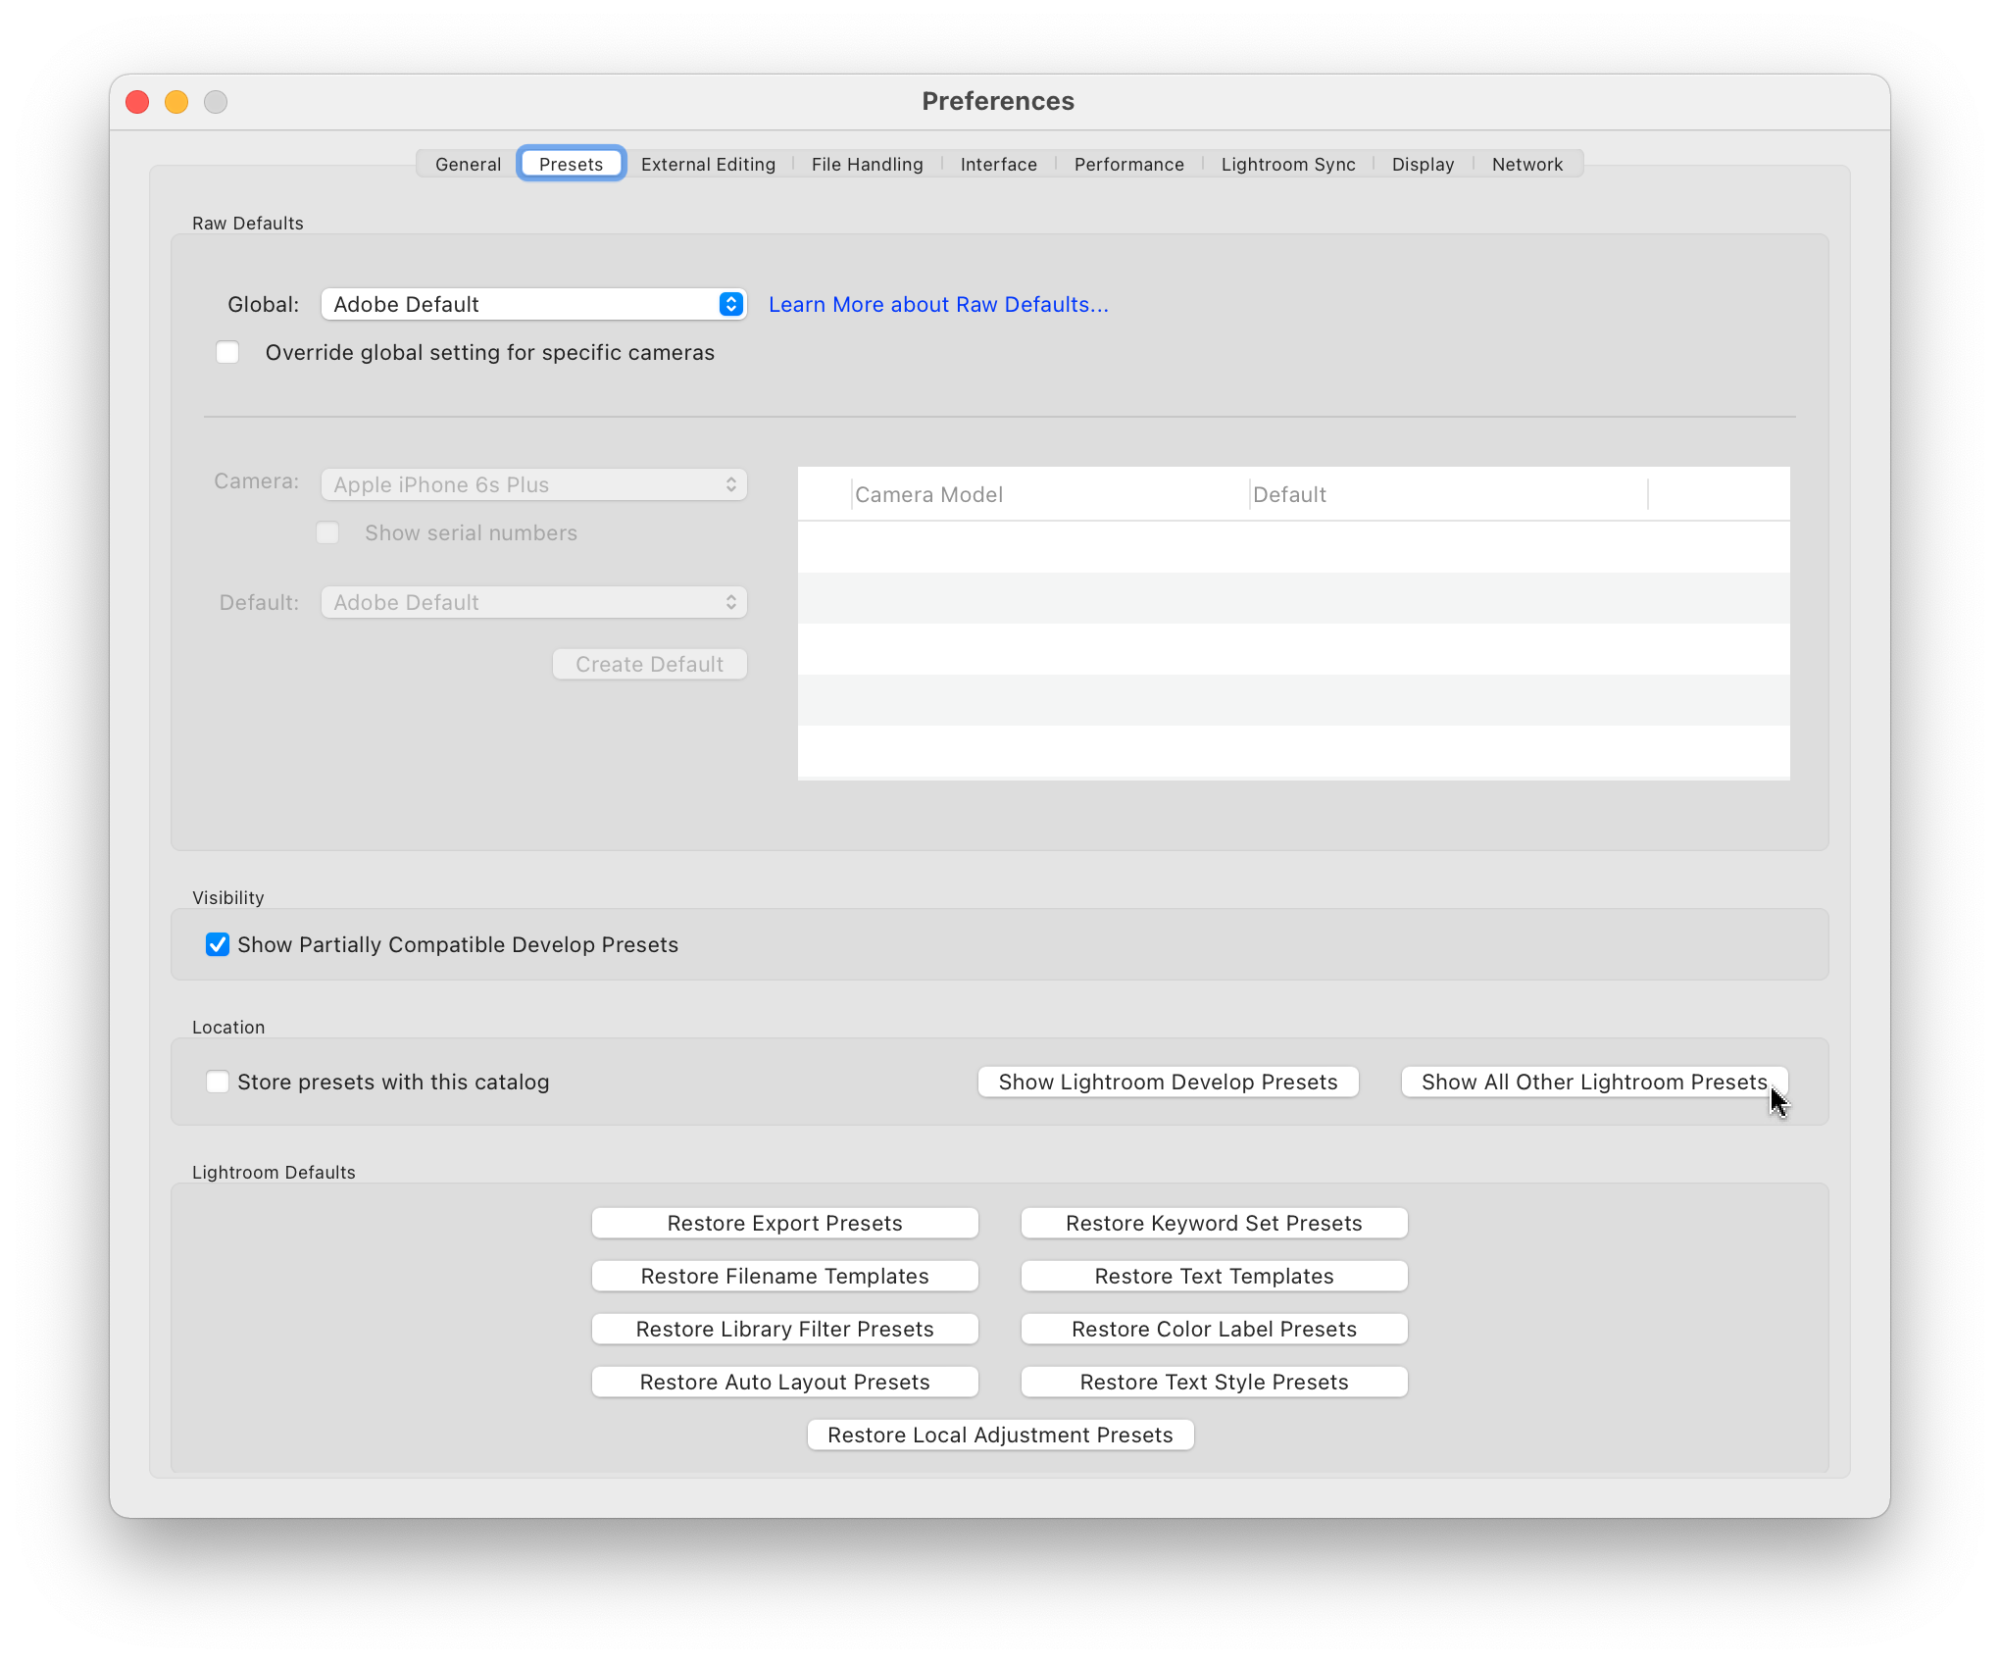
Open the Lightroom Preferences window:
- Mac: Go to the menu and access Lightroom Classic > Preferences
- Windows: Go to Edit > Preferences
Then, go to the Presets tab at the top, and click the button that says “Show All Other Lightroom Presets“.
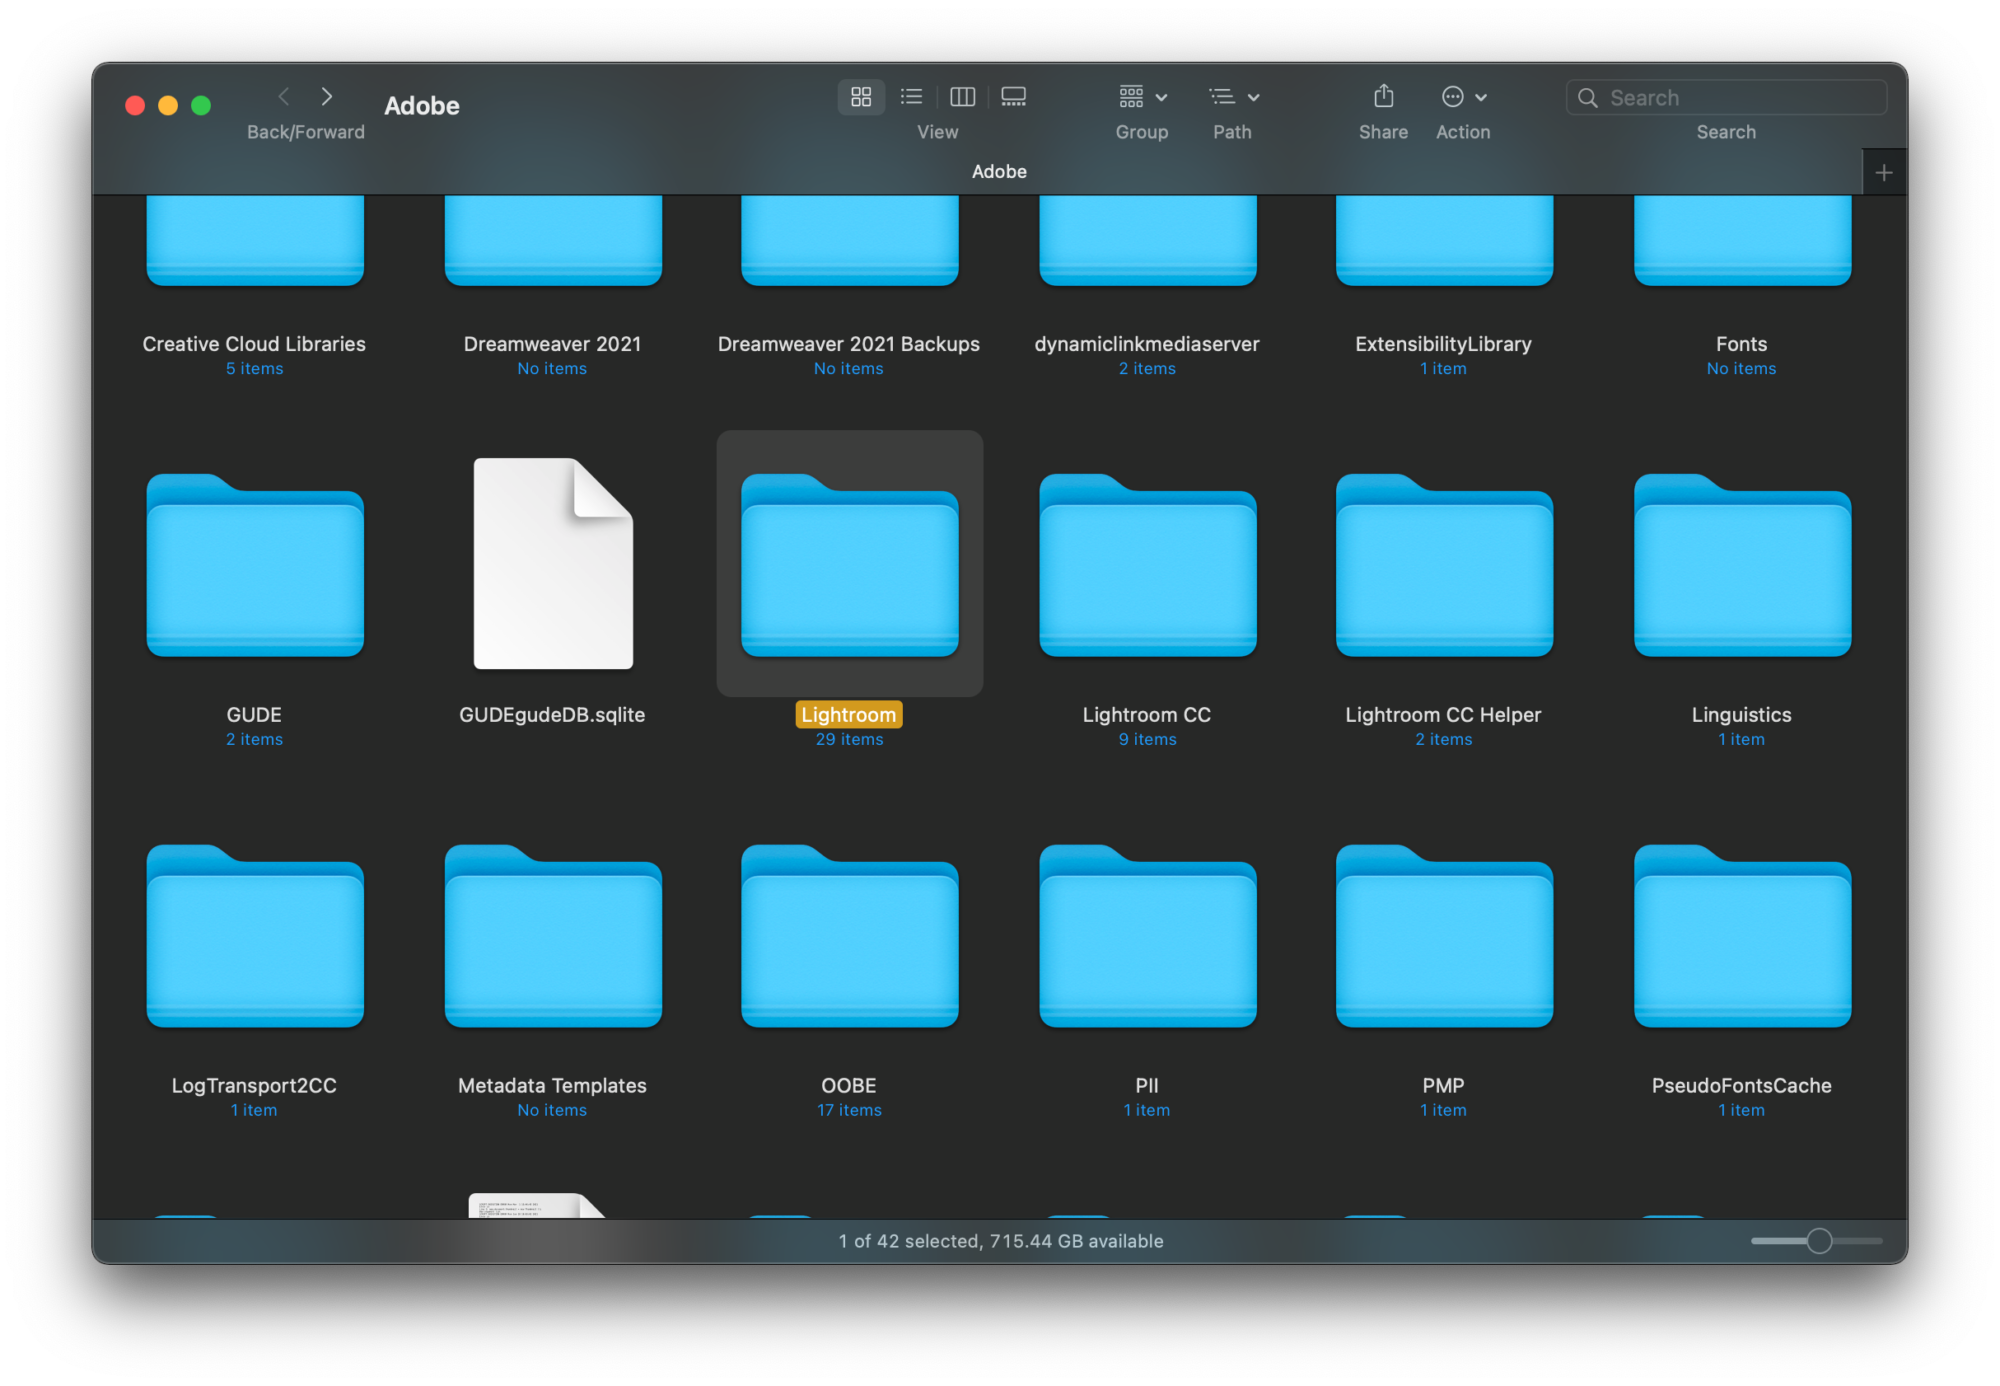
A folder will open on your desktop. In this folder, the Lightroom folder is highlighted. Double-click this folder to open it up.
Next, open the Print Templates folder:
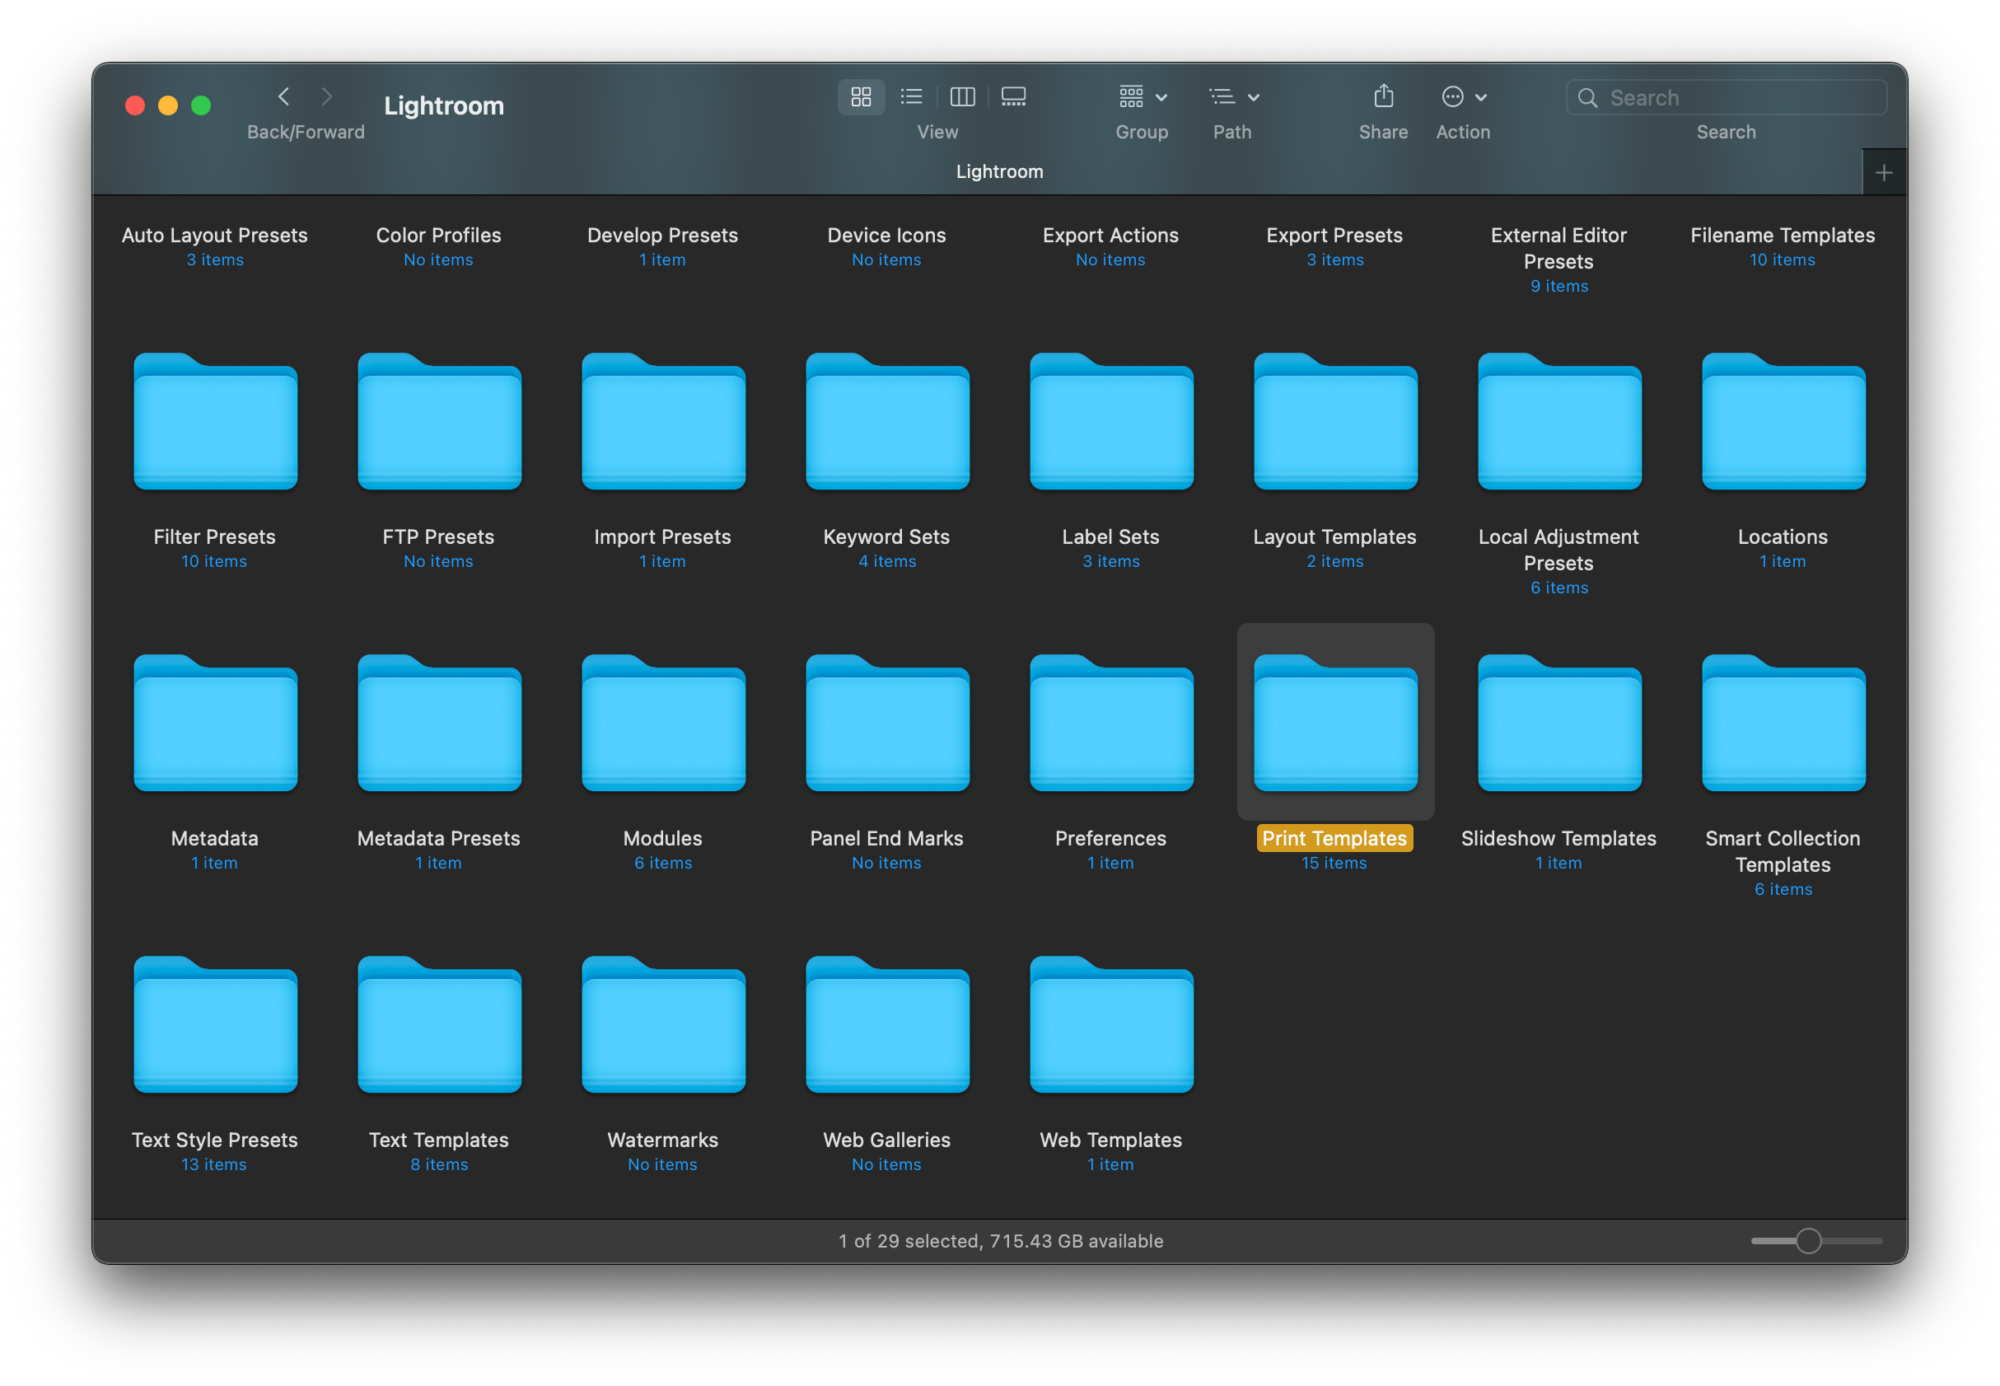
The Print Templates folder is where you will add your folders of .lrtemplate files. You can drag-and-drop them into this folder, or copy and paste them.
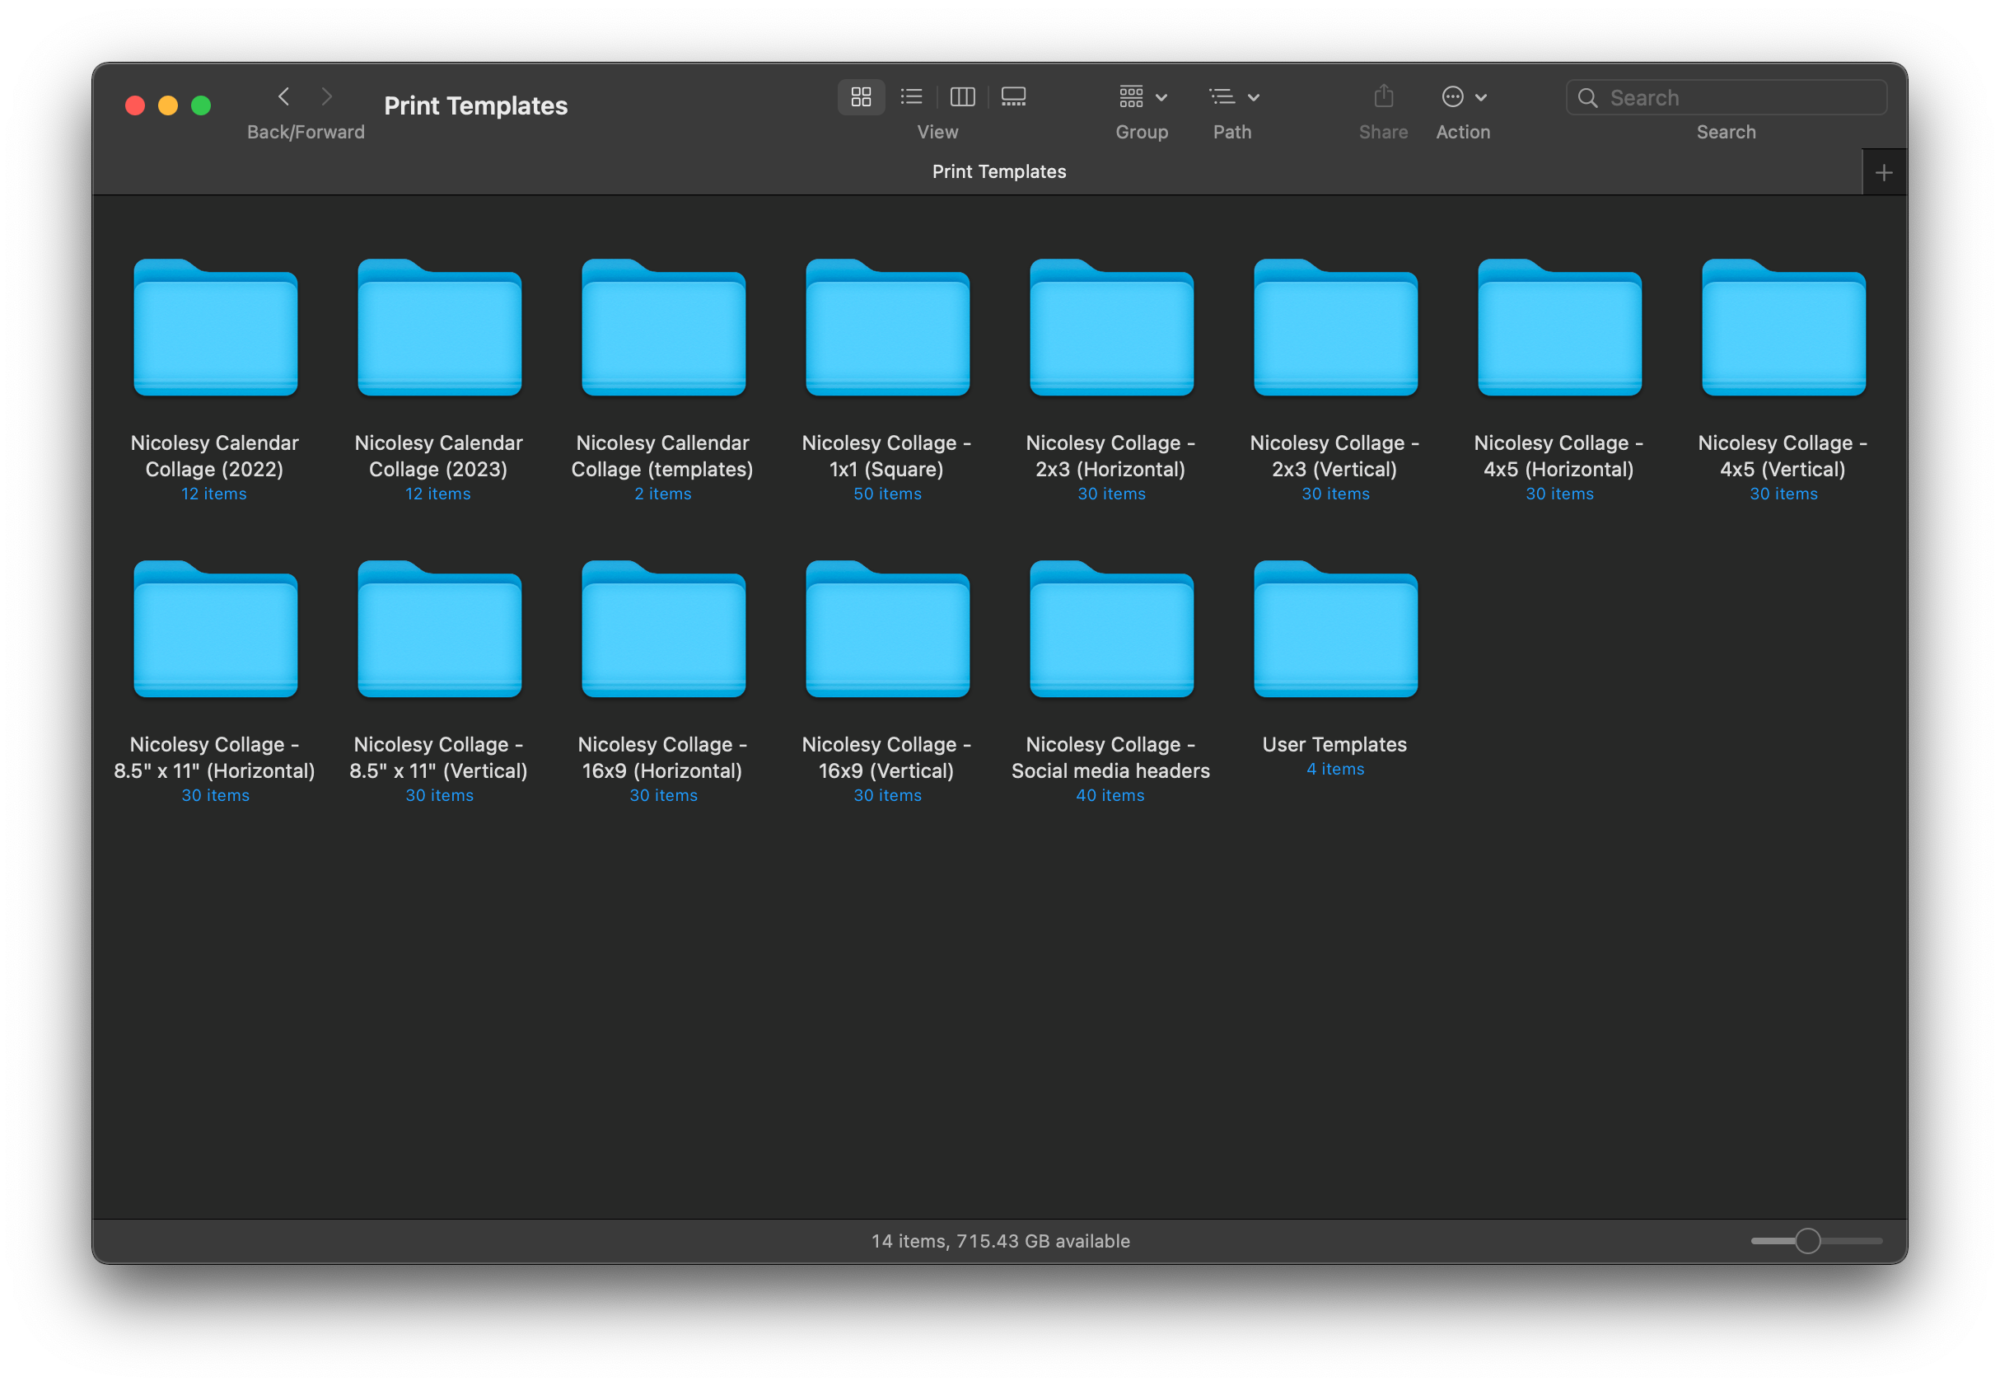
Organizing them into folders will allow you to keep them organized well inside of Lightroom. The folders here in the Print Template folder will show up the same way inside of the Templates panel in the Lightroom Classic Print module.
Alternate method:
Open Lightroom Classic and access the Print module.
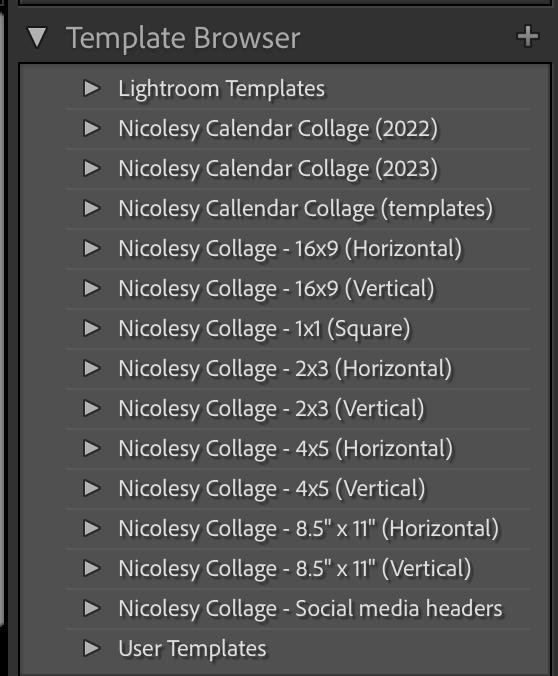
Access the Template Browser on the left.
Expand the User Templates folder and right-click over one of the templates. (You may need to save a new template quickly if you don’t see any in this list.)
Choose the “Show in Finder / Explorer” option to reveal the folder on your computer.
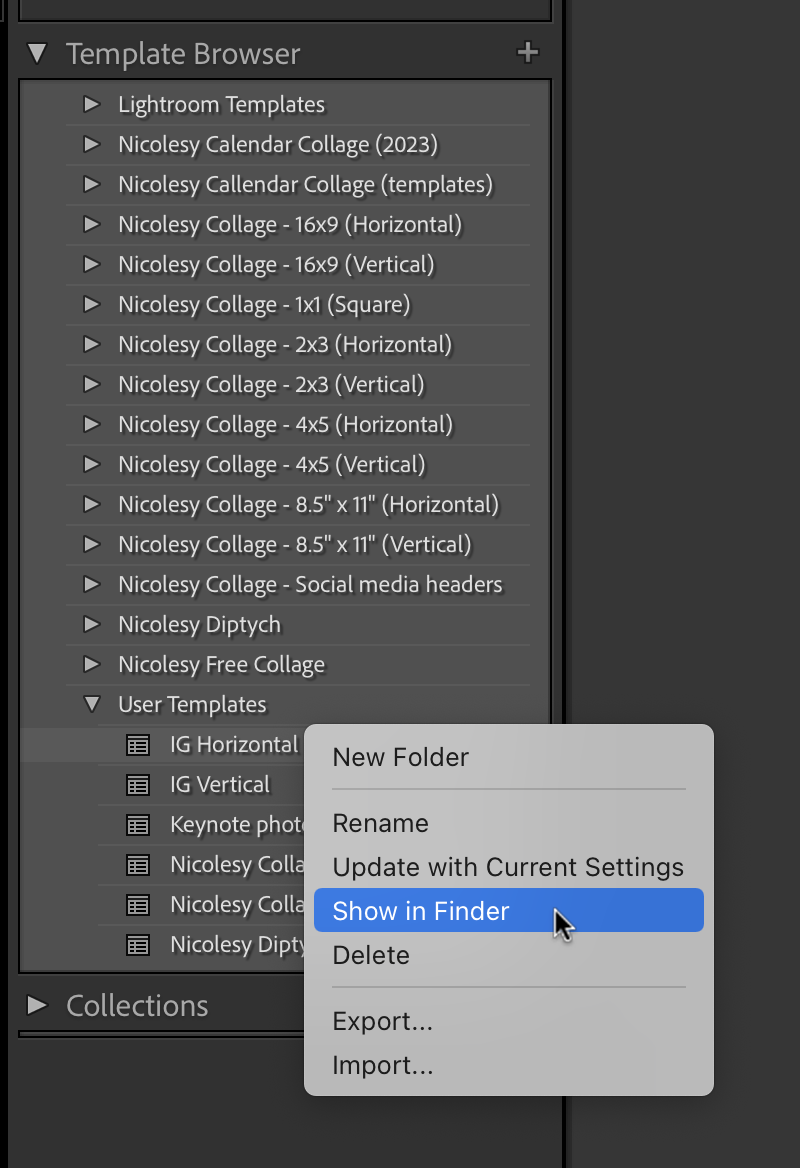
Copy your .lrtemplate files to this folder, or go back one step to the main Print Templates folder, create a new folder, and add them there.
You can drag and drop them into this folder or copy and paste them.
Note: You may need to quit and restart Lightroom to see the new presets in the Template Browser.

 Photoshop
Installing LUTs into Photoshop (.cube files)
Note: When Photoshop updates, the 3DLUTs folder usually resets and custom LUT files will be deleted. Make sure you keep a backup of your LUT (.cube) files in a separate location so you do not lose them.
Click to expand each step for more information.
Applying a LUT (.cube) file in Photoshop using the Color Lookup adjustment
Click to expand each step for more information.
Open any image into Photoshop.
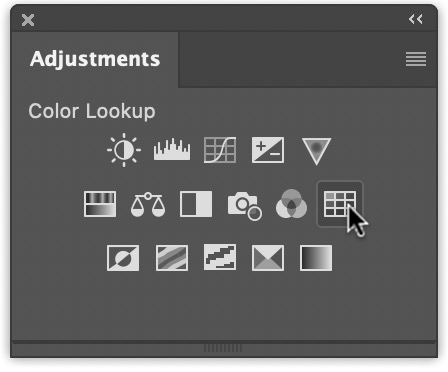
Access the Adjustments panel. If you don’t see it, go to Window > Adjustments.
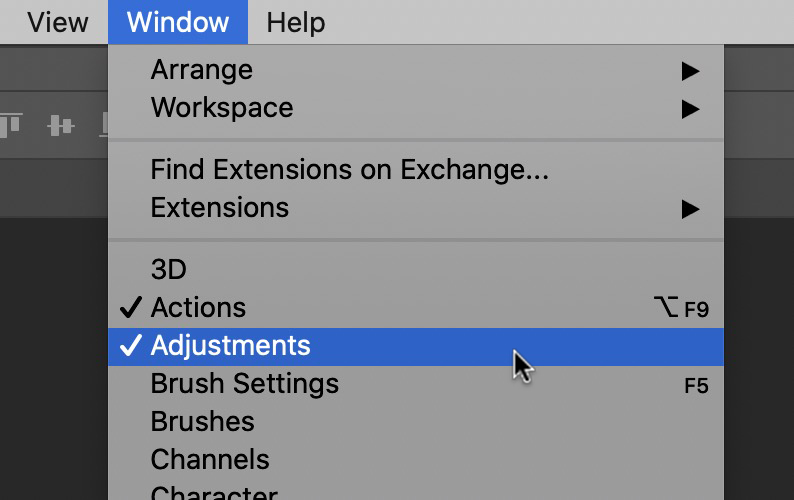
Add the Color Lookup adjustment using the Adjustments panel.
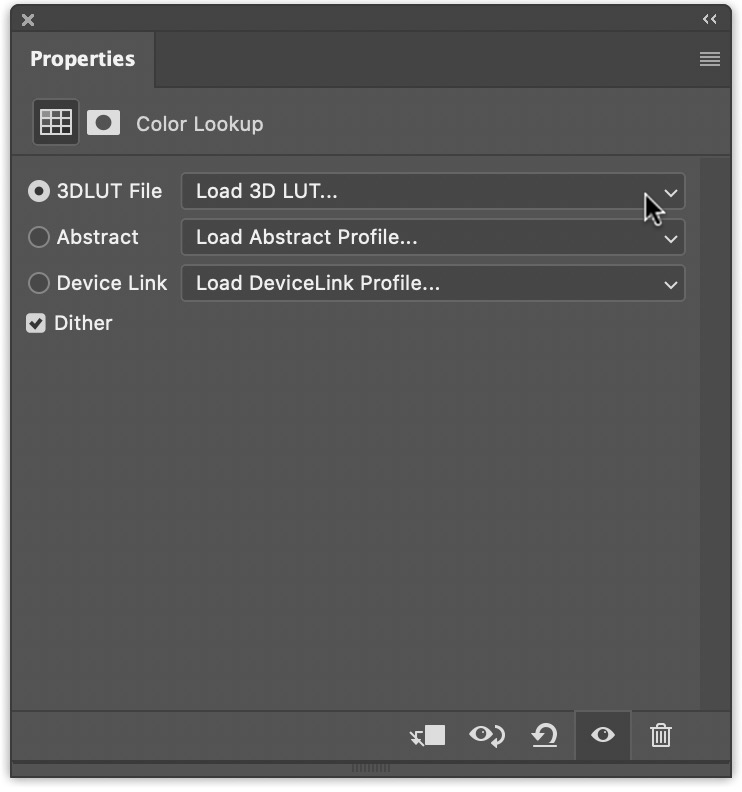
Access the Properties panel (Window > Properties) and click the Load 3D LUT drop-down. Select a LUT file from the list, or click Load 3D LUT… to choose one from your computer.
This tutorial shows you how to install ACR presets (older .xmp files) into older versions of Photoshop (CS6 and older).
Please note that any new .xmp “Profile” presets will not install into ACR in CS6 and older. Only the CC versions of Photoshop (and Lightroom) will work with the Profile presets.
Click here for written instructions, including both Mac and Windows paths for installing ACR presets.
Installing ACR Presets (Photoshop CS6 and older)
This tutorial shows you how to install ACR presets (older .xmp files) into older versions of Photoshop (CS6 and older).
Please note that any new .xmp “Profile” presets will not install into ACR in CS6 and older. Only the CC versions of Photoshop (and Lightroom) will work with the Profile presets.
Adding Textures using Photoshop
Importing skies into the Sky Replacement tool
Learn how to import skies into the Sky Replacement tool in Photoshop CC. You can import both image files and .sky files into this tool.
Click to expand each step for more information.
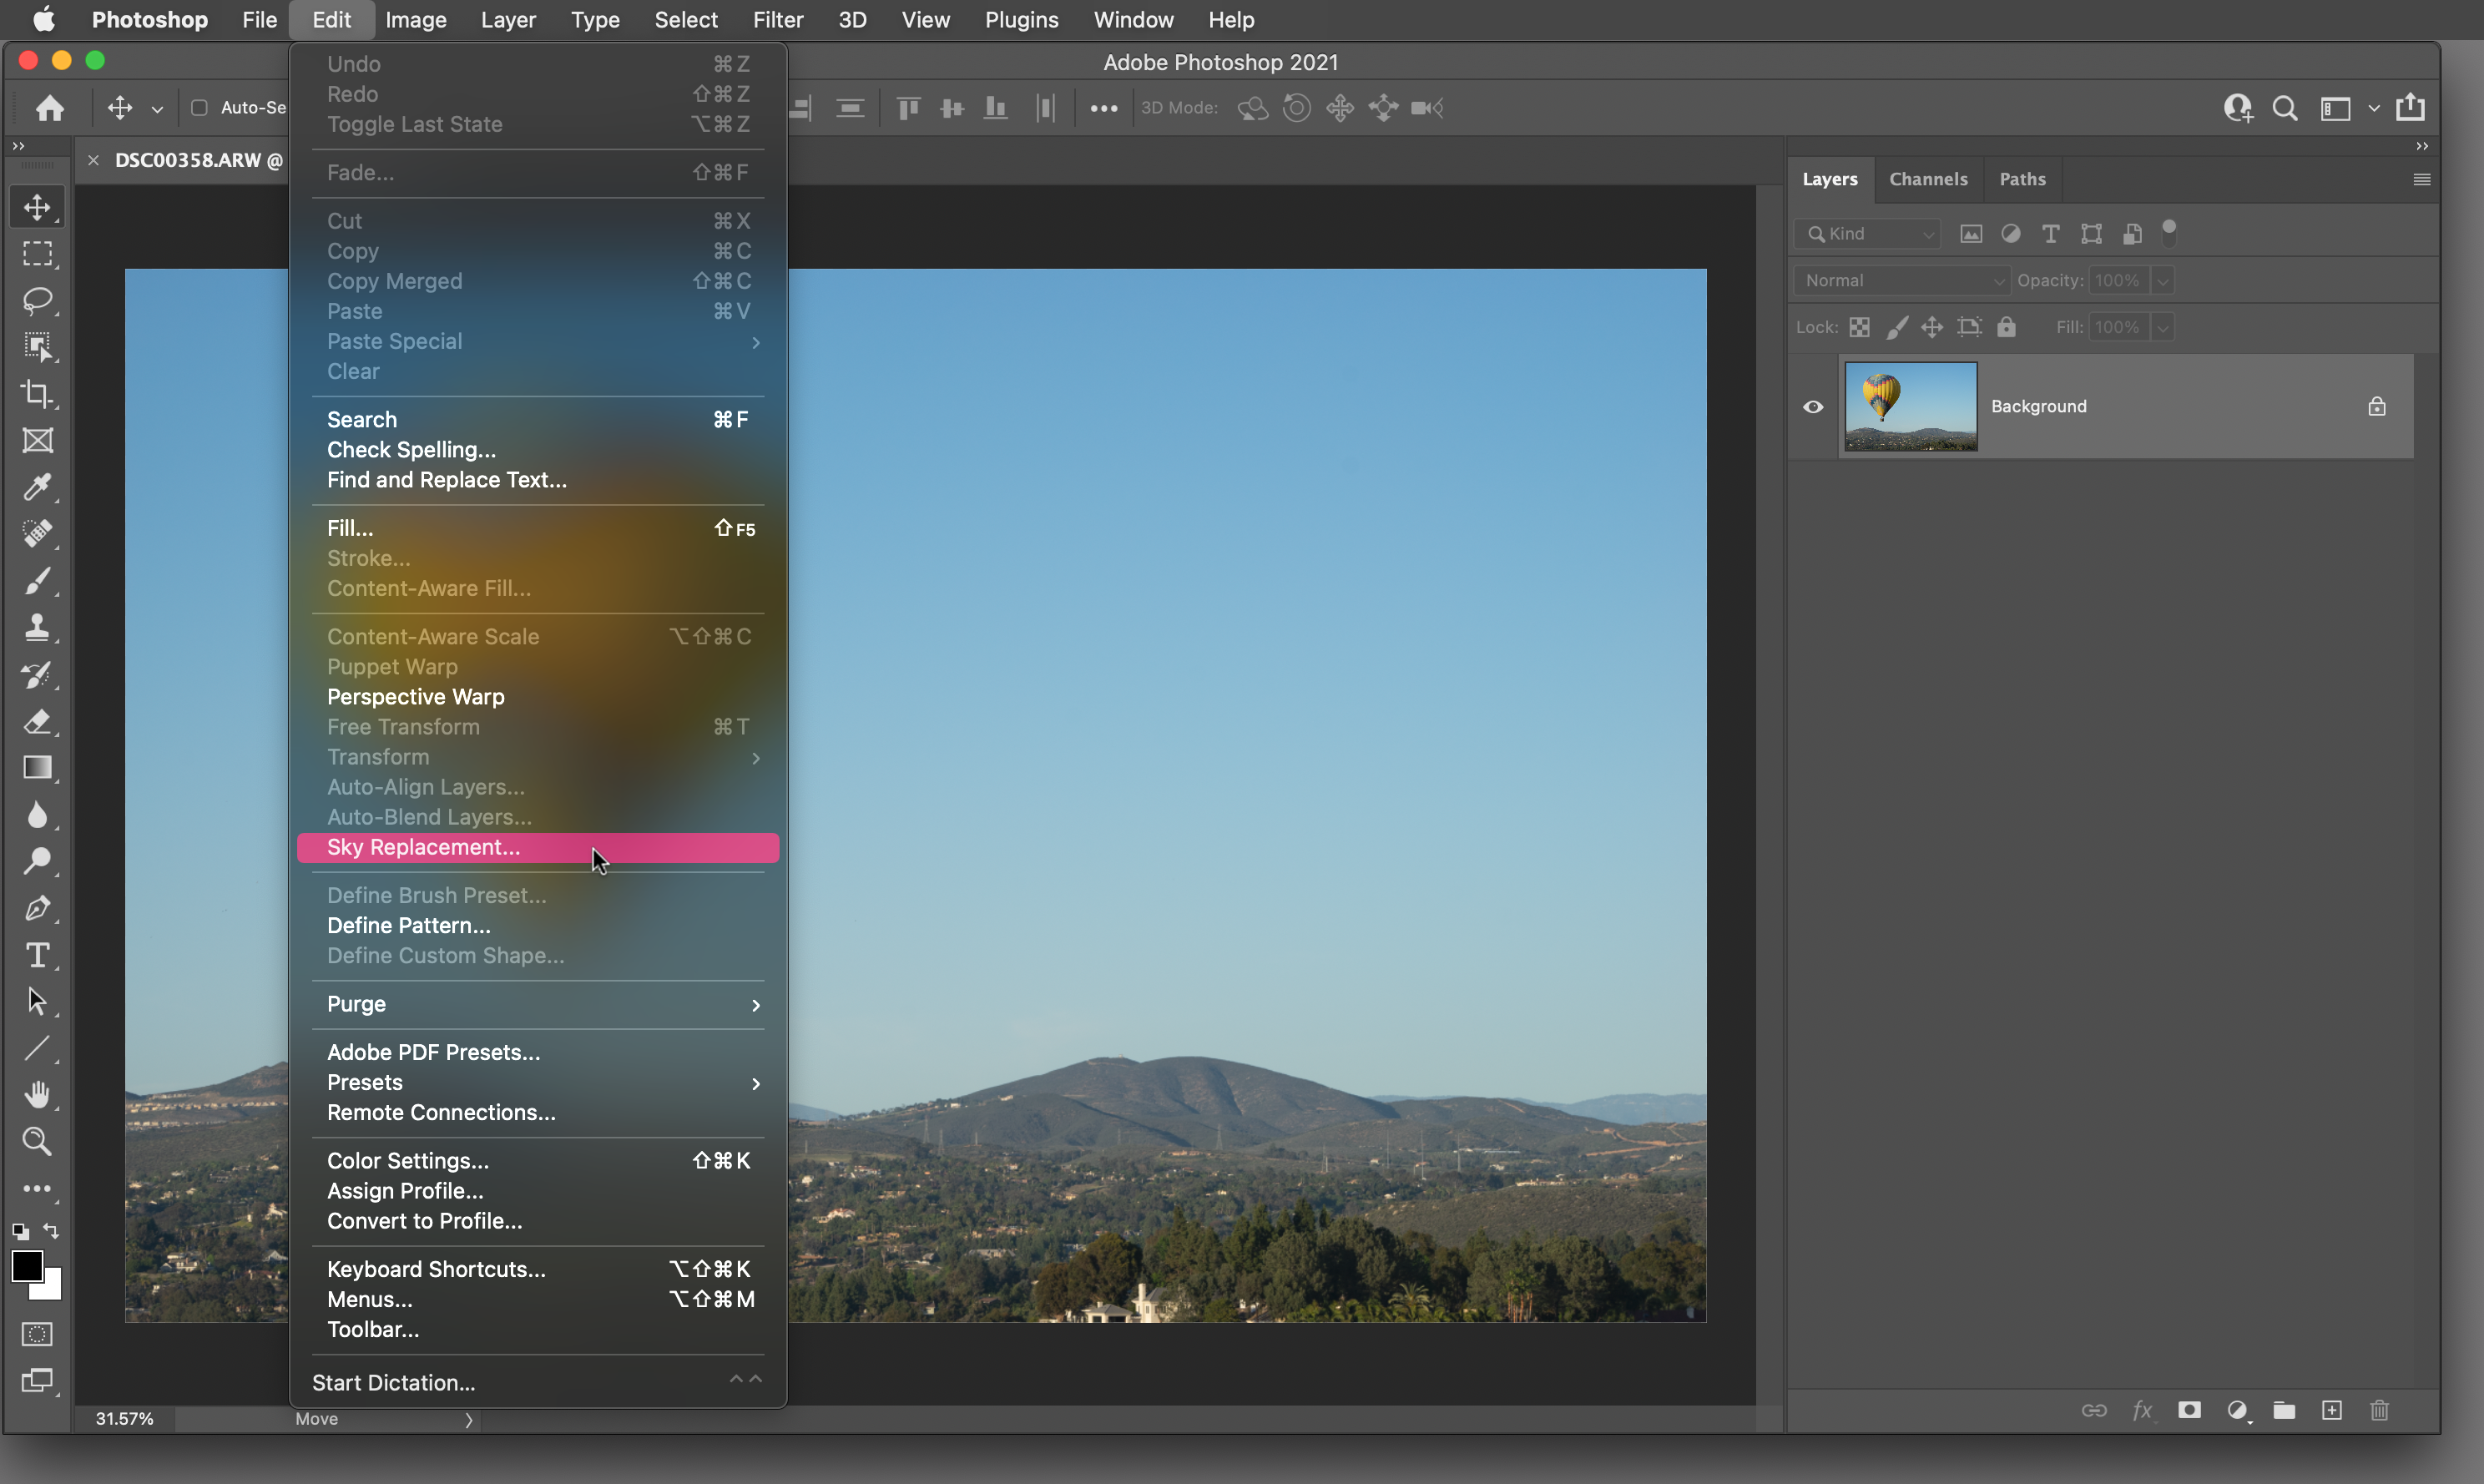
Open an image into Photoshop. The image must have an obvious sky area for this to work.
In the menu, go to Edit > Sky Replacement.
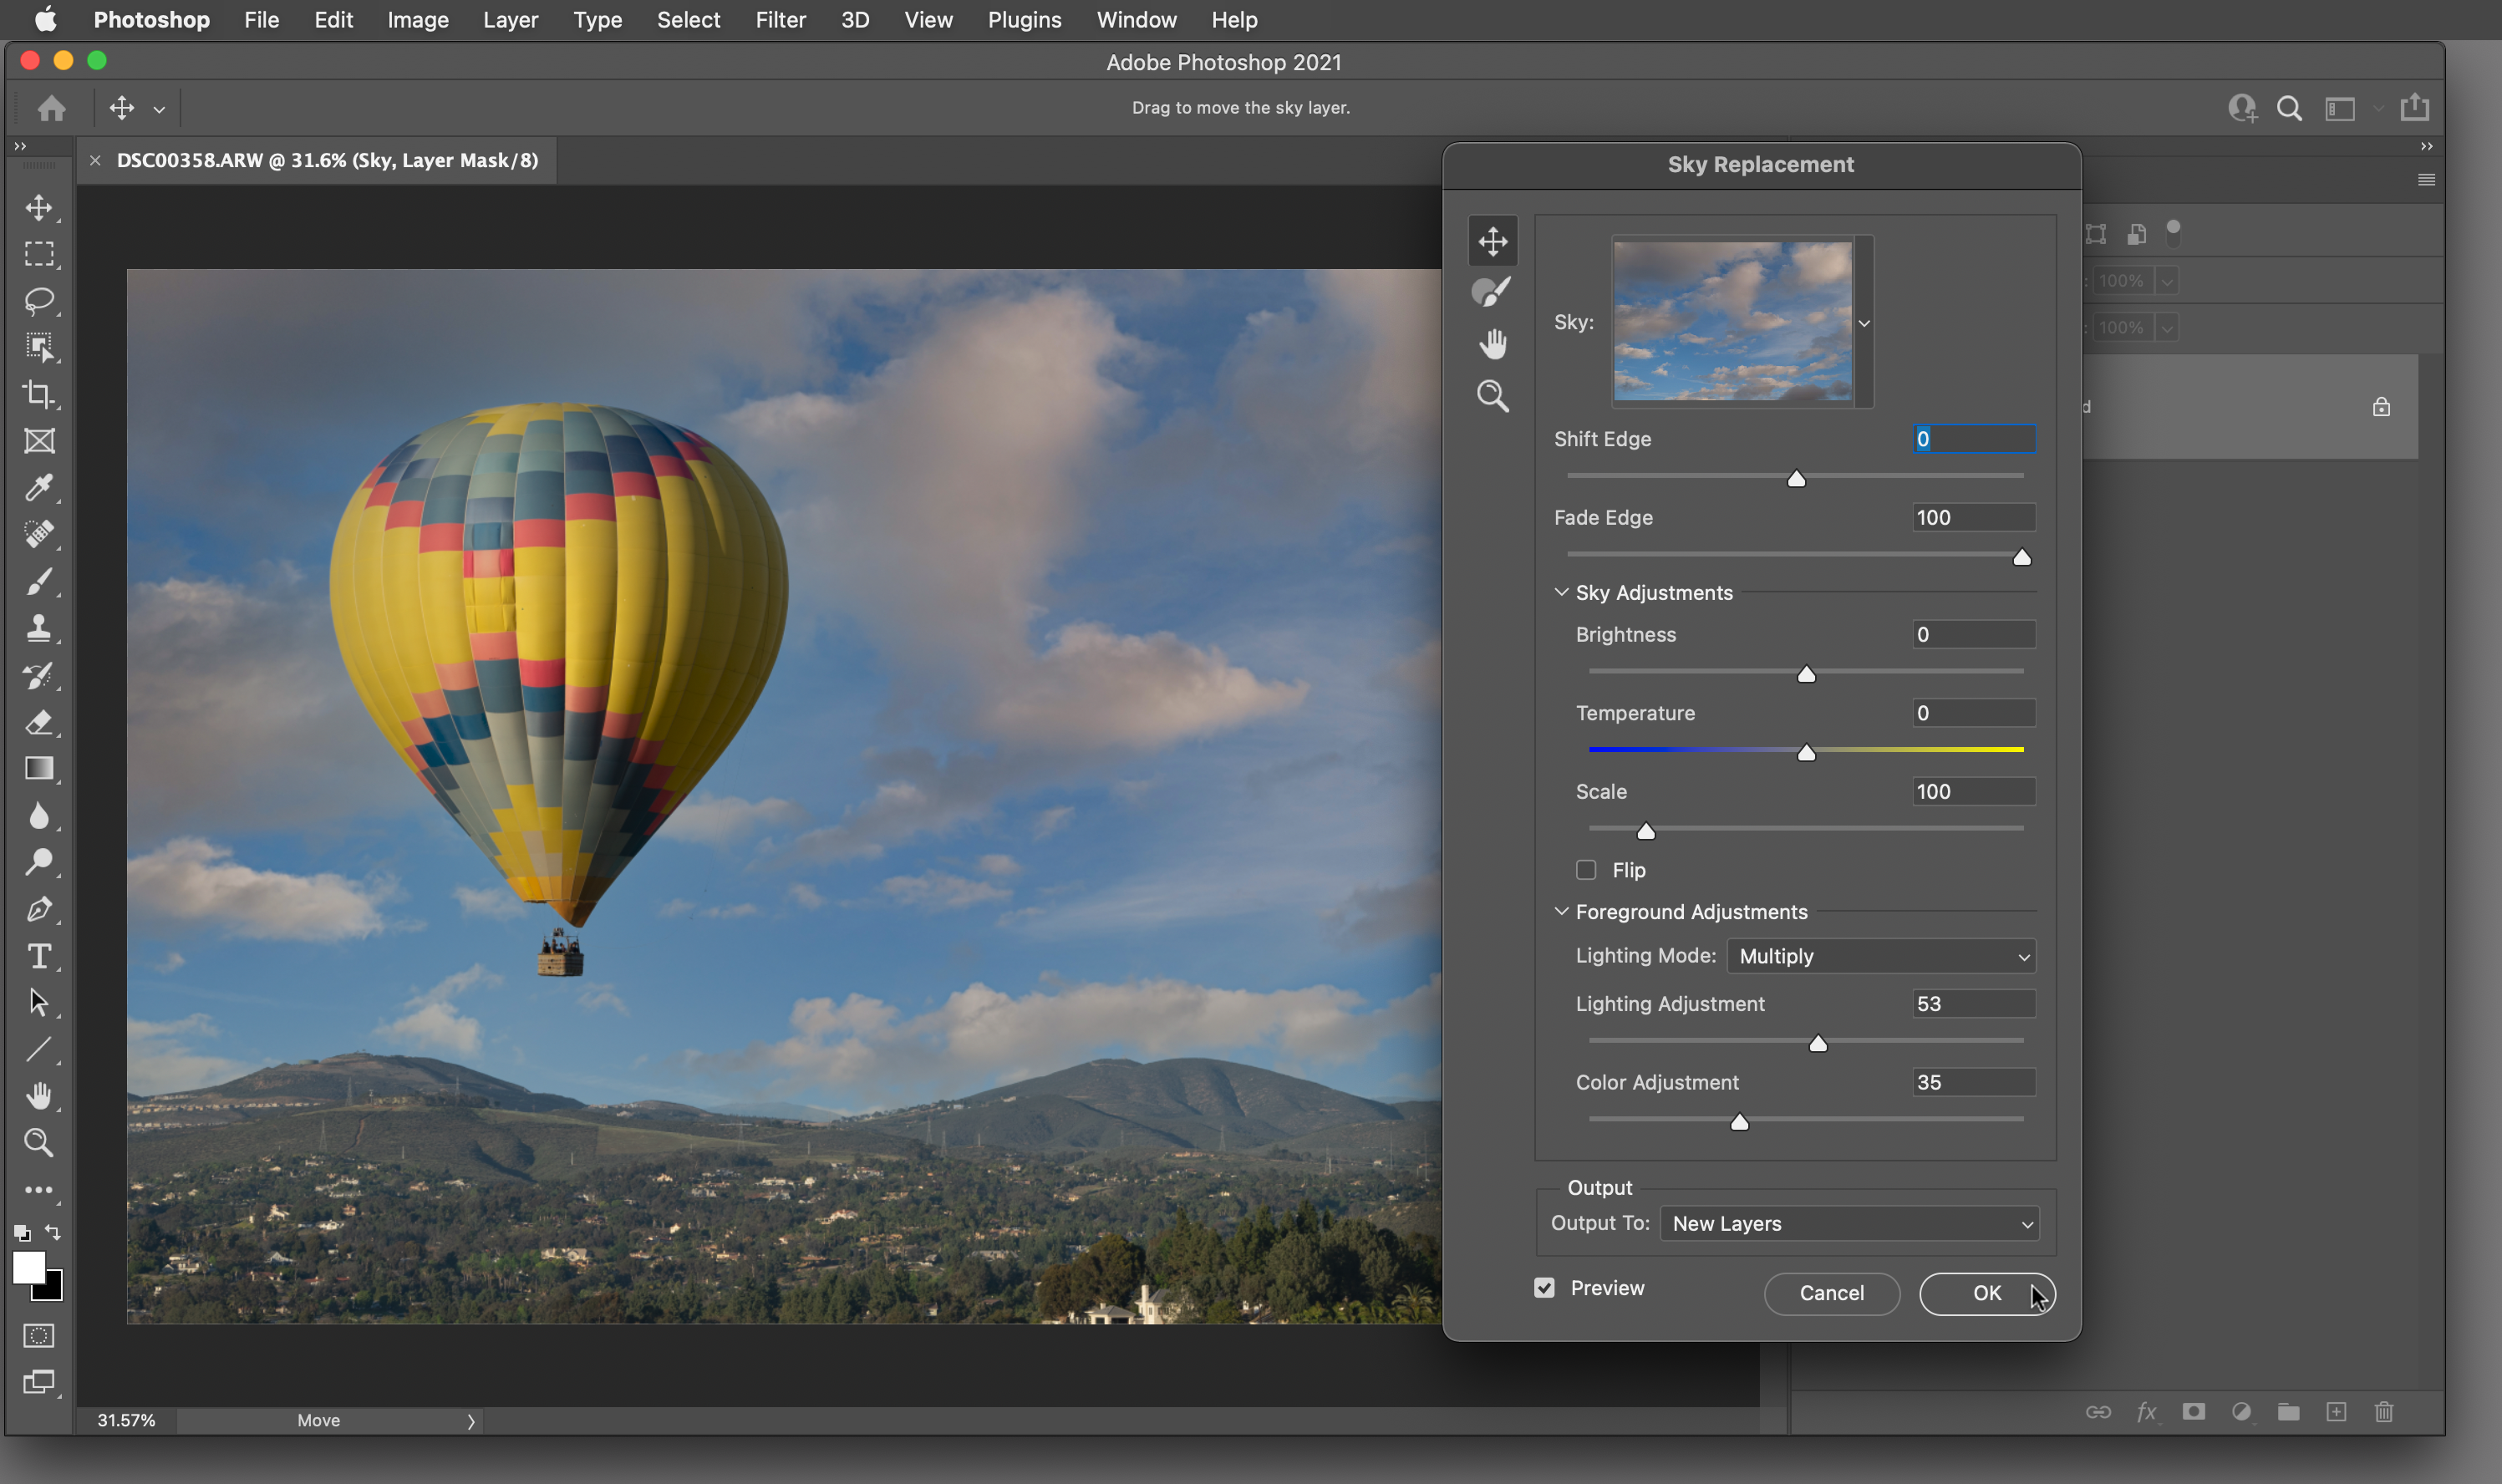
Click the small drop-down arrow next to the sky preview at the top of the Sky Replacement panel. Then, click the gear icon and select Import Skies. You can either import image files, or from a .sky preset. Choose your option, then navigate to the appropriate files and click OPEN.

If you imported a .sky preset, you will have a new category with skies in that folder (image files will be added to the bottom of the list). To add a sky, click on a preview image to apply it. Click OK when finished.

Importing actions into the Photoshop Actions panel
Learn how to import actions files (.atn) into the Actions panel in Photoshop CC.
Click to expand each step for more information.
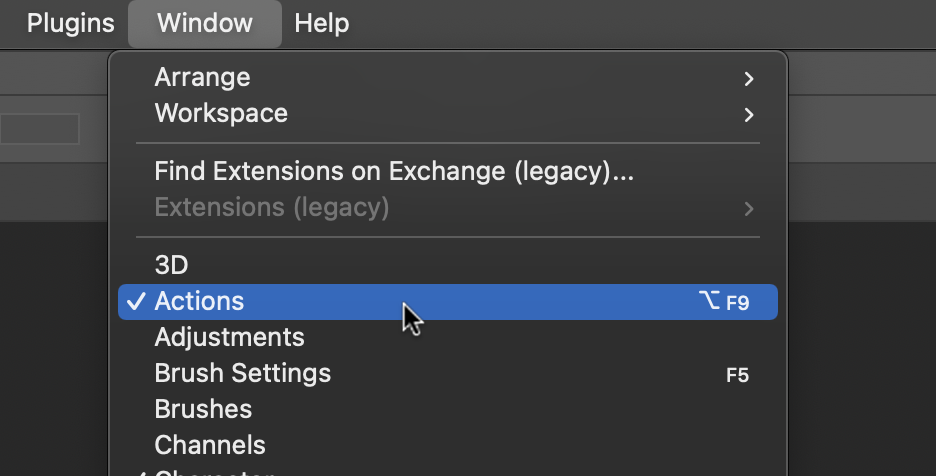
In Photoshop, access the Actions panel. If you don’t see it in your workspace, go to Window > Actions.
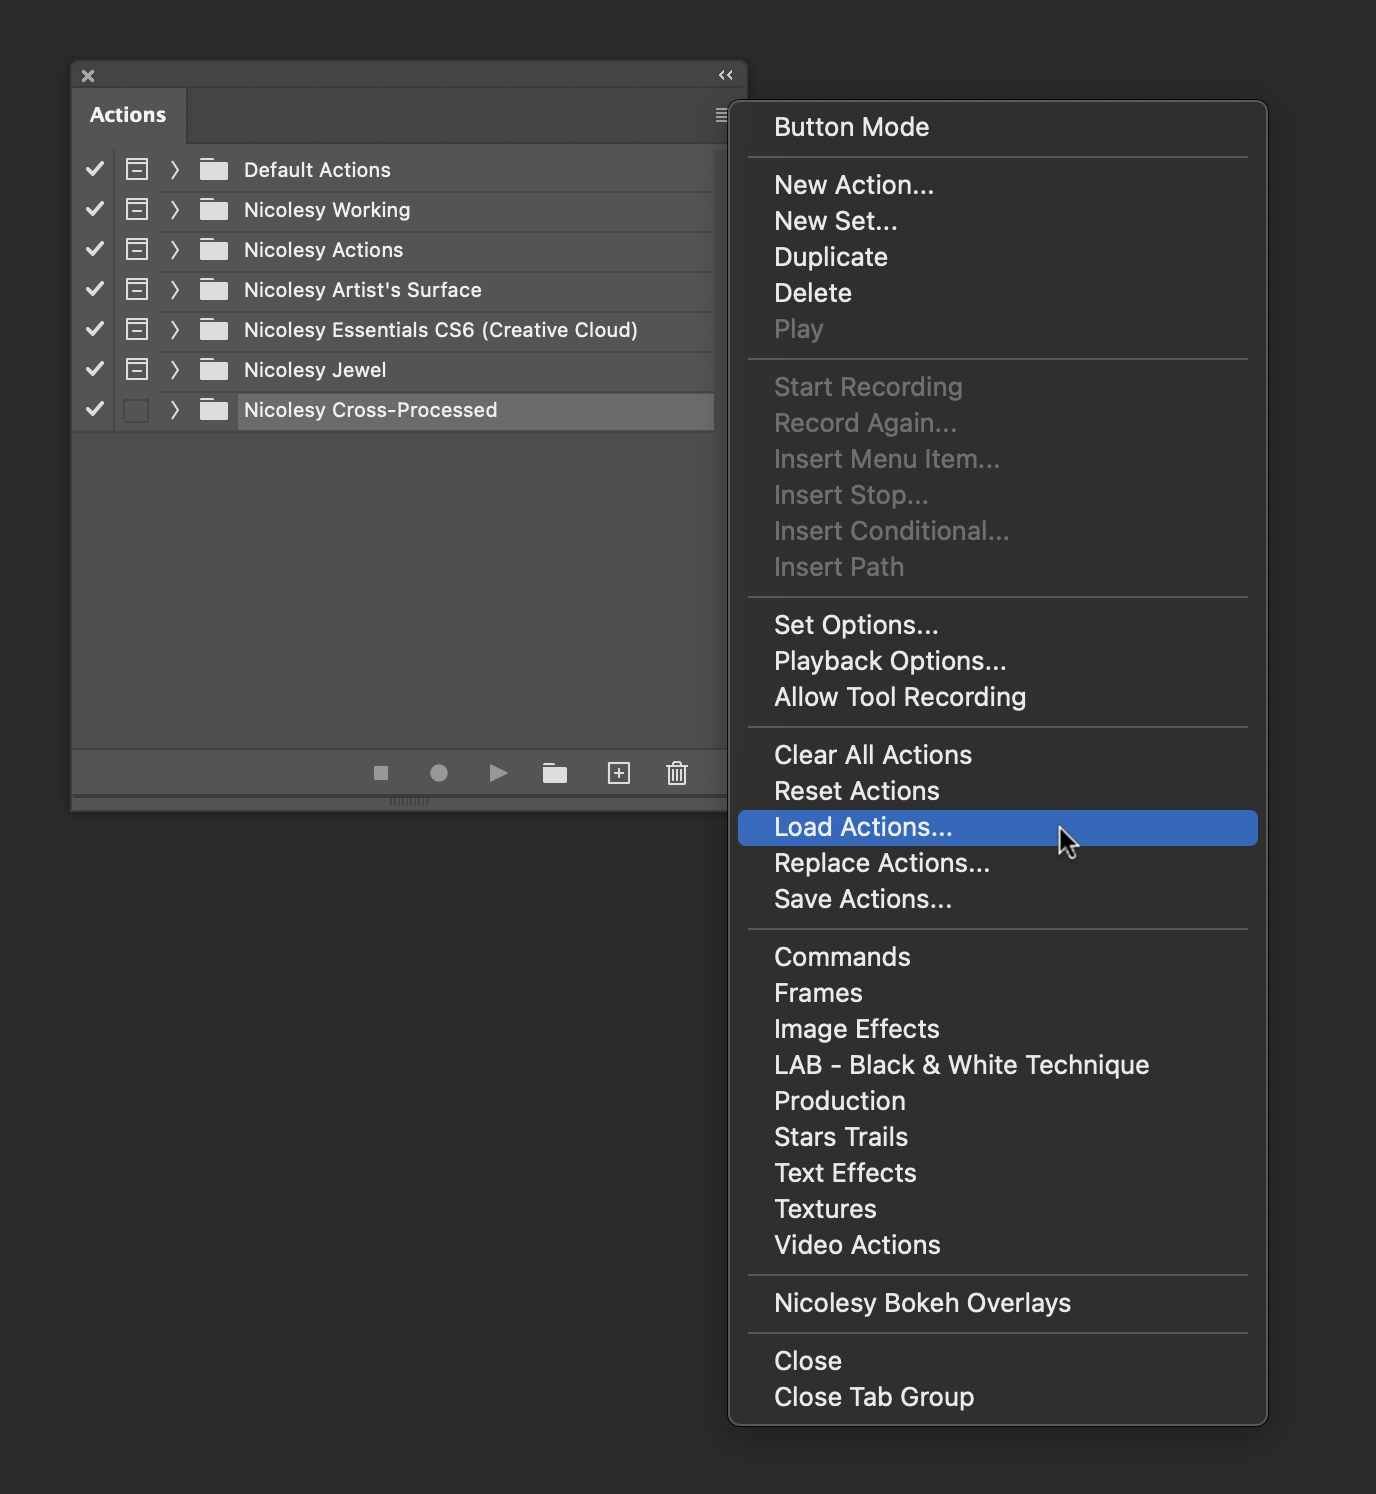
In the Actions panel, click the top-right menu drop down and choose Load Actions.
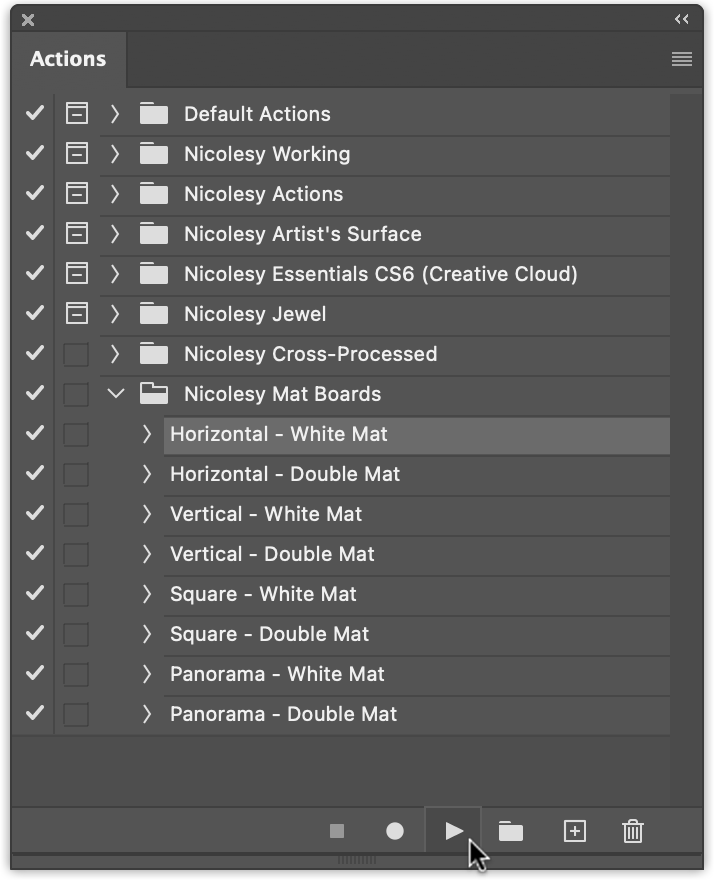
Then, navigate to the .atn file you wish to import and click Open.

To play an action from an action set, click the action you want to use and press the Play button on the bottom of the window.
Importing brush presets into Photoshop
Learn how to import brush files (.abr) into the Photoshop Presets Manager.
Click to expand each step for more information.
Importing patterns into Photoshop
Learn how to import pattern files (.pat) into the Photoshop Presets Manager.
Click to expand each step for more information.
 Photoshop Elements
Installing actions into Photoshop (.atn files)
Installing brushes into Photoshop (.abr files)
Installing actions into Photoshop (.pat files)
 ON1 Photo RAW
Installing ON1 Photo RAW Presets (.ONPreset files)
These instructions show you how to install preset packs (.ONPreset files) into ON1 Photo RAW.
Click to expand each step for more information.
Download the ON1 Photo preset pack from your download page.
Next, right-click on the .ONPreset file and select the appropriate version of ON1 Photo you would like to install your presets into. This will likely be the most-recent version.
Note: Do not double-click the .ONPreset file; if you have older versions of ON1 Photo installed on your computer, it may install into one of those applications instead of the most current version.
ON1 will open and ask you if you would like to install these presets. Click Yes.

The files will install and let you know when it is finished click Close to proceed.
Applying ON1 Photo RAW Presets (.ONPreset files)
- In the Browse module, select an image you would like to work on.
- Next, make sure that the Presets panel on the left is visible.
- Click on the preset you would like to apply and it will add the effects to your photo.
Note: If you would like to edit the preset effects and filters, please go to the Effects module.
- First, open an image into the Effects module.
- Next, make sure that the Presets panel on the left is visible.
- Then locate the preset you want to apply to your image:
- To apply this preset and overwrite all existing filters, then click once on the preset to apply it.
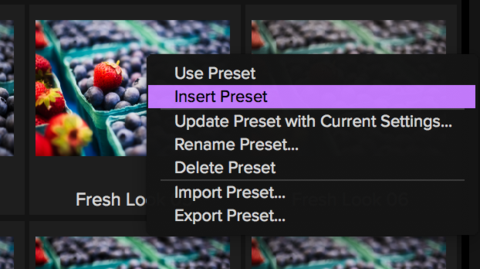
- To apply this preset on top of any existing filters, right-click the filter and select Insert Preset.
Applying a LUT (.cube) file to your image in ON1
Open a photo into ON1 and access the Edit view.

Access the Effects section, click “Add Filter”, and then choose the LUTs filter from the pop-up.
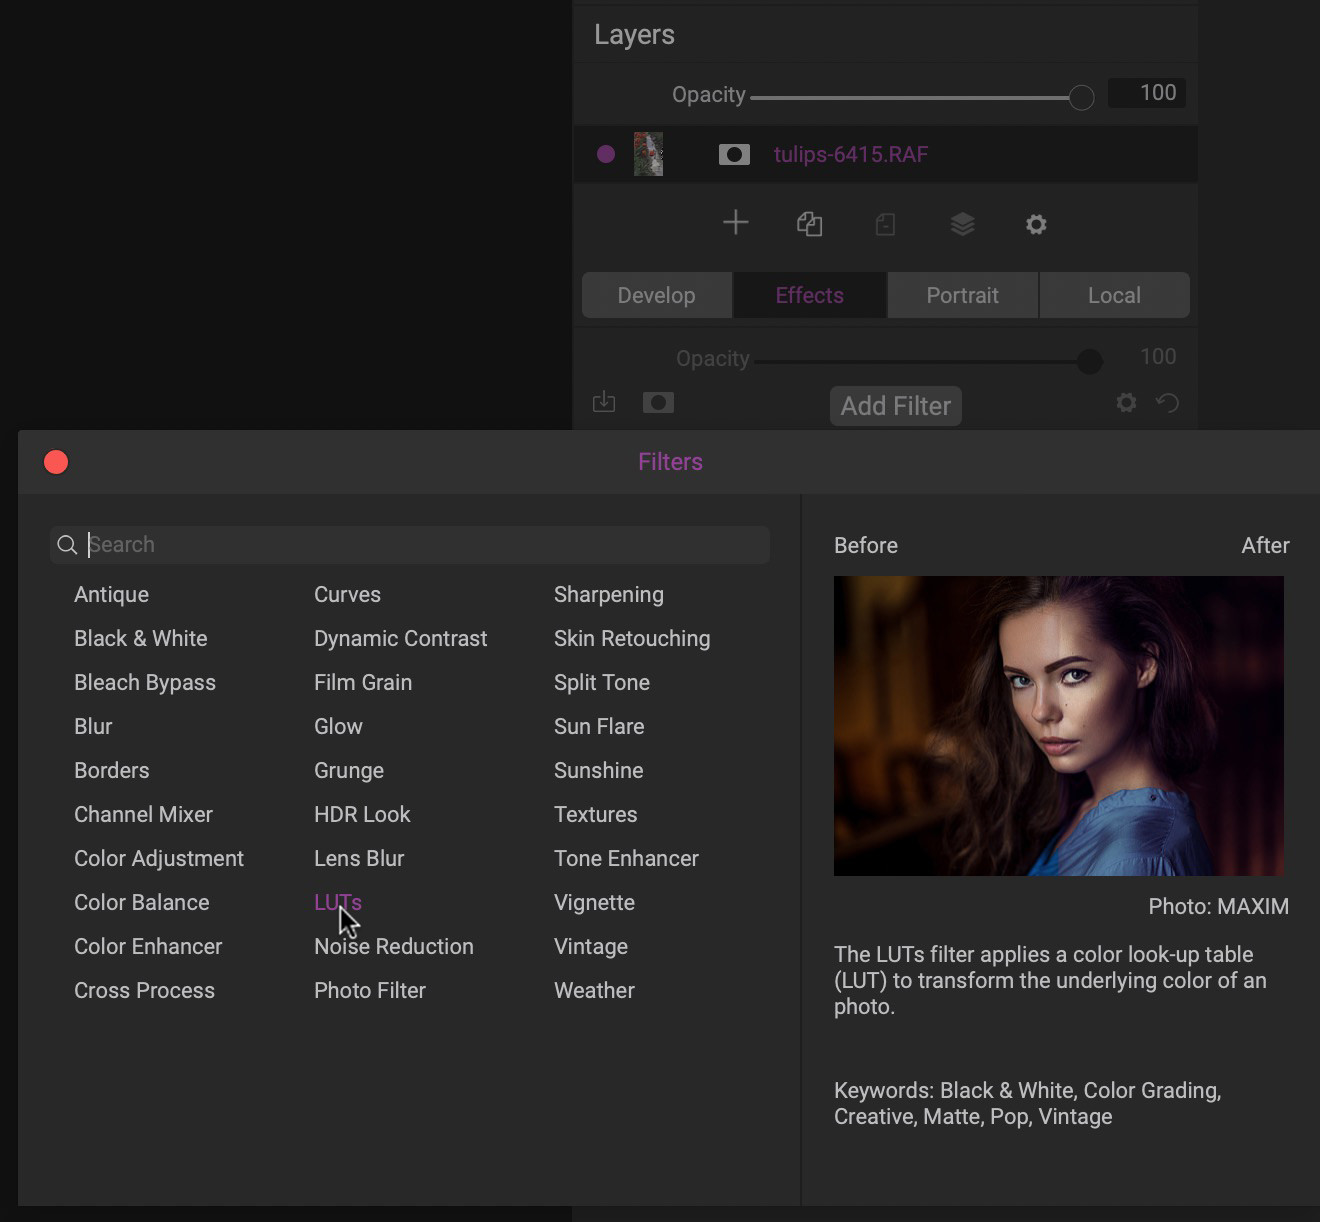
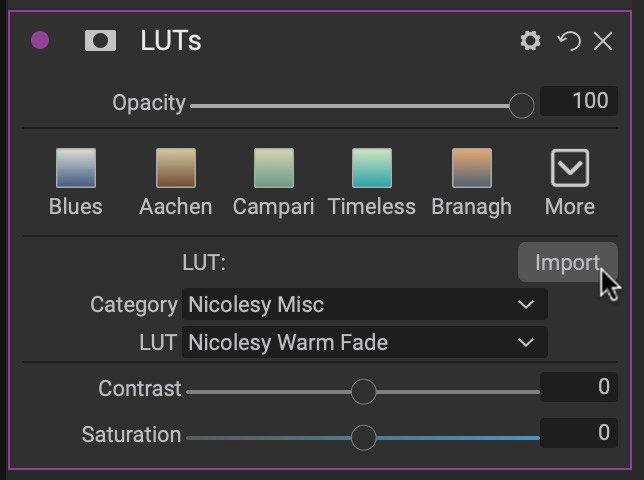
In the LUTs filter, click Import. Then, navigate to your .cube file and follow the on-screen instructions to add this filter to an existing category (or create a new one). You can now use the LUTs filter to access your newly-added LUT file.
 Luminar
Installing Luminar Neo preset packs (.lnpc files)
Installing preset packs (.lnpc files) into Luminar Neo.
Click to expand each step for more information.
Download and unzip your new files (as needed) using the download link you received when you placed your order.
Next, open Luminar Neo and go to File > Add Luminar Neo Preset Collection.
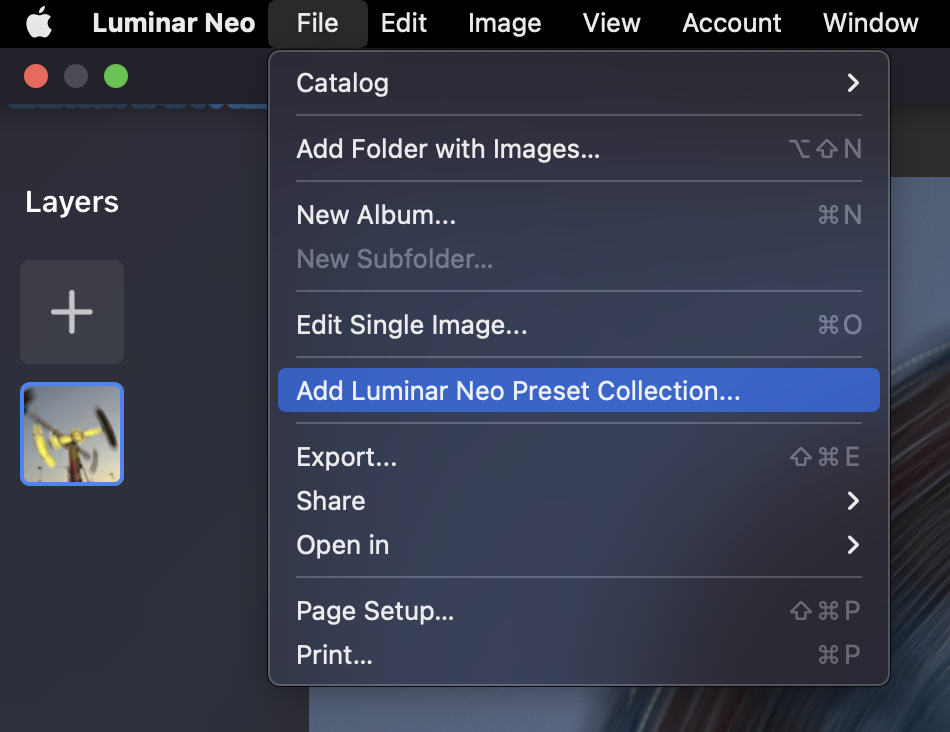
Navigate to the .lnpc file you just downloaded/unzipped. Select this file and click “Open.”

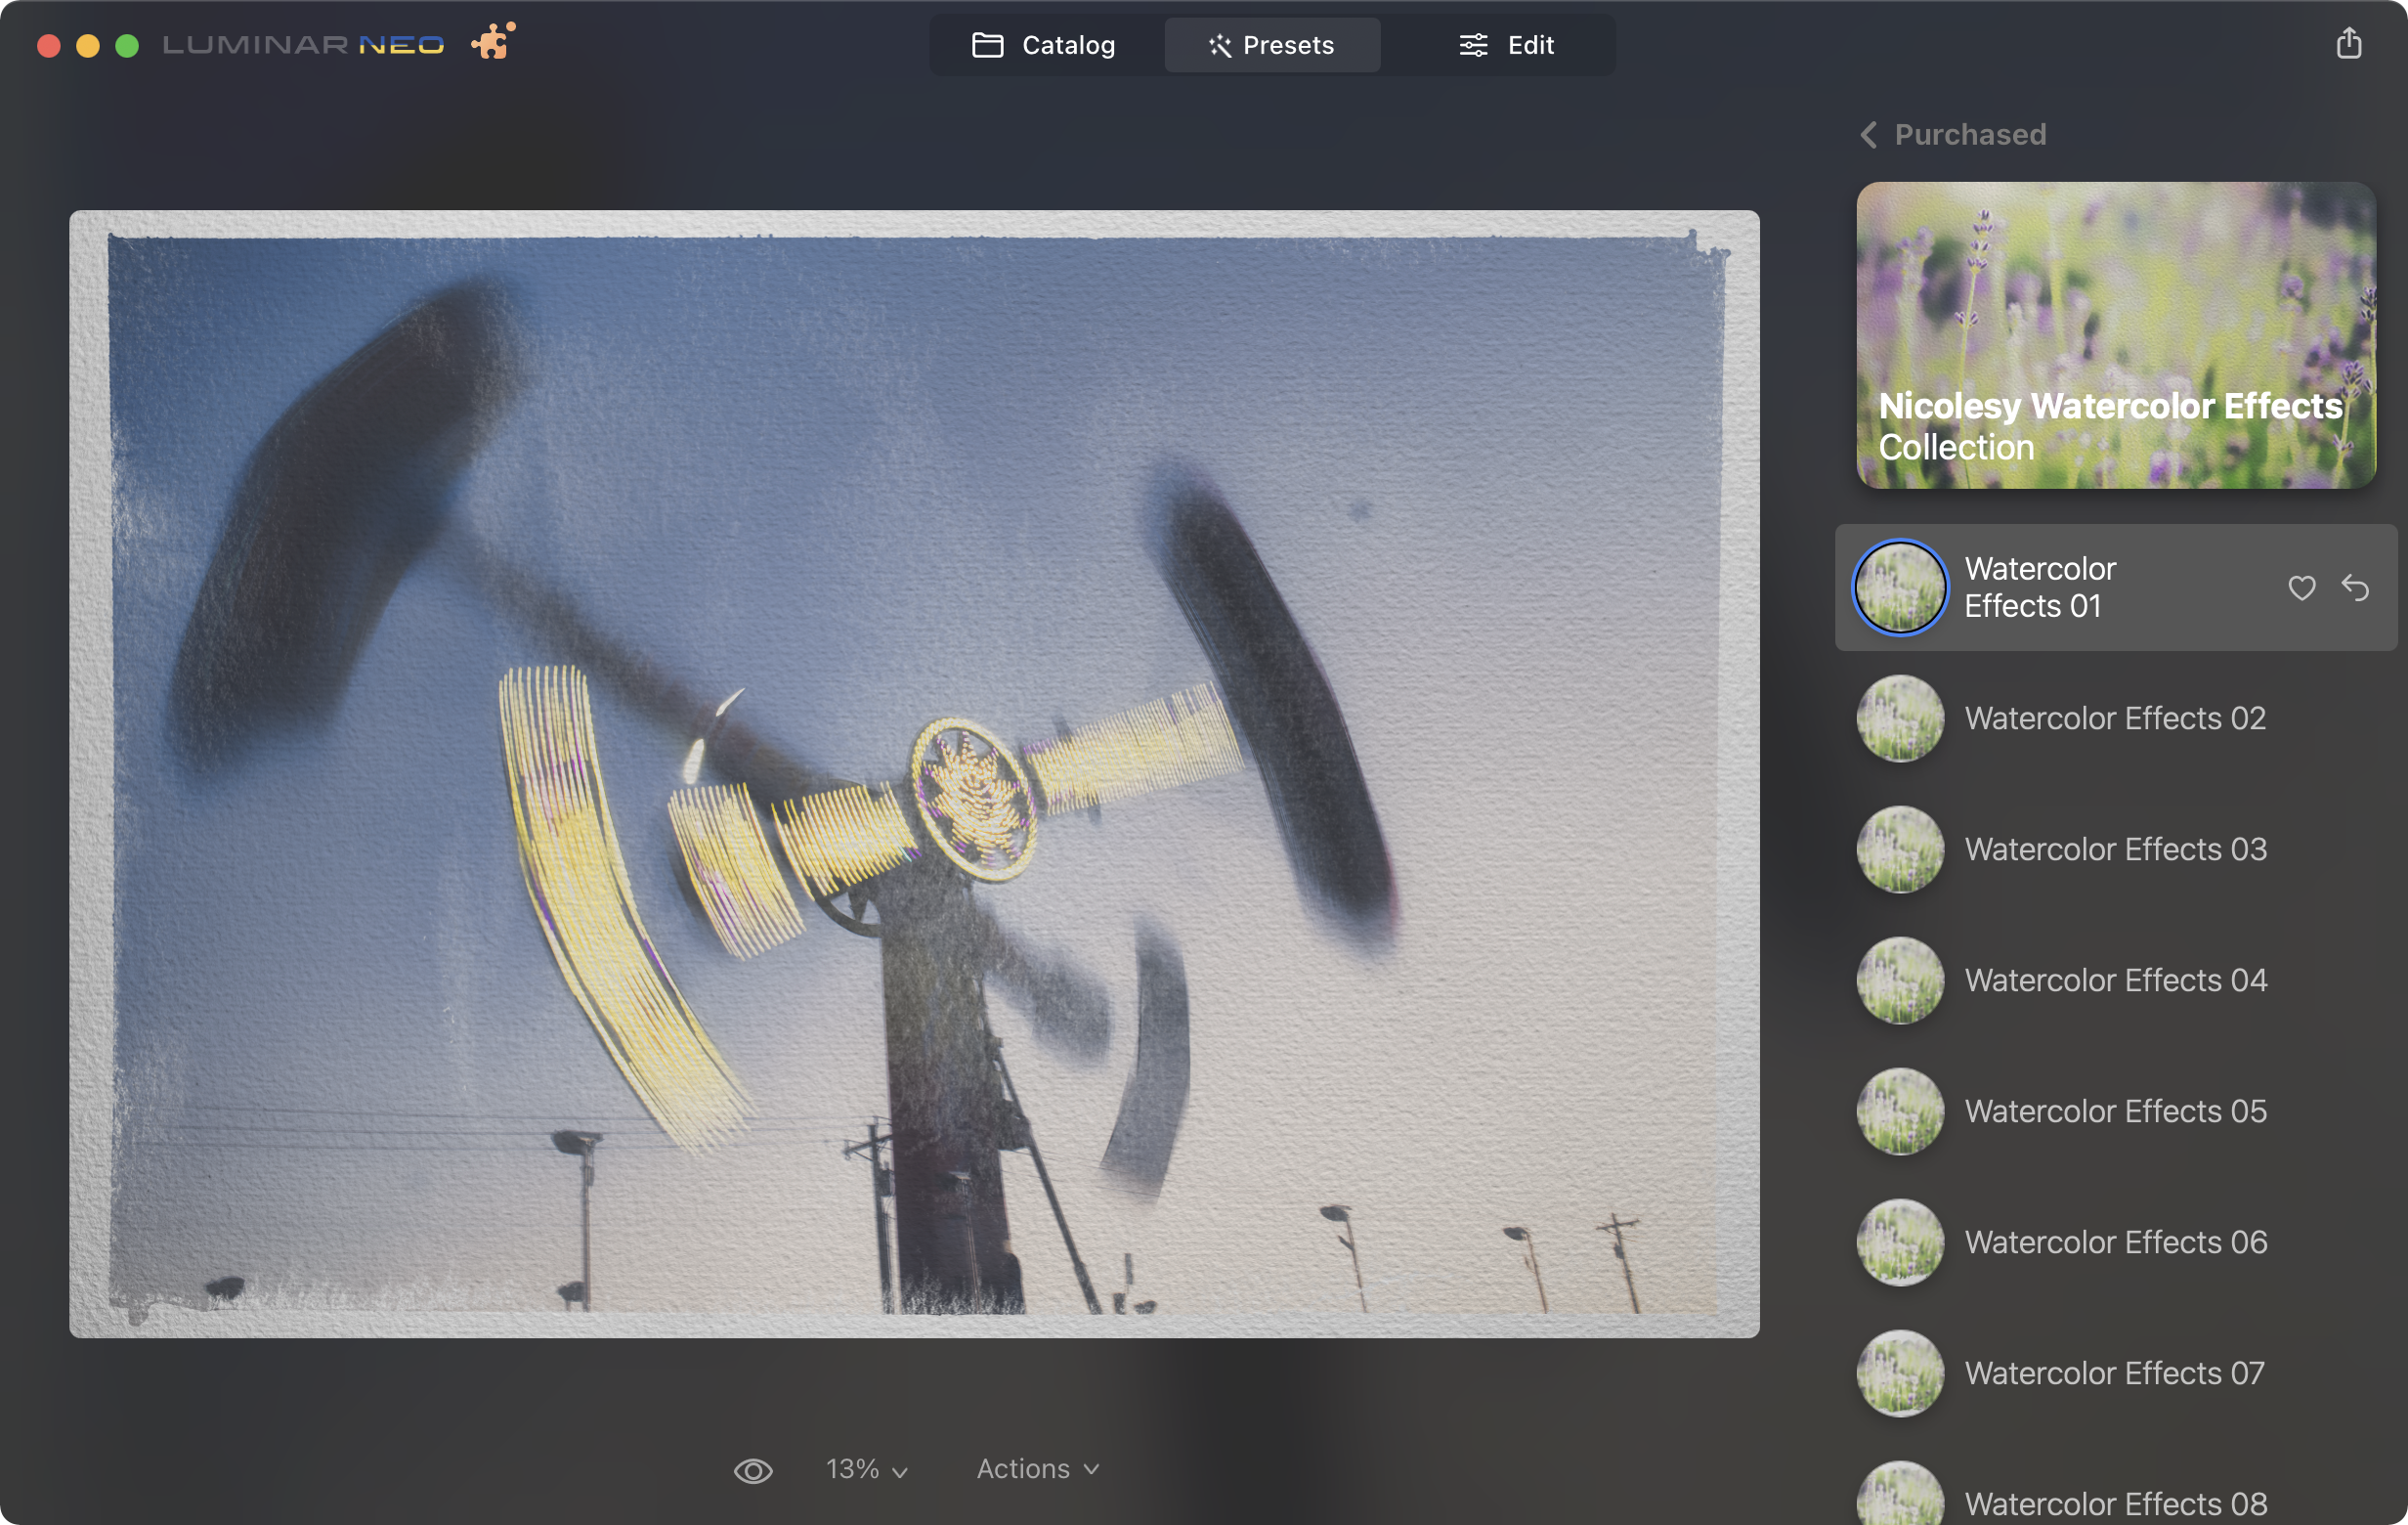
Your newly-added templates can now be accessed using the Presets tab at the top and viewed by going to the Purchased category.
Installing Luminar preset packs (.ltc files)
Installing preset packs (.ltc files) into Luminar AI.
Click to expand each step for more information.
Download and unzip your new files (as needed) using the download link you received when you placed your order.
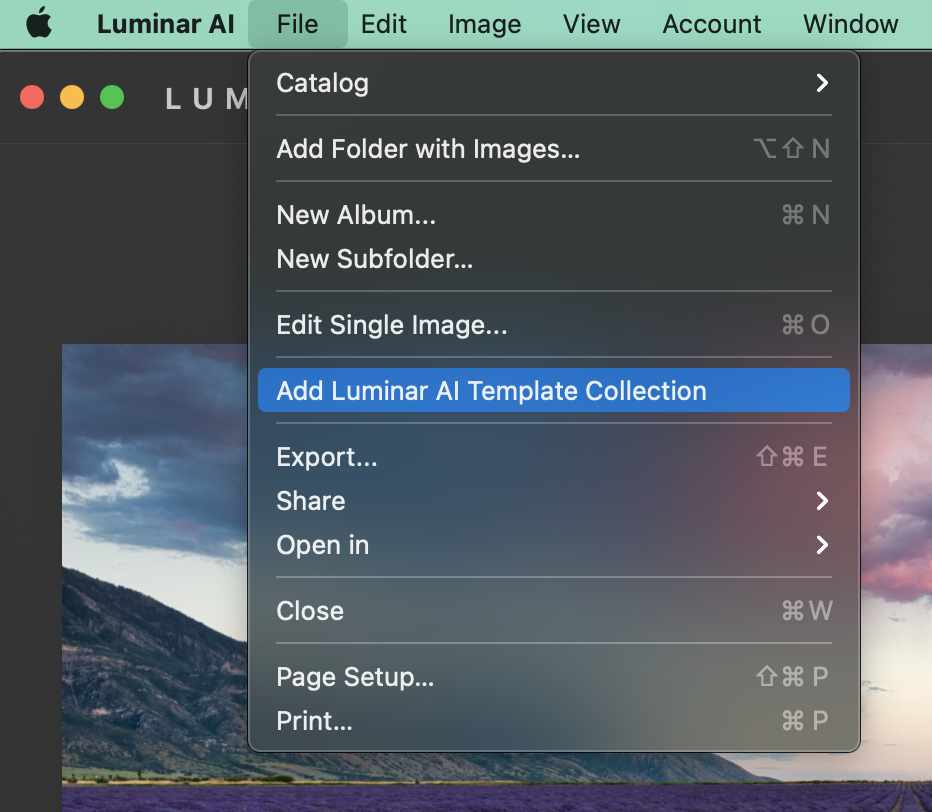
Next, open Luminar AI and go to File > Add Luminar AI Template Collection.
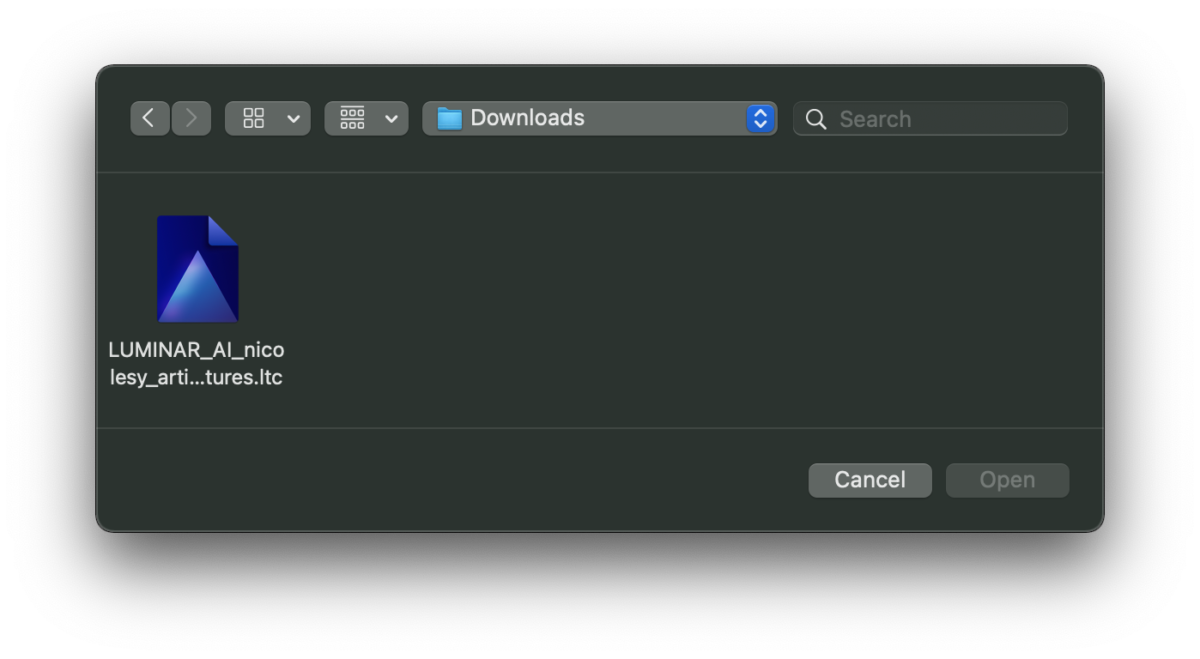
Navigate to the .ltc file you just downloaded/unzipped. Select this file and click “Open”.
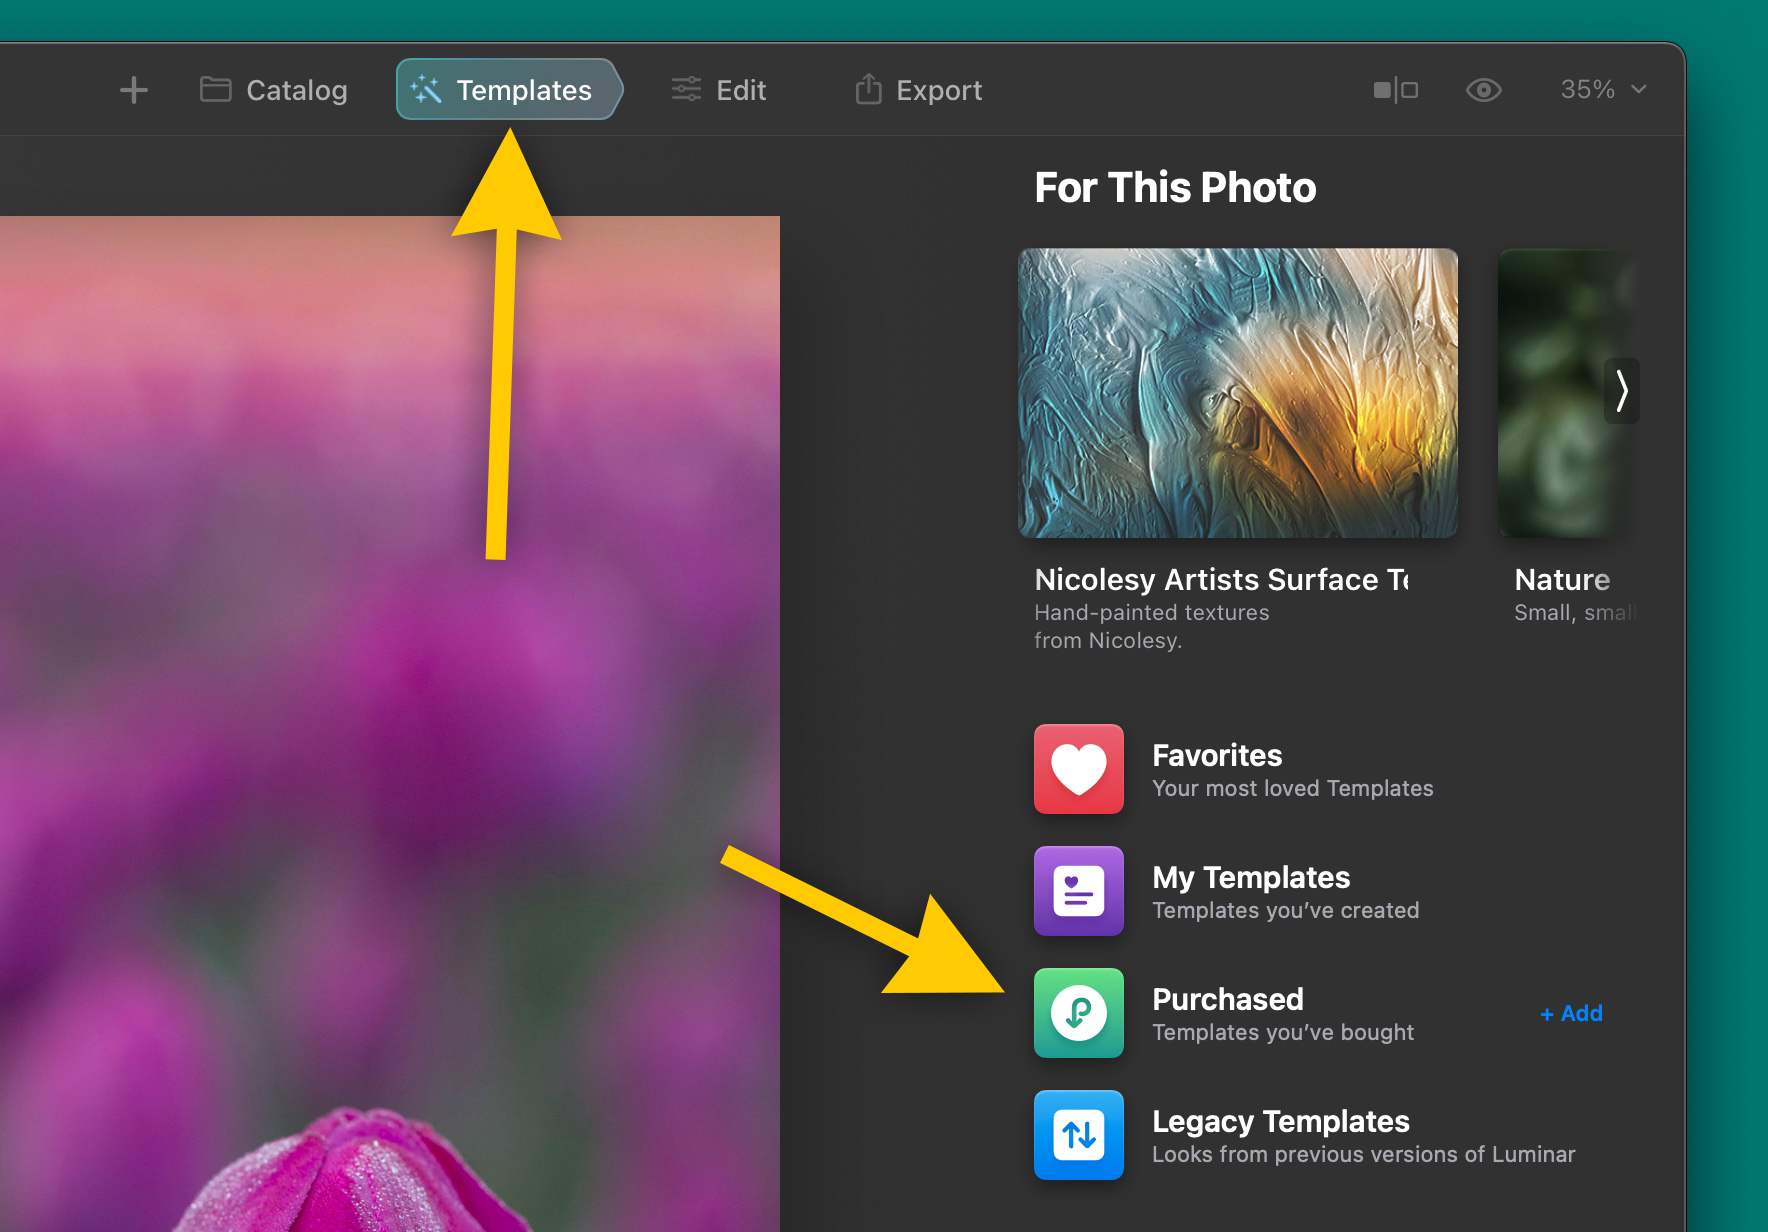
Your newly-added templates can now be accessed using the Templates tab at the top and viewed by going to the Purchased category. Some Nicolesy template packs might also appear in the “For this photo” section (on the top-right corner of the Templates tab view).
Installing sky photos into the Sky AI tool
Learn how to upload your own skies into the Sky AI tool in Luminar AI.
Click to expand each step for more information.
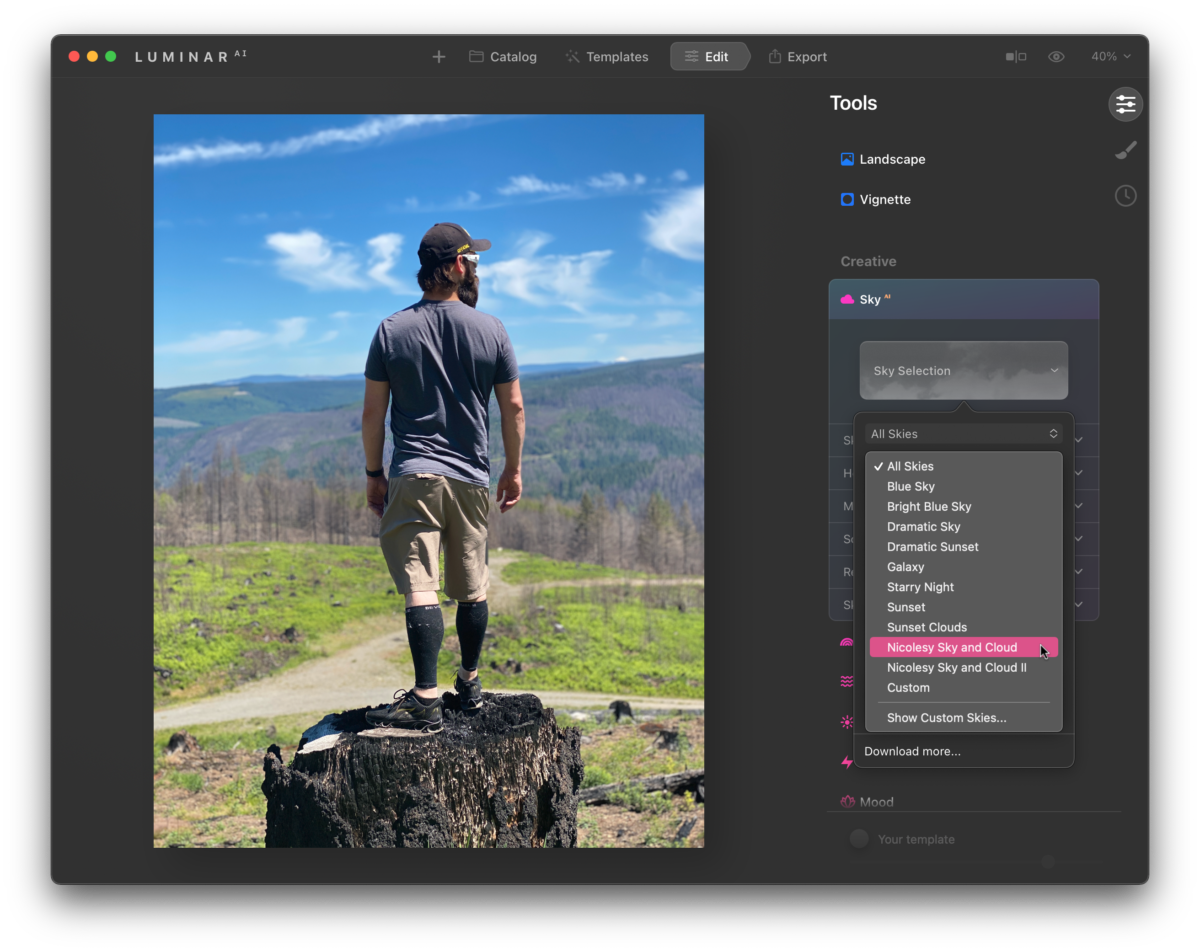
Open Luminar AI and click the Edit tab at the top. Then, expand the Sky AI tool within the Creative section.
Note: You will need to have a photo open that allows this tool to work so that you can access the settings, such as a landscape photo with an obvious sky.
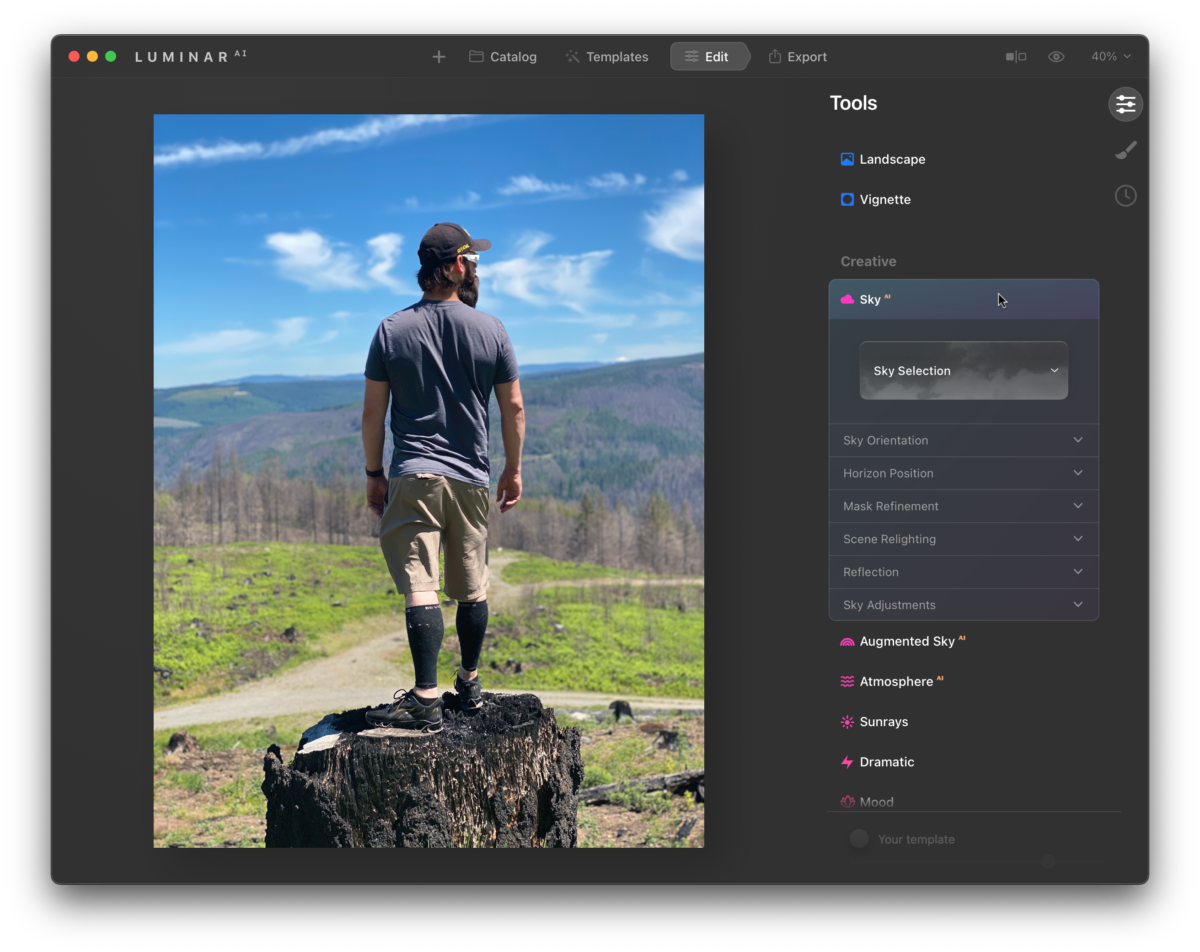
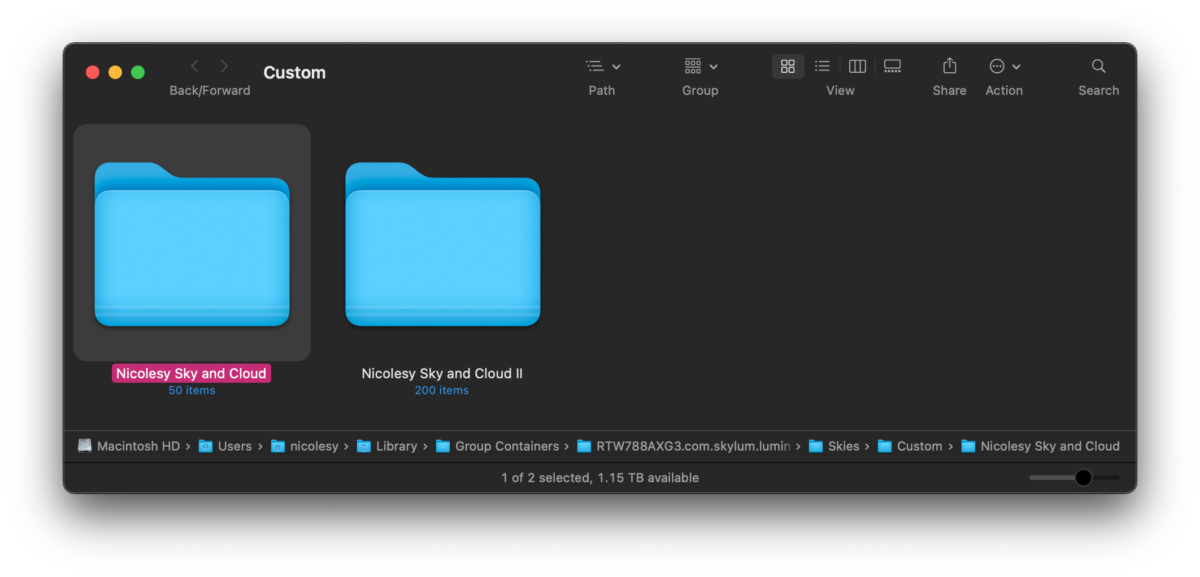
In the Sky AI tool, click the Sky Selection dropdown, and then click the drop-down within this pop-up window. Then, choose “Show Custom Skies” and a folder will open up on your desktop.

Now, access the folder that appeared on your desktop from the previous step (this is where you will add your custom sky files). In a second folder, navigate to the sky files you wish to add to the Sky AI tool and copy/paste them into this folder.
If you would like to keep your sky images organized, you can also add sub-folders, which will categorize them within the tool.
Note: Skylum Software recommends limiting your own custom skies to 50. You can add more than that, but if you start to see performance issues with the software, I recommend removing some skies to see if that helps.
Now, open the drop-down to reveal the skies and locate your newly-added files. If you added a sub-folder, you will see it within the category names. Otherwise, your files will be in the “Custom” category.

Installing your own textures into the Textures tool
Learn how to upload your own textures and overlays into the Textures tool in Luminar AI.
Click to expand each step for more information.
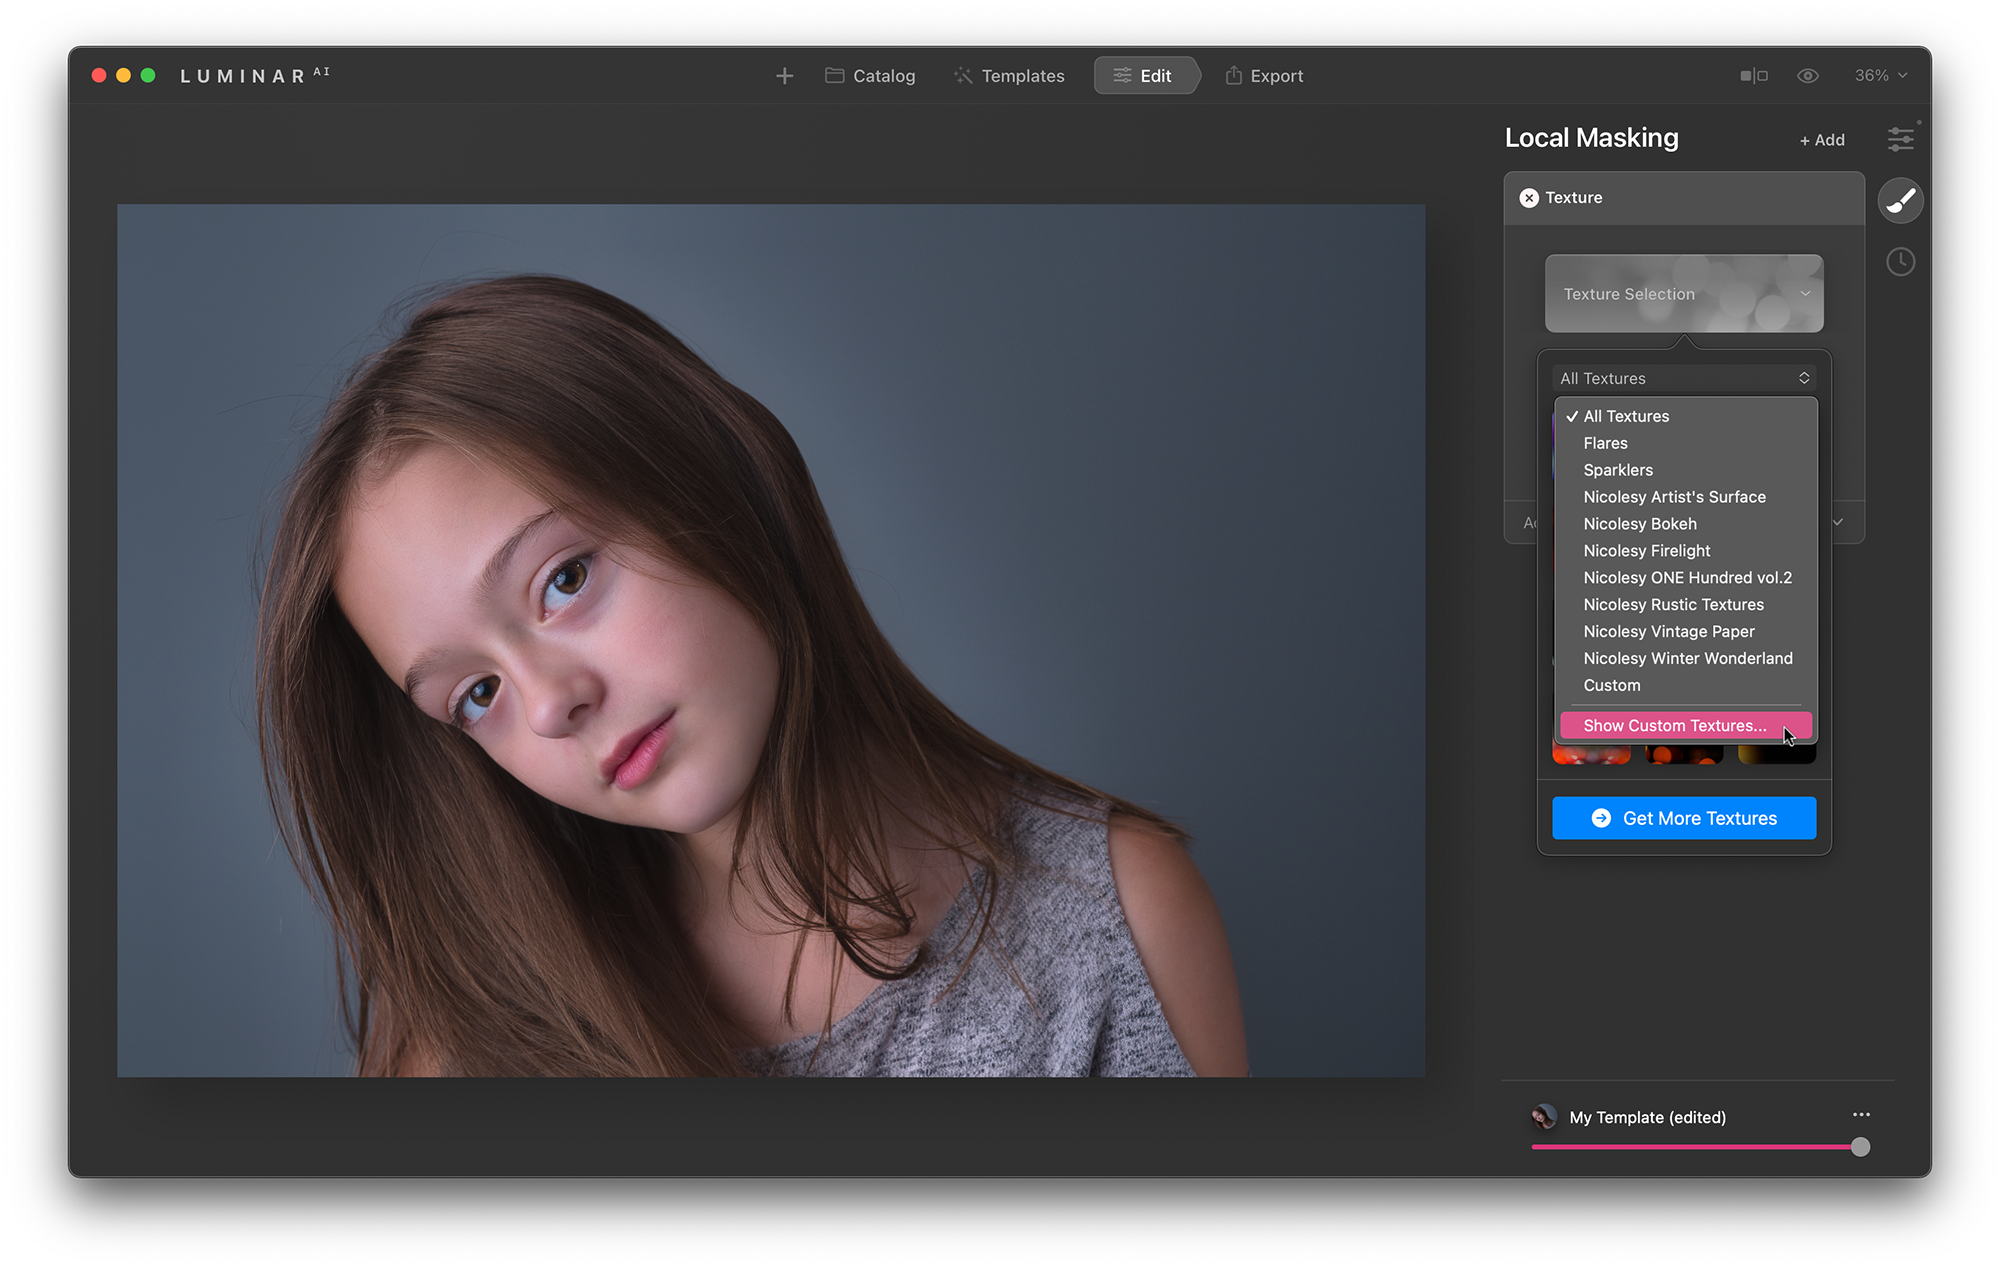
Open Luminar AI and click the Edit tab at the top. Then, access the Local Masking section on the right.
Then, click the Add button at the top and select Texture. This adds an empty Texture tool to your image.

First, click the Texture Selection drop-down. Then, click the second drop-down and select Show Custom Textures.
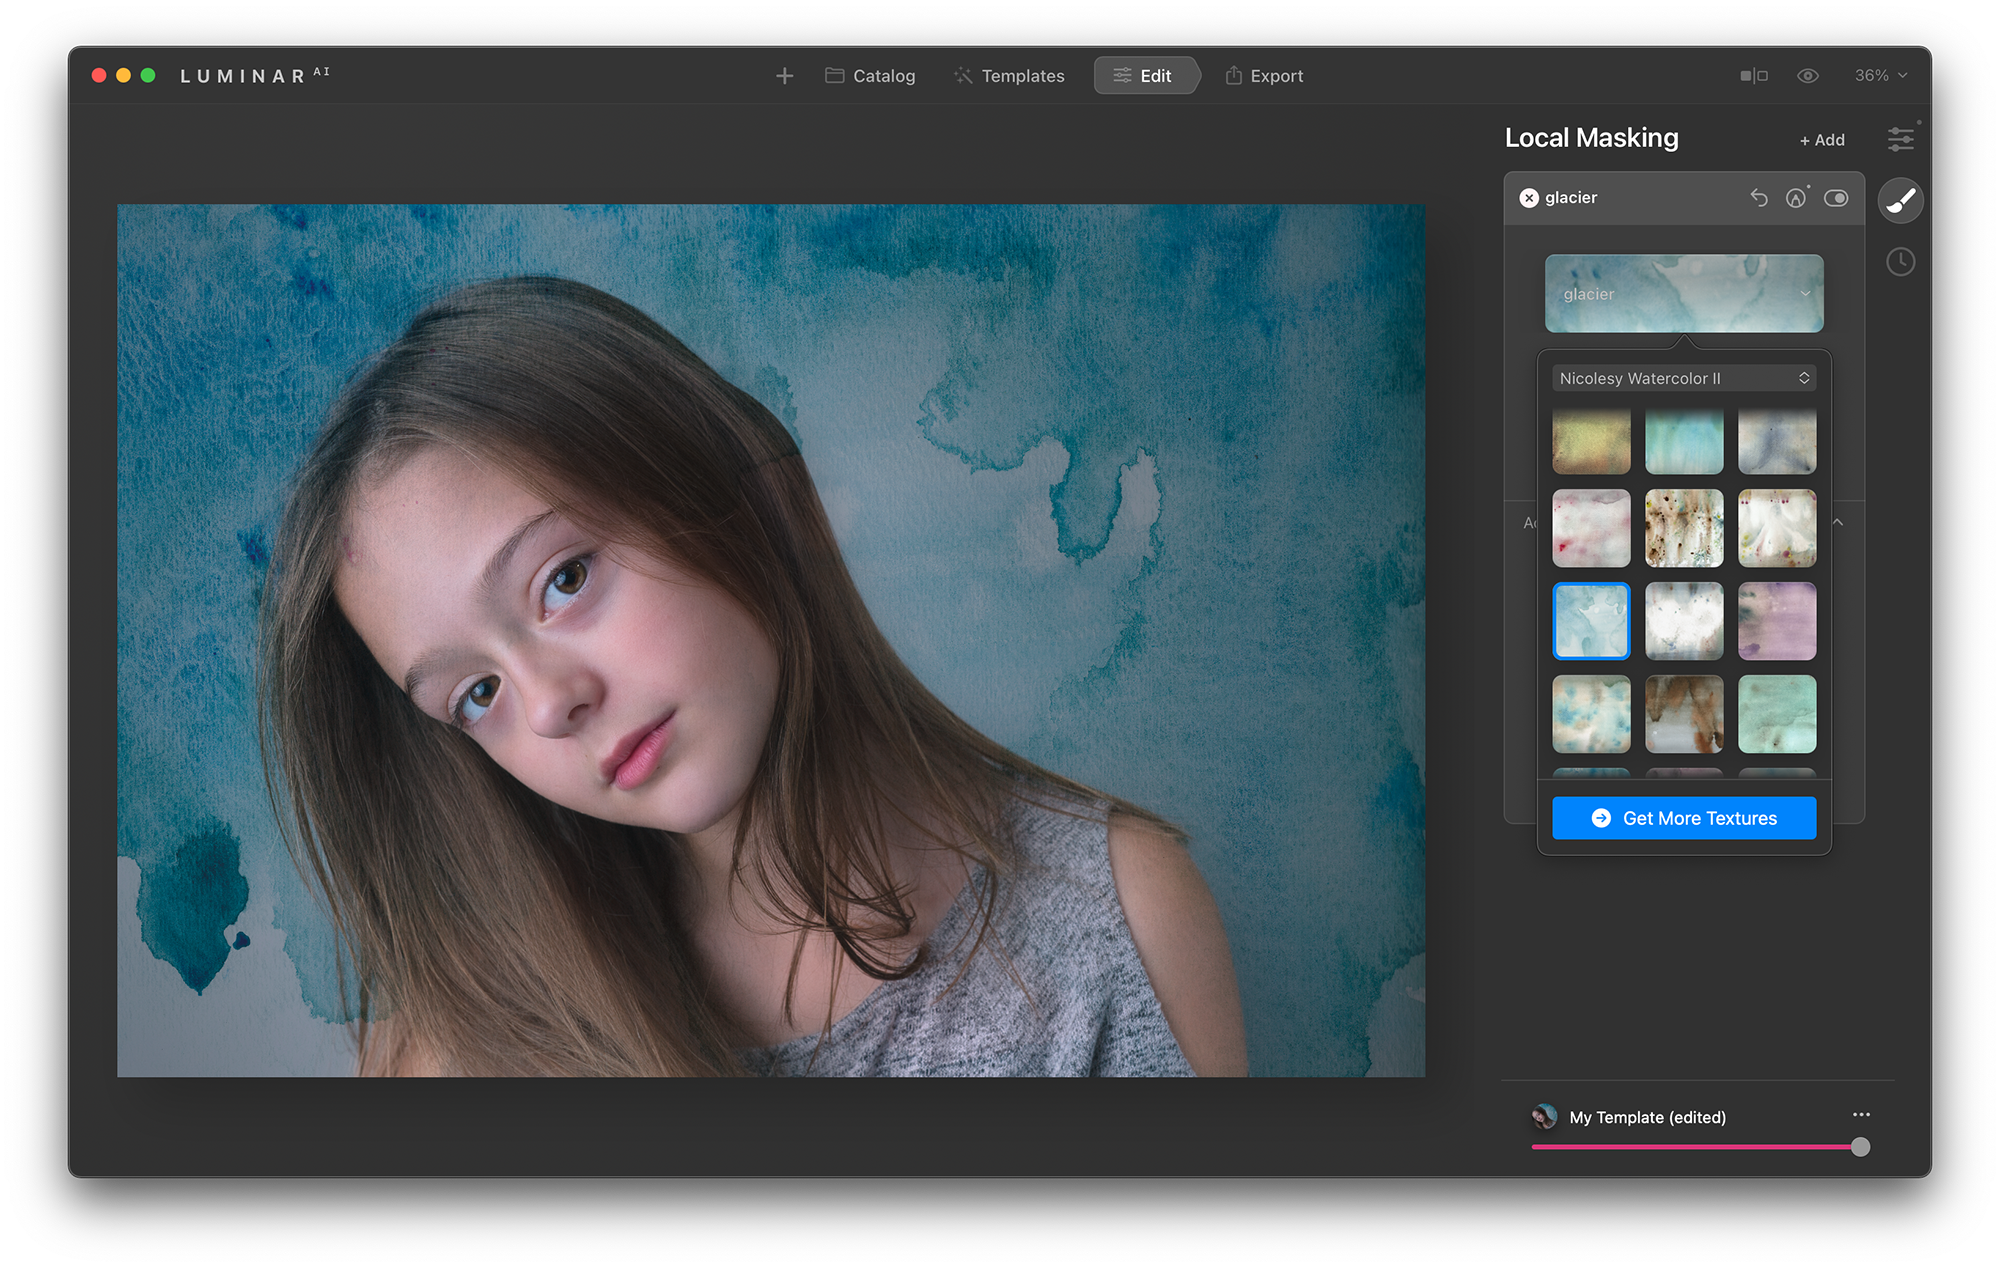
A folder opens up on your computer, which is where all of your custom textures will be placed. Copy and paste your textures into this folder and they will appear inside of the Luminar Texture drop-down. Then, apply them and stylize your photo as you like!
Tip: Add subfolders to keep your textures organized!

 Luminar 2018/3/4
Installing Luminar preset packs (.mplumpack files)
Installing preset packs (.mplumpack files) into Luminar 3 and Luminar 4.
Click to expand each step for more information.
Download and unzip your new files (as needed) using the download link you received when you placed your order.
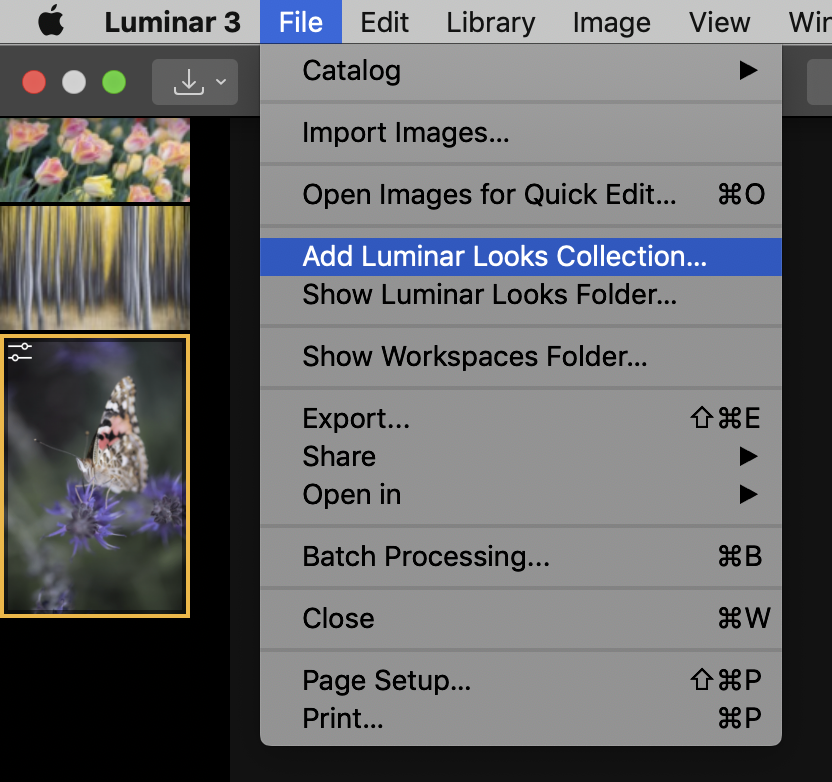
Next, open Luminar 3 and go to File > Add Luminar Looks Collection.
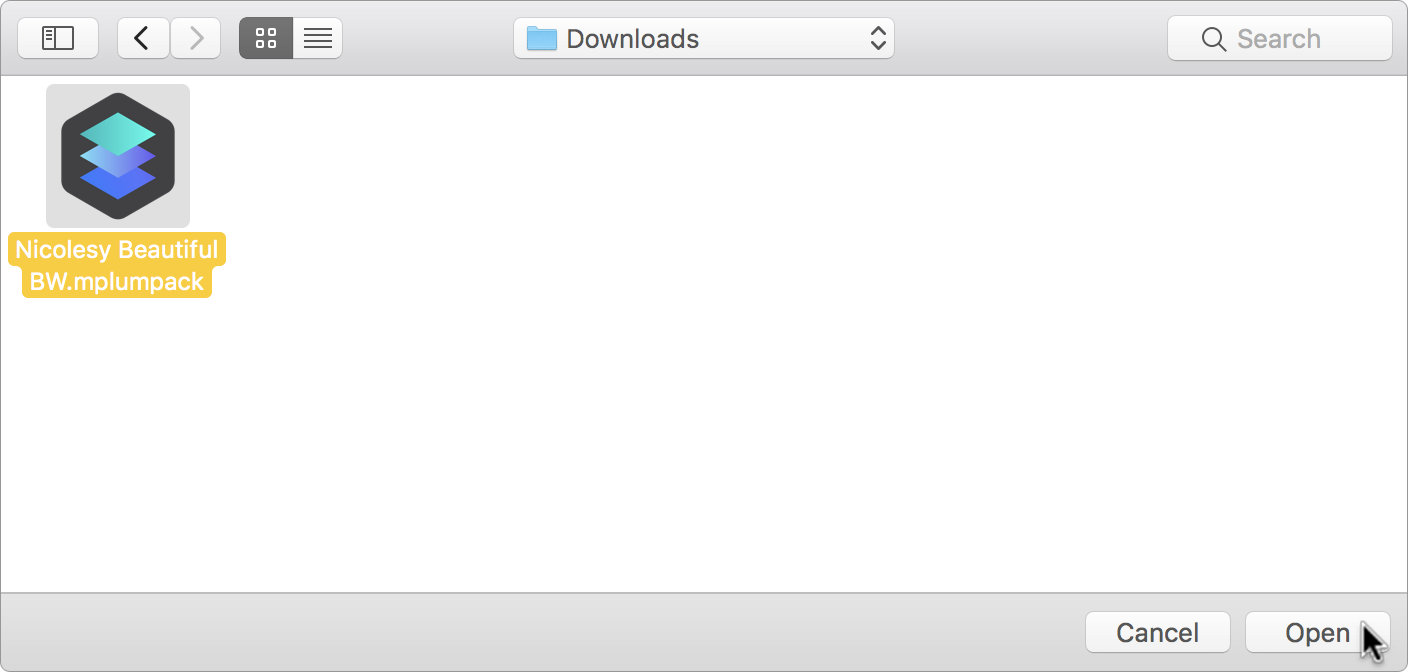
Navigate to the .mplumpack file you just downloaded/unzipped. Select this file and click “Open”.
Your newly-added presets can now be accessed using the Presets panel at the bottom of the application window.
Installing preset packs (.mplumpack files) into Luminar 2018.
Click to expand each step for more information.
Download and unzip your new files (as needed) using the download link you received when you placed your order.
Next, open Luminar and go to File > Add Custom Presets Pack.

Navigate to the .mplumpack file you just downloaded/unzipped. Select this file and click “Open”.
Your newly-added presets can now be accessed using the Presets panel at the bottom of the application window.
Applying individual LUT files in Luminar 4 (.cube files)
These steps show you how to add individual LUT (.cube) files to a photo using the “Color Styles (LUT)” tool in Luminar 4.
Click to expand each step for more information.
Open a photo into Luminar 4.
In the Edit view on the right, access the Creative category.
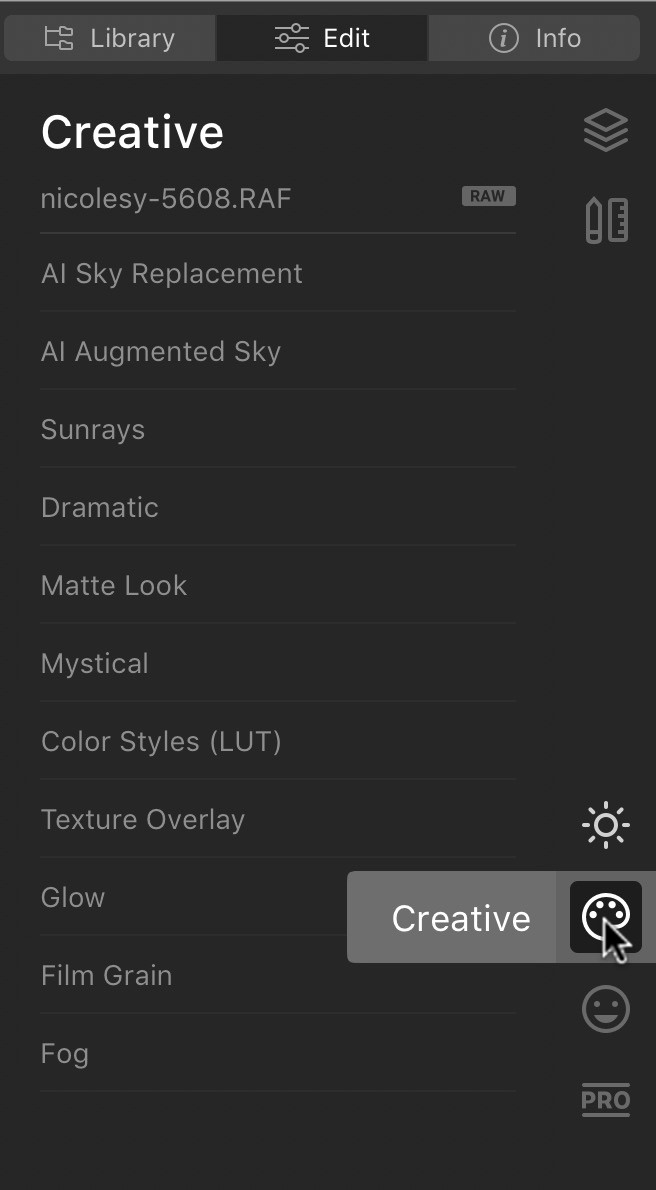
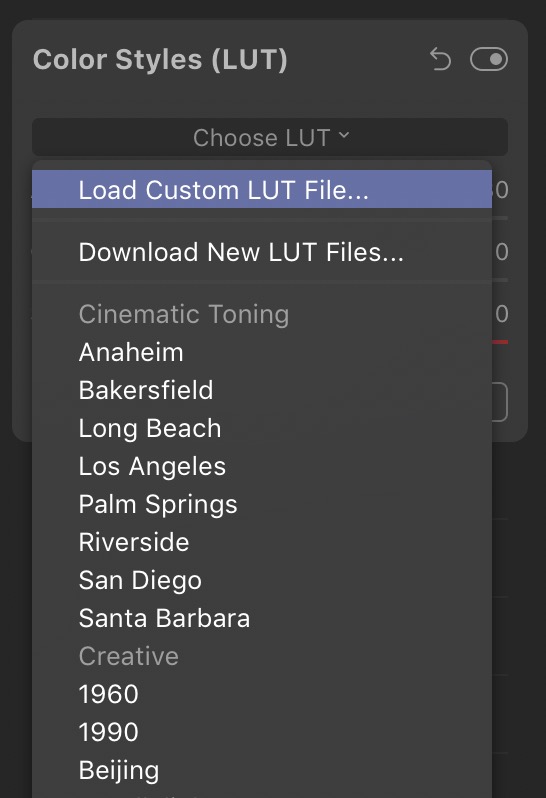
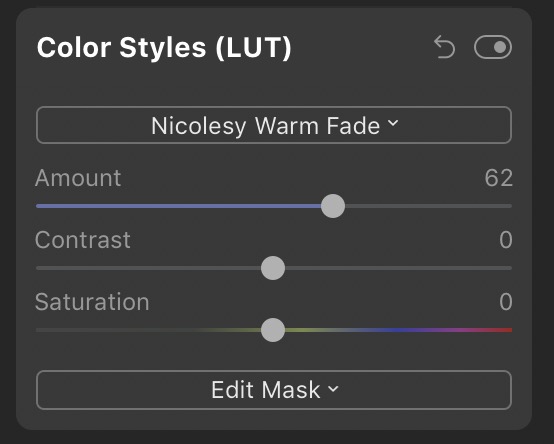
Open the Color Styles (LUT) tool.
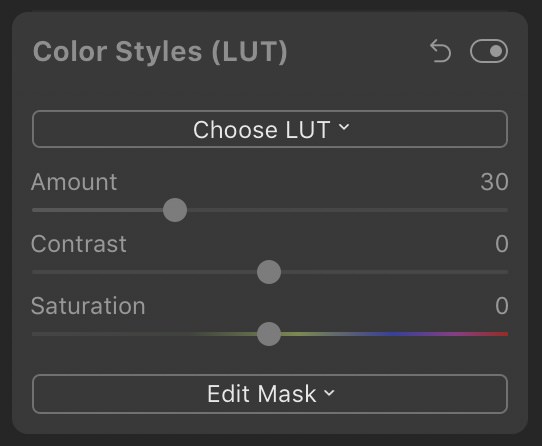
In this tool, click on the Choose LUT drop-down. You can either select a LUT file that is in the drop-down list, or you can select Load Custom LUT File to access a file on your computer.
Applying individual LUT files in Luminar 2018 and Luminar 3 (.cube files)
These steps show you how to add individual LUT (.cube) files to a photo using the “LUT Mapping” filter in Luminar 2018 and Luminar 3.
Click to expand each step for more information.
Open a photo into either Luminar 2018 or Luminar 3.
In the Filters panel on the right, click on Add Filter.
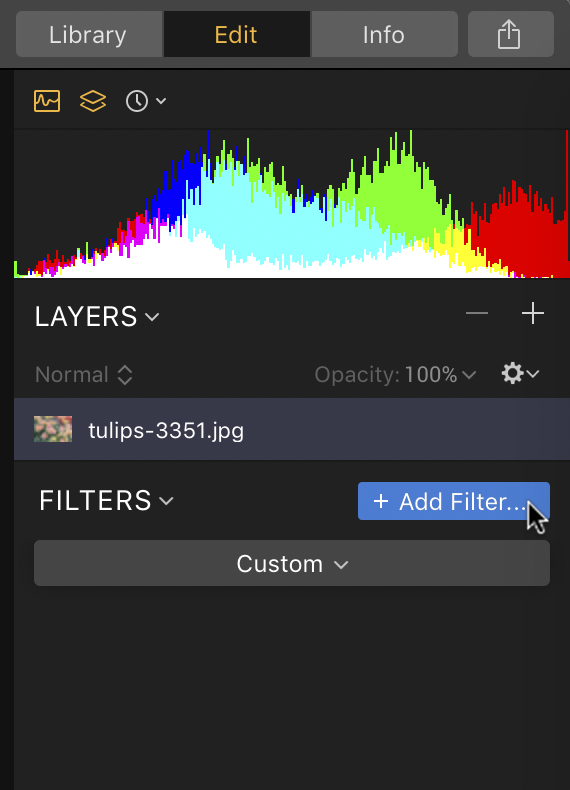
In the Filters Catalog, scroll down until you get to the “Professional” category. Click once on the LUT Mapping filter and it will be added to your Filters panel on the right.
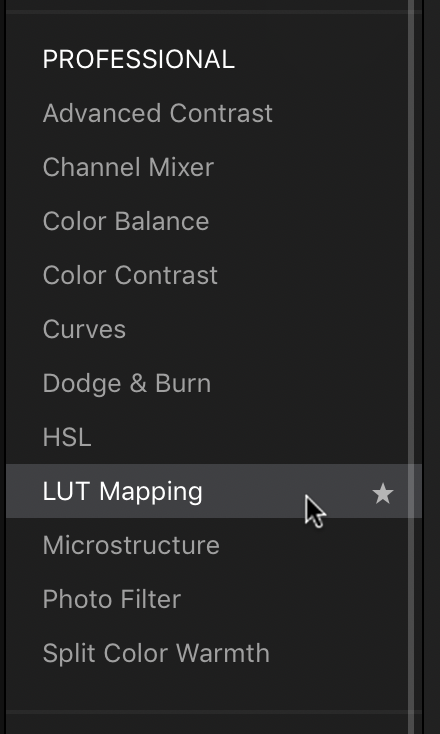
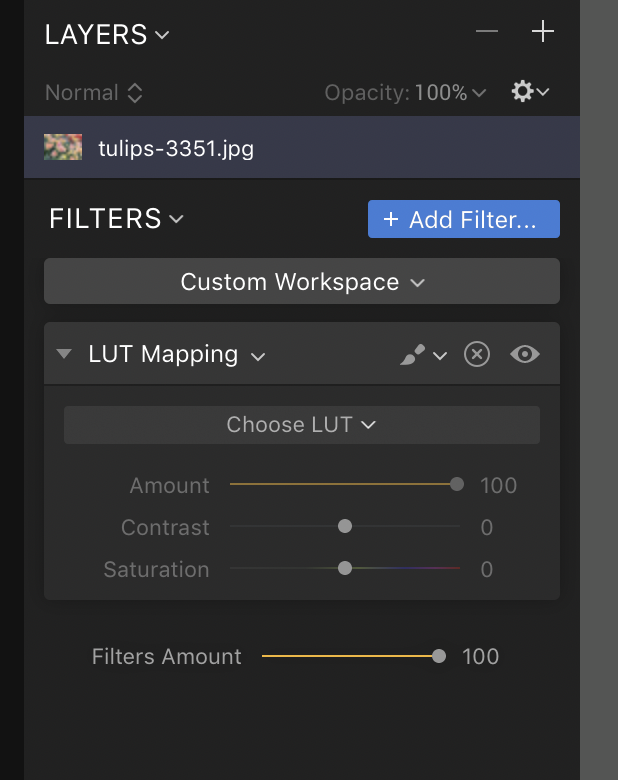
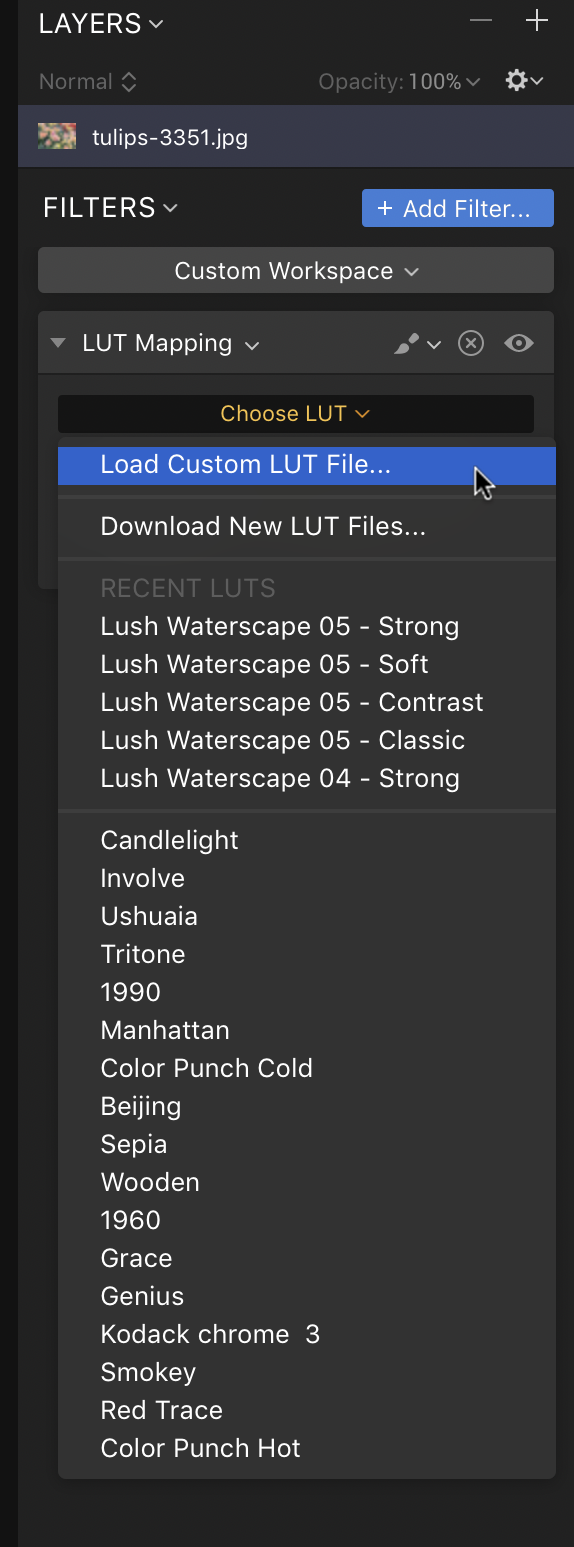
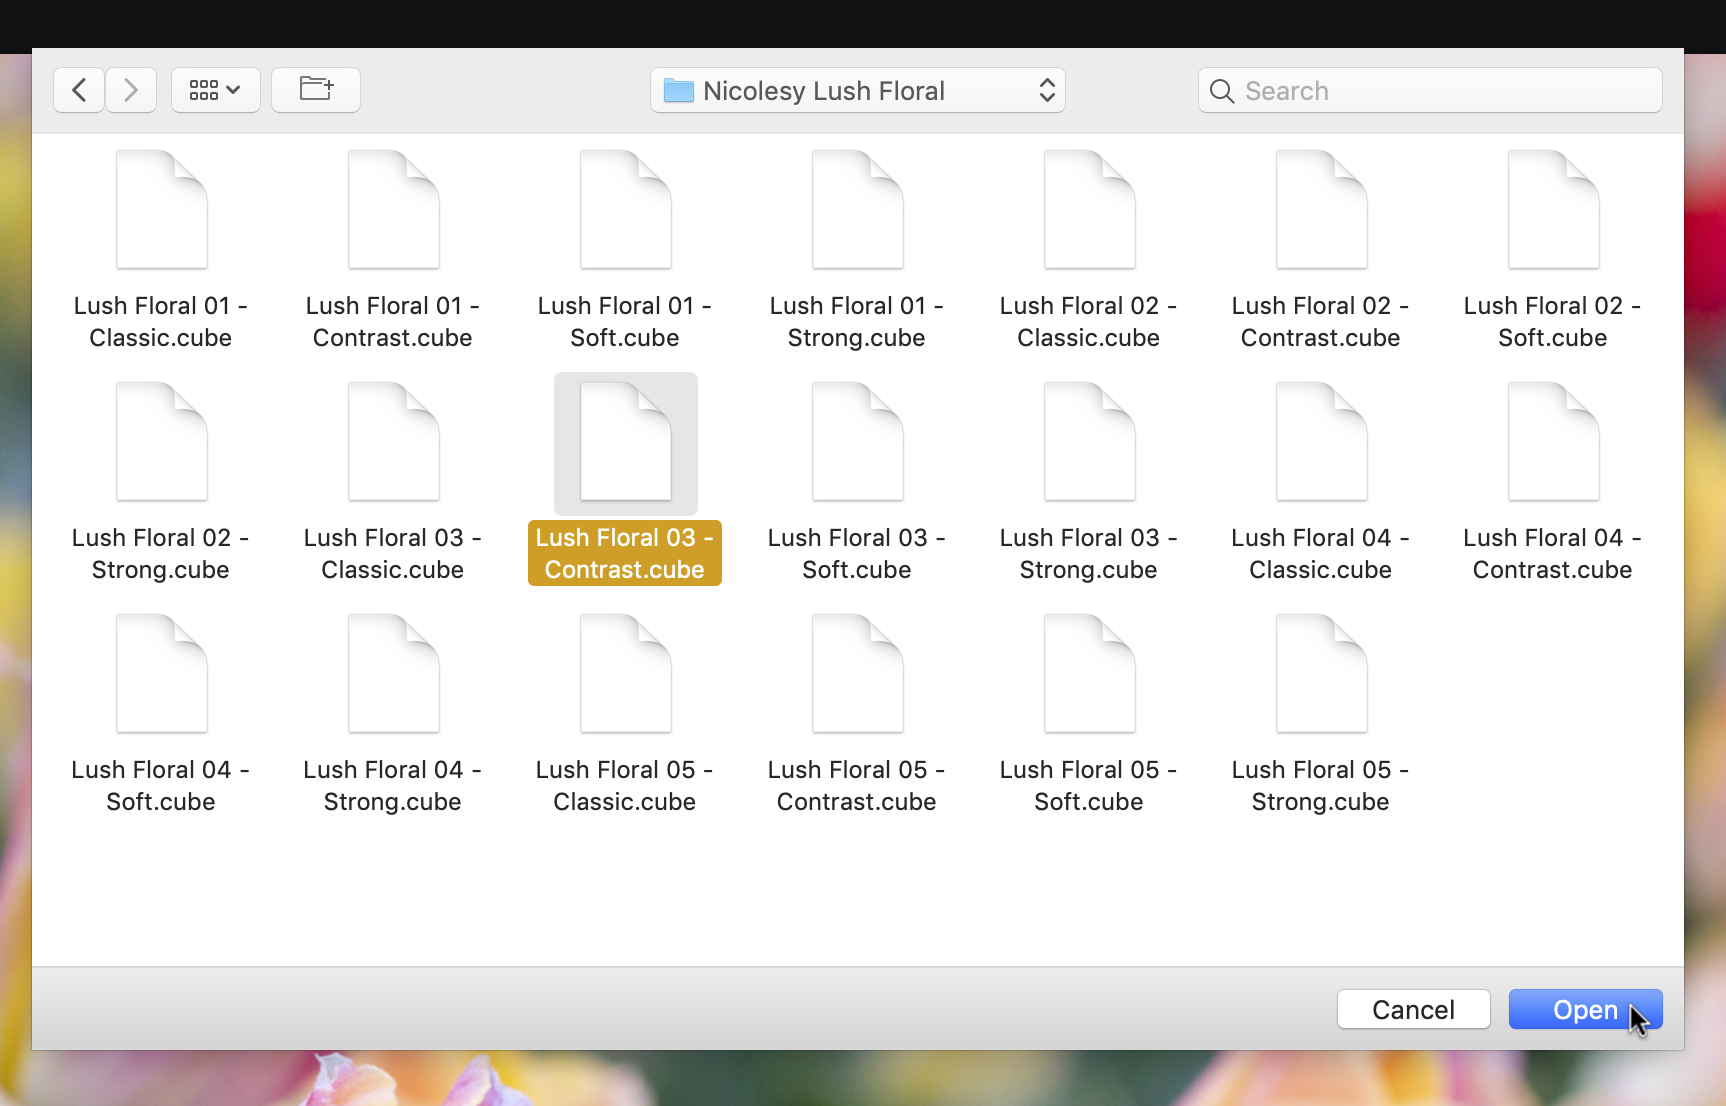
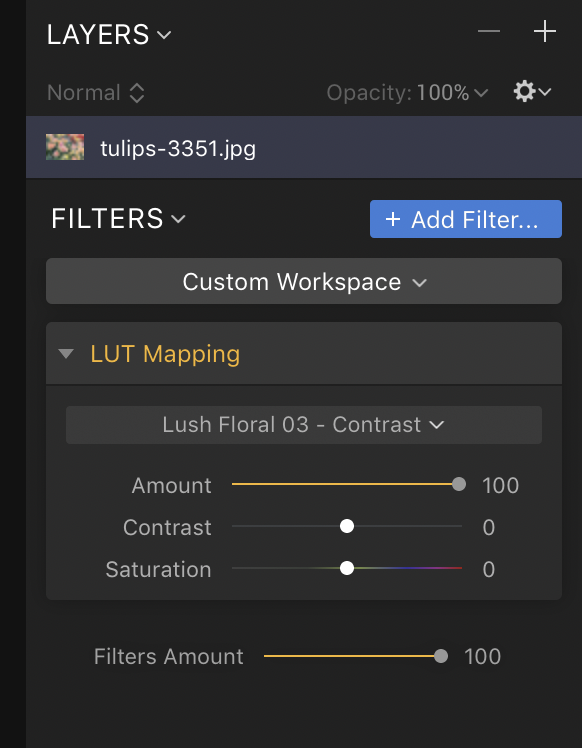
In this newly-added filter, click on the Choose LUT drop-down. You can either select a LUT file that is in the drop-down list, or you can select Load Custom LUT File to access one you have on your computer.
This video shows you how to add individual LUT (.cube) files to a photo using the “LUT Mapping” filter in Luminar 2018 and Luminar 3.
Aurora HDR
Installing Aurora HDR 2019 preset packs (.maupack files)
Installing preset packs (.maupack files) into Aurora HDR 2019.
Download and unzip your new files (as needed) using the download link you received when you placed your order.
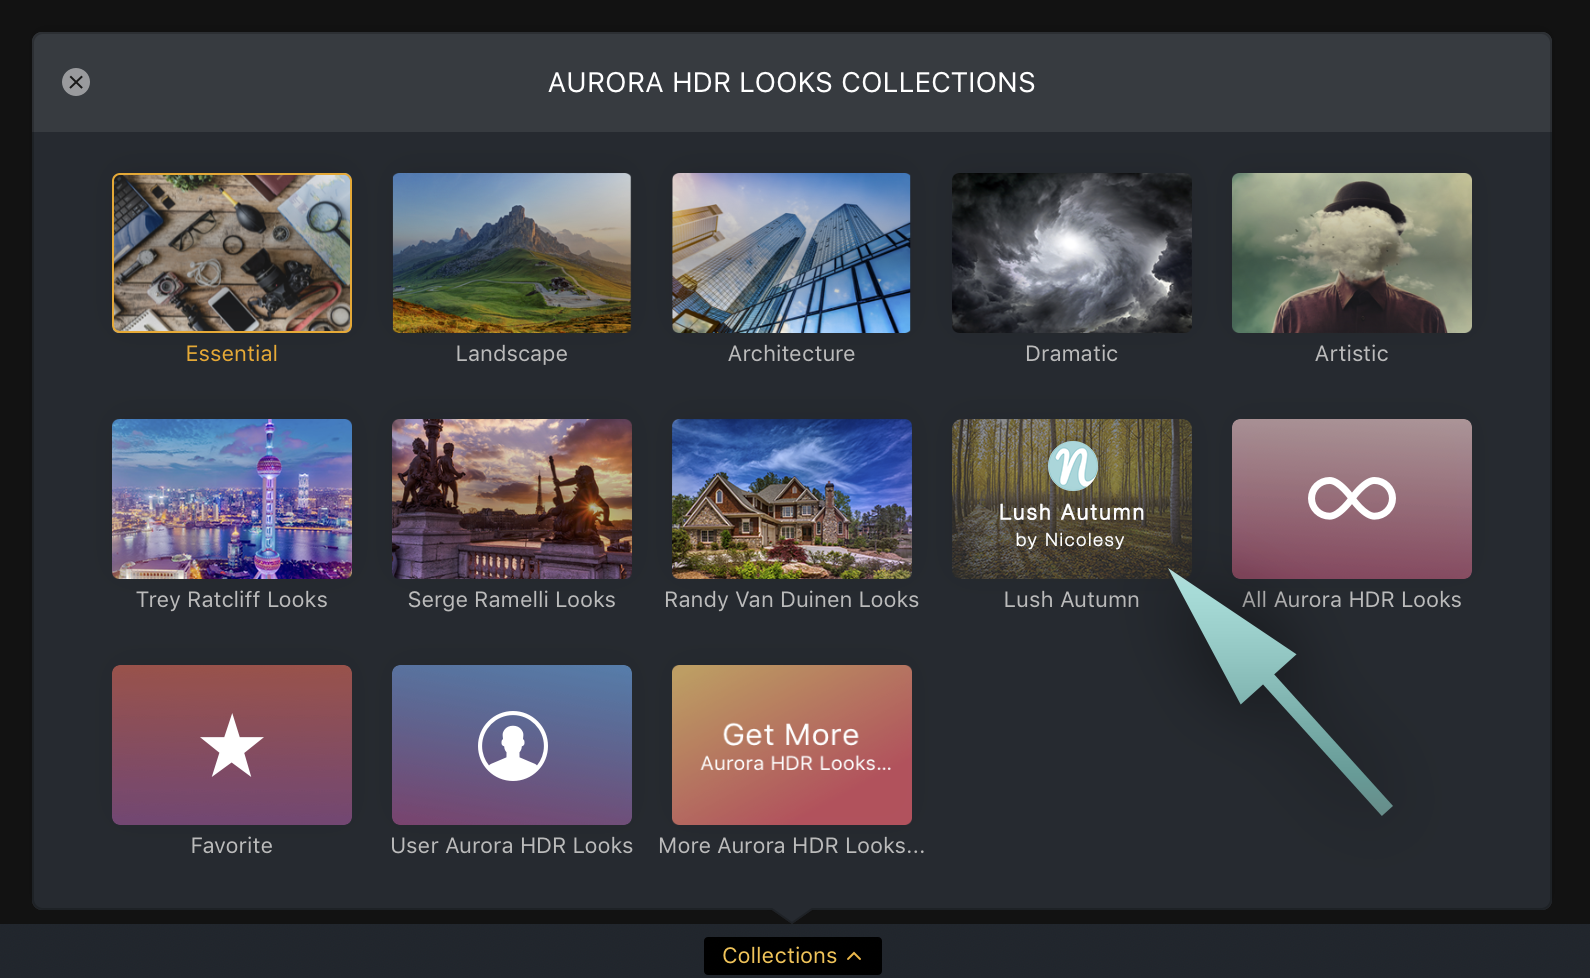
Next, open Aurora HDR 2019 and go to File > Import Aurora HDR Looks Pack.
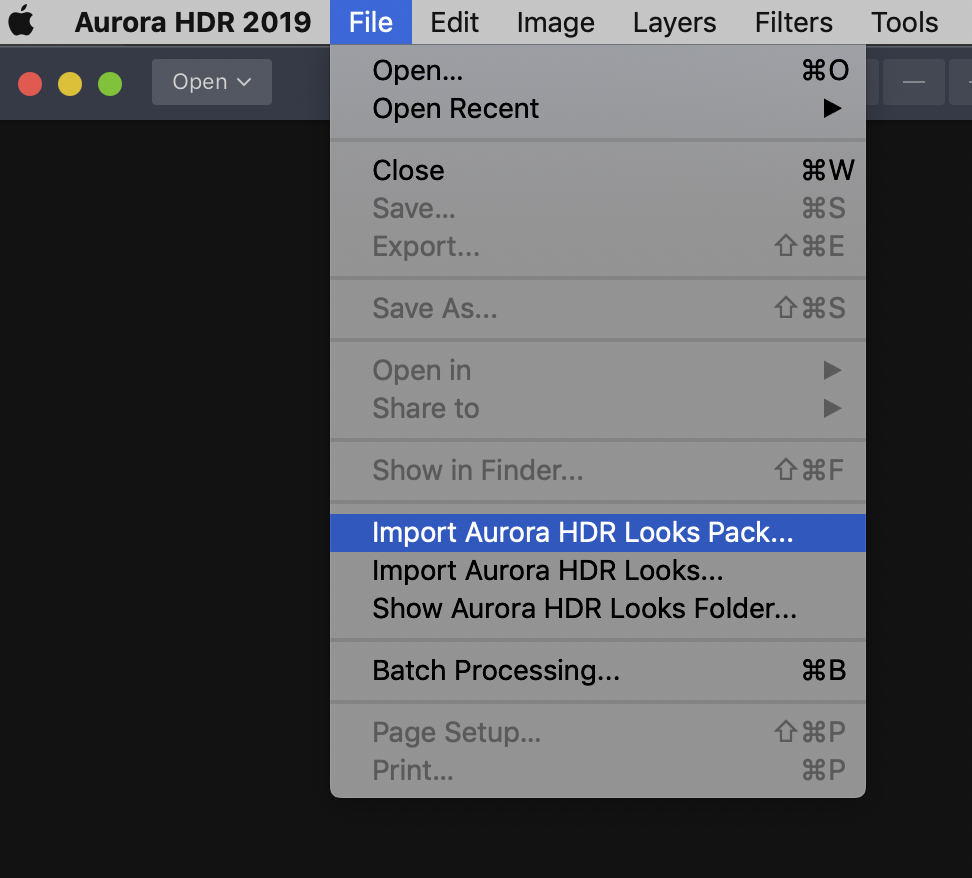
Navigate to the .maupack file you just downloaded/unzipped. Select this file and click “Open”.

Your newly-added presets can now be accessed using the Looks (Categories) panel at the bottom of the application window. (Newly-added preset packs will be added to the end of the list.)