Layers & Masks
You’re THIS CLOSE to finally understanding Photoshop
Have you always wanted to UNDERSTAND Photoshop, but didn’t know where to begin?
I can remember when I was first learning how to edit my digital photos, and layers and masks were a mystery to me. I knew that once I understood those foundations, so much more would be possible when it comes to creating the photos I could see in my head.
And I was right!
After I finally started to understand how to use layers and work non-destructively, my photography edits improved ten-fold. I no longer had to struggle through Photoshop, guessing every step along the way.
Now I can create with purpose
Layers and masks in Photoshop are two of the biggest essential features that must be understood in order to create the vision you see. Photoshop is an extremely powerful program that YOU can FINALLY MASTER.
YOU can finally master Photoshop and learn how to:


Take charge of your photography with Layers & Masks
COURSE FEATURES
This course features easy-to-follow videos that walk you through learning layers and masking for photographers.
Here are some of the things you will discover and learn while taking this course:
COURSE FEATURES
This course features easy-to-follow videos that walk you through learning layers and masking for photographers.
Here are some of the things you will discover and learn while taking this course:
PDF WORKBOOK
Includes a printable PDF workbook and video guide so you can follow along with each lesson. Also includes a list of essential keyboard shortcuts.

TRAINING FEATURES
Here are some of the video training features you’ll find in this course (hover over each item to learn more):
KEYBOARD SHORTCUTS

CLOSED CAPTIONS

HIGHLIGHTED CURSOR

ZOOM-INS

TRAINING FEATURES
Here are some of the video training features you’ll find in this course:
KEYBOARD SHORTCUTS
Keyboard shortcuts are listed on the bottom of the screen to help you reinforce and remember quick access to tools and functions.
CLOSED CAPTIONS
Optional closed captions (in English) are included with each video file. Use your video software to turn this feature on or off as needed.
HIGHLIGHTED CURSOR
The cursor is highlighted in yellow to make it easy to follow along with the videos.
ZOOM-INS
The video is zoomed in as needed to make each step easy to follow and see the important parts of each lesson.

100% Satisfaction Guaranteed!
Your satisfaction is important to me. That’s why I’m backing this course with a 100% satisfaction guarantee! If you are not happy with your purchase, please get in touch through my support email and I’ll take care of you.
Frequently Asked Questions
What software does this course work best with?
This course is created for Photoshop CC users and was created using Photoshop CC 2022. If you have an older version of Photoshop, you will still benefit from much of this course. Things such as layers, adjustments, and general photo editing will be identical or similar. However, there will be some features that do not exist in your version, so those techniques will not apply to your software. If you have a specific question about software compatibility, please contact support for more information.
If you use Photoshop Elements (PSE), there will be parts of this course that will apply to that software. However, PSE is missing several key masking features, such as the automatic masking tools (Color Range, Select sky, Select subject, etc.), as well as Channels, full use of Smart Object functionality, and many more. If you are interested in moving towards an intermediate or advanced level of enhancing and editing your photos, I recommend upgrading to the full version of Photoshop CC. (For only $9.99/month you can get Lightroom, Lightroom Classic, and Photoshop).
How can I watch this course?
Once you place your order, you will receive a download link with all course files (videos, practice image files, and links to other items, depending on which version you purchase). There is no time limit to accessing your course files, and you are welcome to download them to all of your own personal devices.
What skill level is this course?
This course was created with the beginner and intermediate user in mind, and if you are new to Photoshop then you will have no problem diving into this course and getting the full benefit out of it. You’ll find the approachable nature of the teaching style in this course to be easy to follow while still learning advanced and creative editing techniques.
No prior Photoshop experience is required in order to use this course!
In general, users of all levels (including those who consider themselves “advanced” Photoshop users) will still find a lot of valuable information and should find this training beneficial to building their Photoshop skills.
What photography genres does this cover?
In the video examples, you’ll see a wide variety of images, such as portraits, landscapes, still-life, and so on. This training is not made for a specific style of photography. Instead, it is created to help you understand masks and layers so that you can apply the concepts to your unique images.
What is included in the PDF Workbook?
The workbook has a list of all videos, their descriptions, filenames, and as well as the filenames for the images used in the hands-on project section(s). There is also a note-taking area on each video page, as well as a keyboard shortcut list at the back of the document.
PREVIEW THE TABLE OF CONTENTS
TRANSFORM YOUR PHOTOGRAPHY RIGHT NOW
SNEAK PEEK
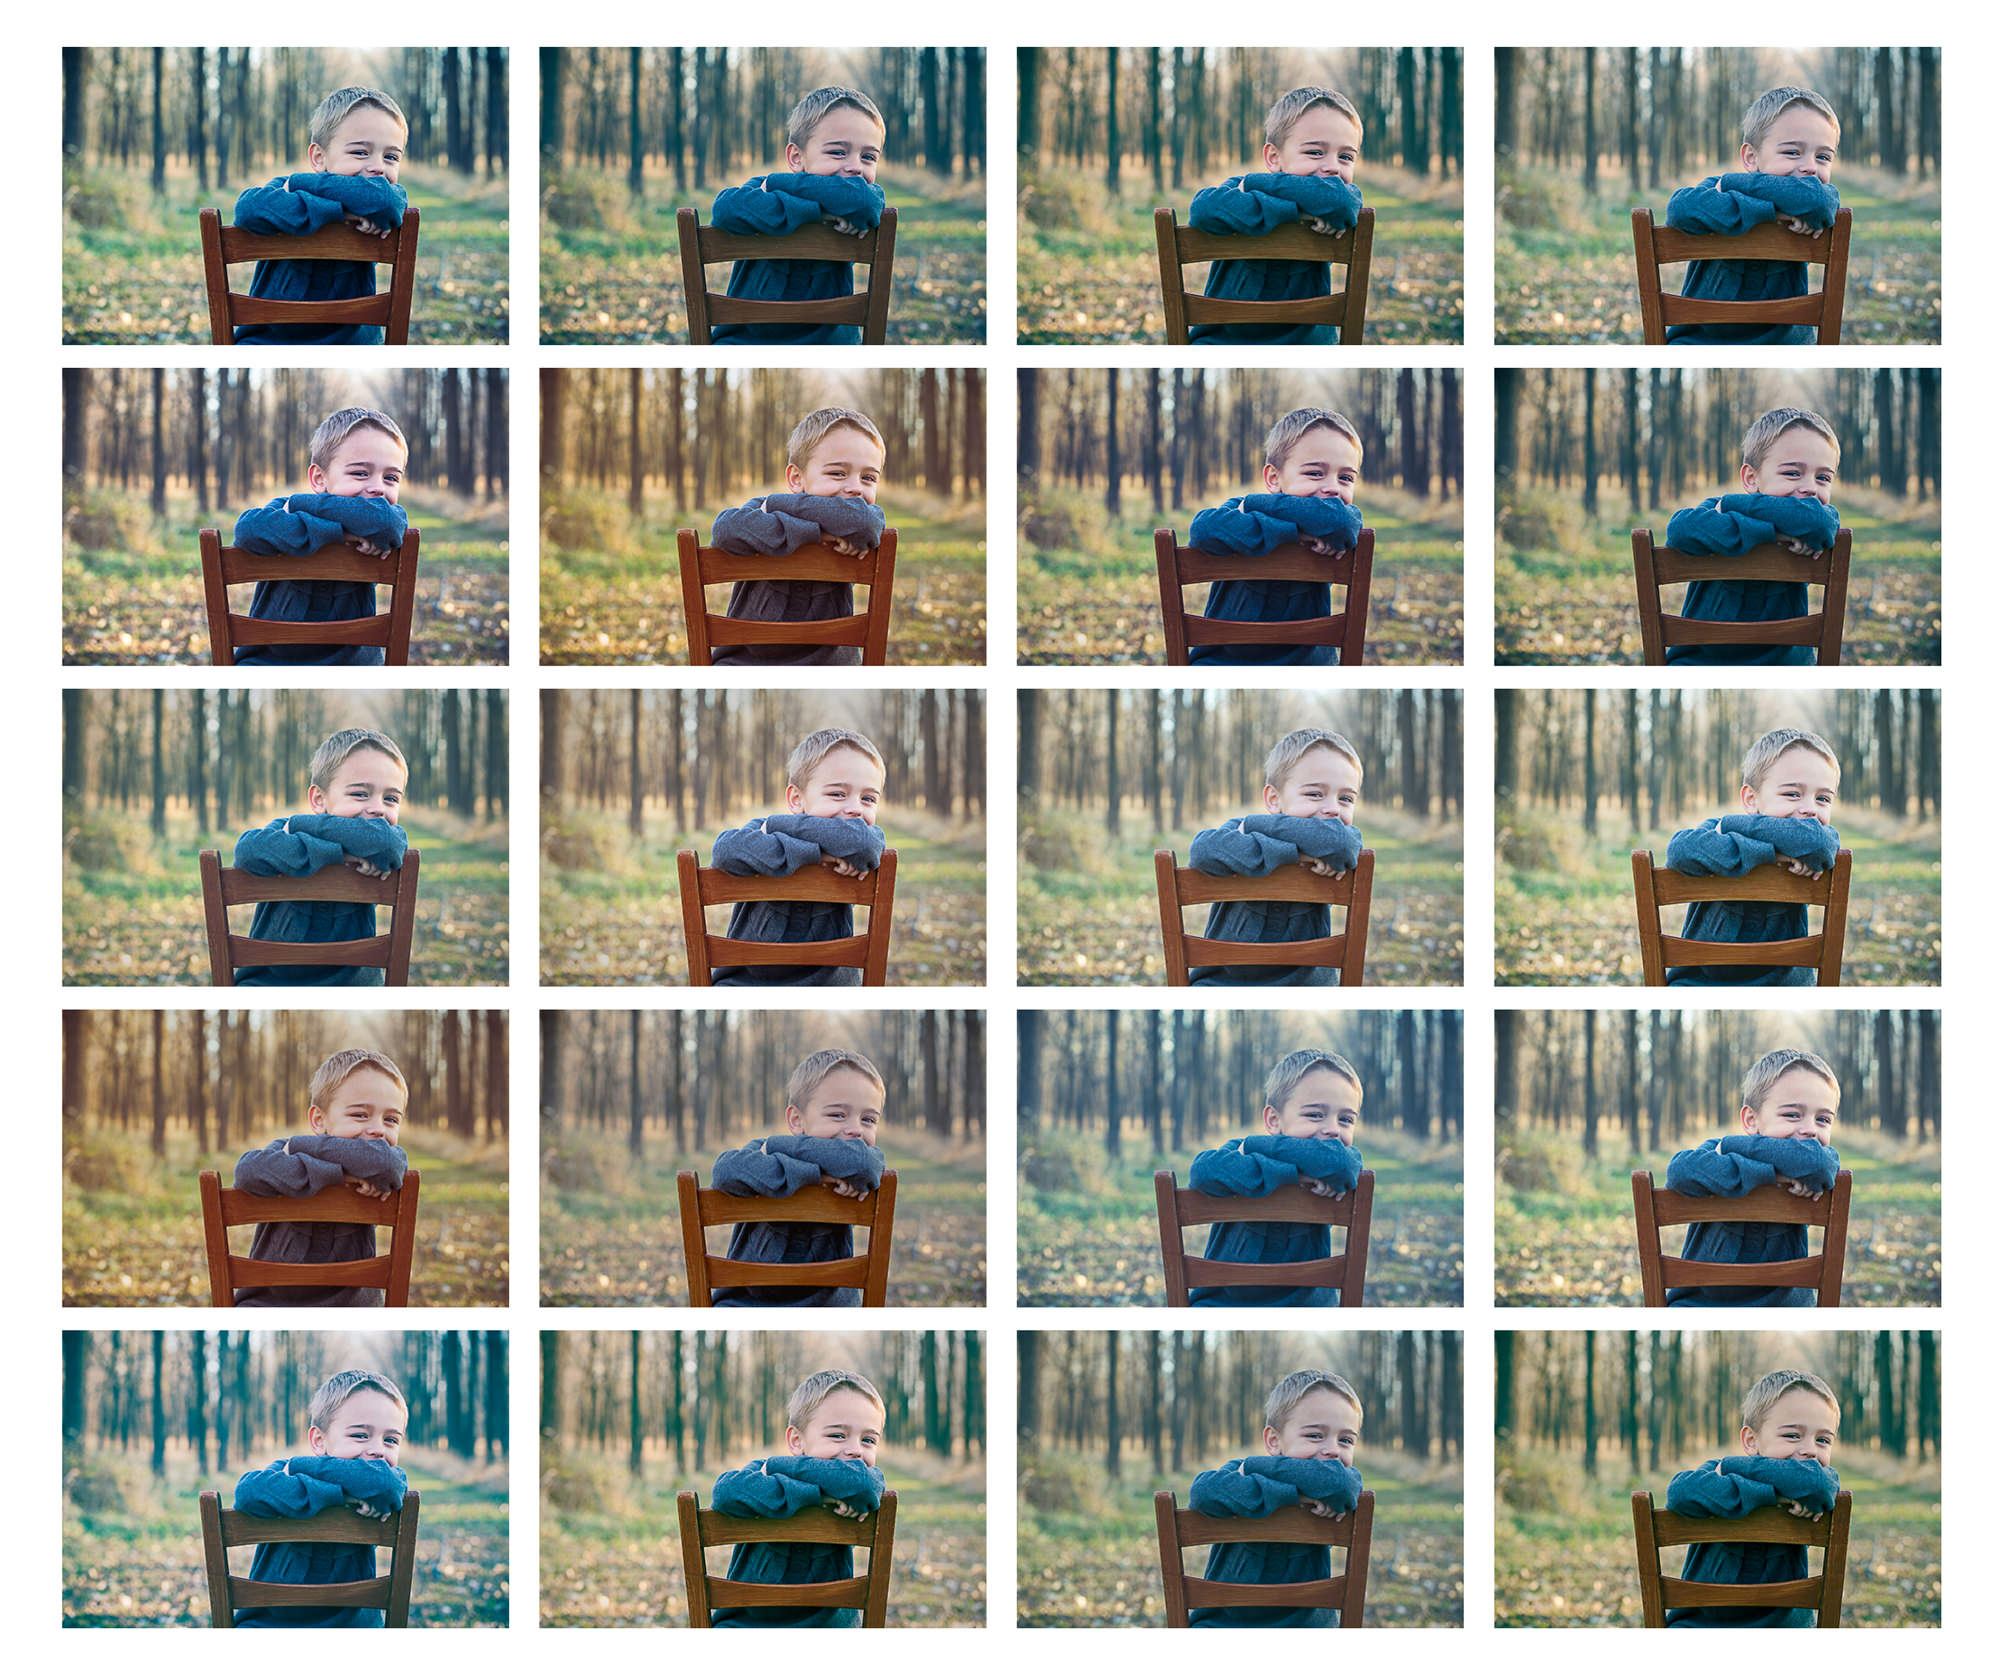
Take a peek at two of the lessons from this course to get a feel for what to expect:
PREVIEW THE HANDS-ON PROJECTS
Take a peek below at some of the hands-on projects included in this course.
This project walks through the steps of adding a new backdrop to a photo of a person, mask their hair, and stylize the photo so it blends together.
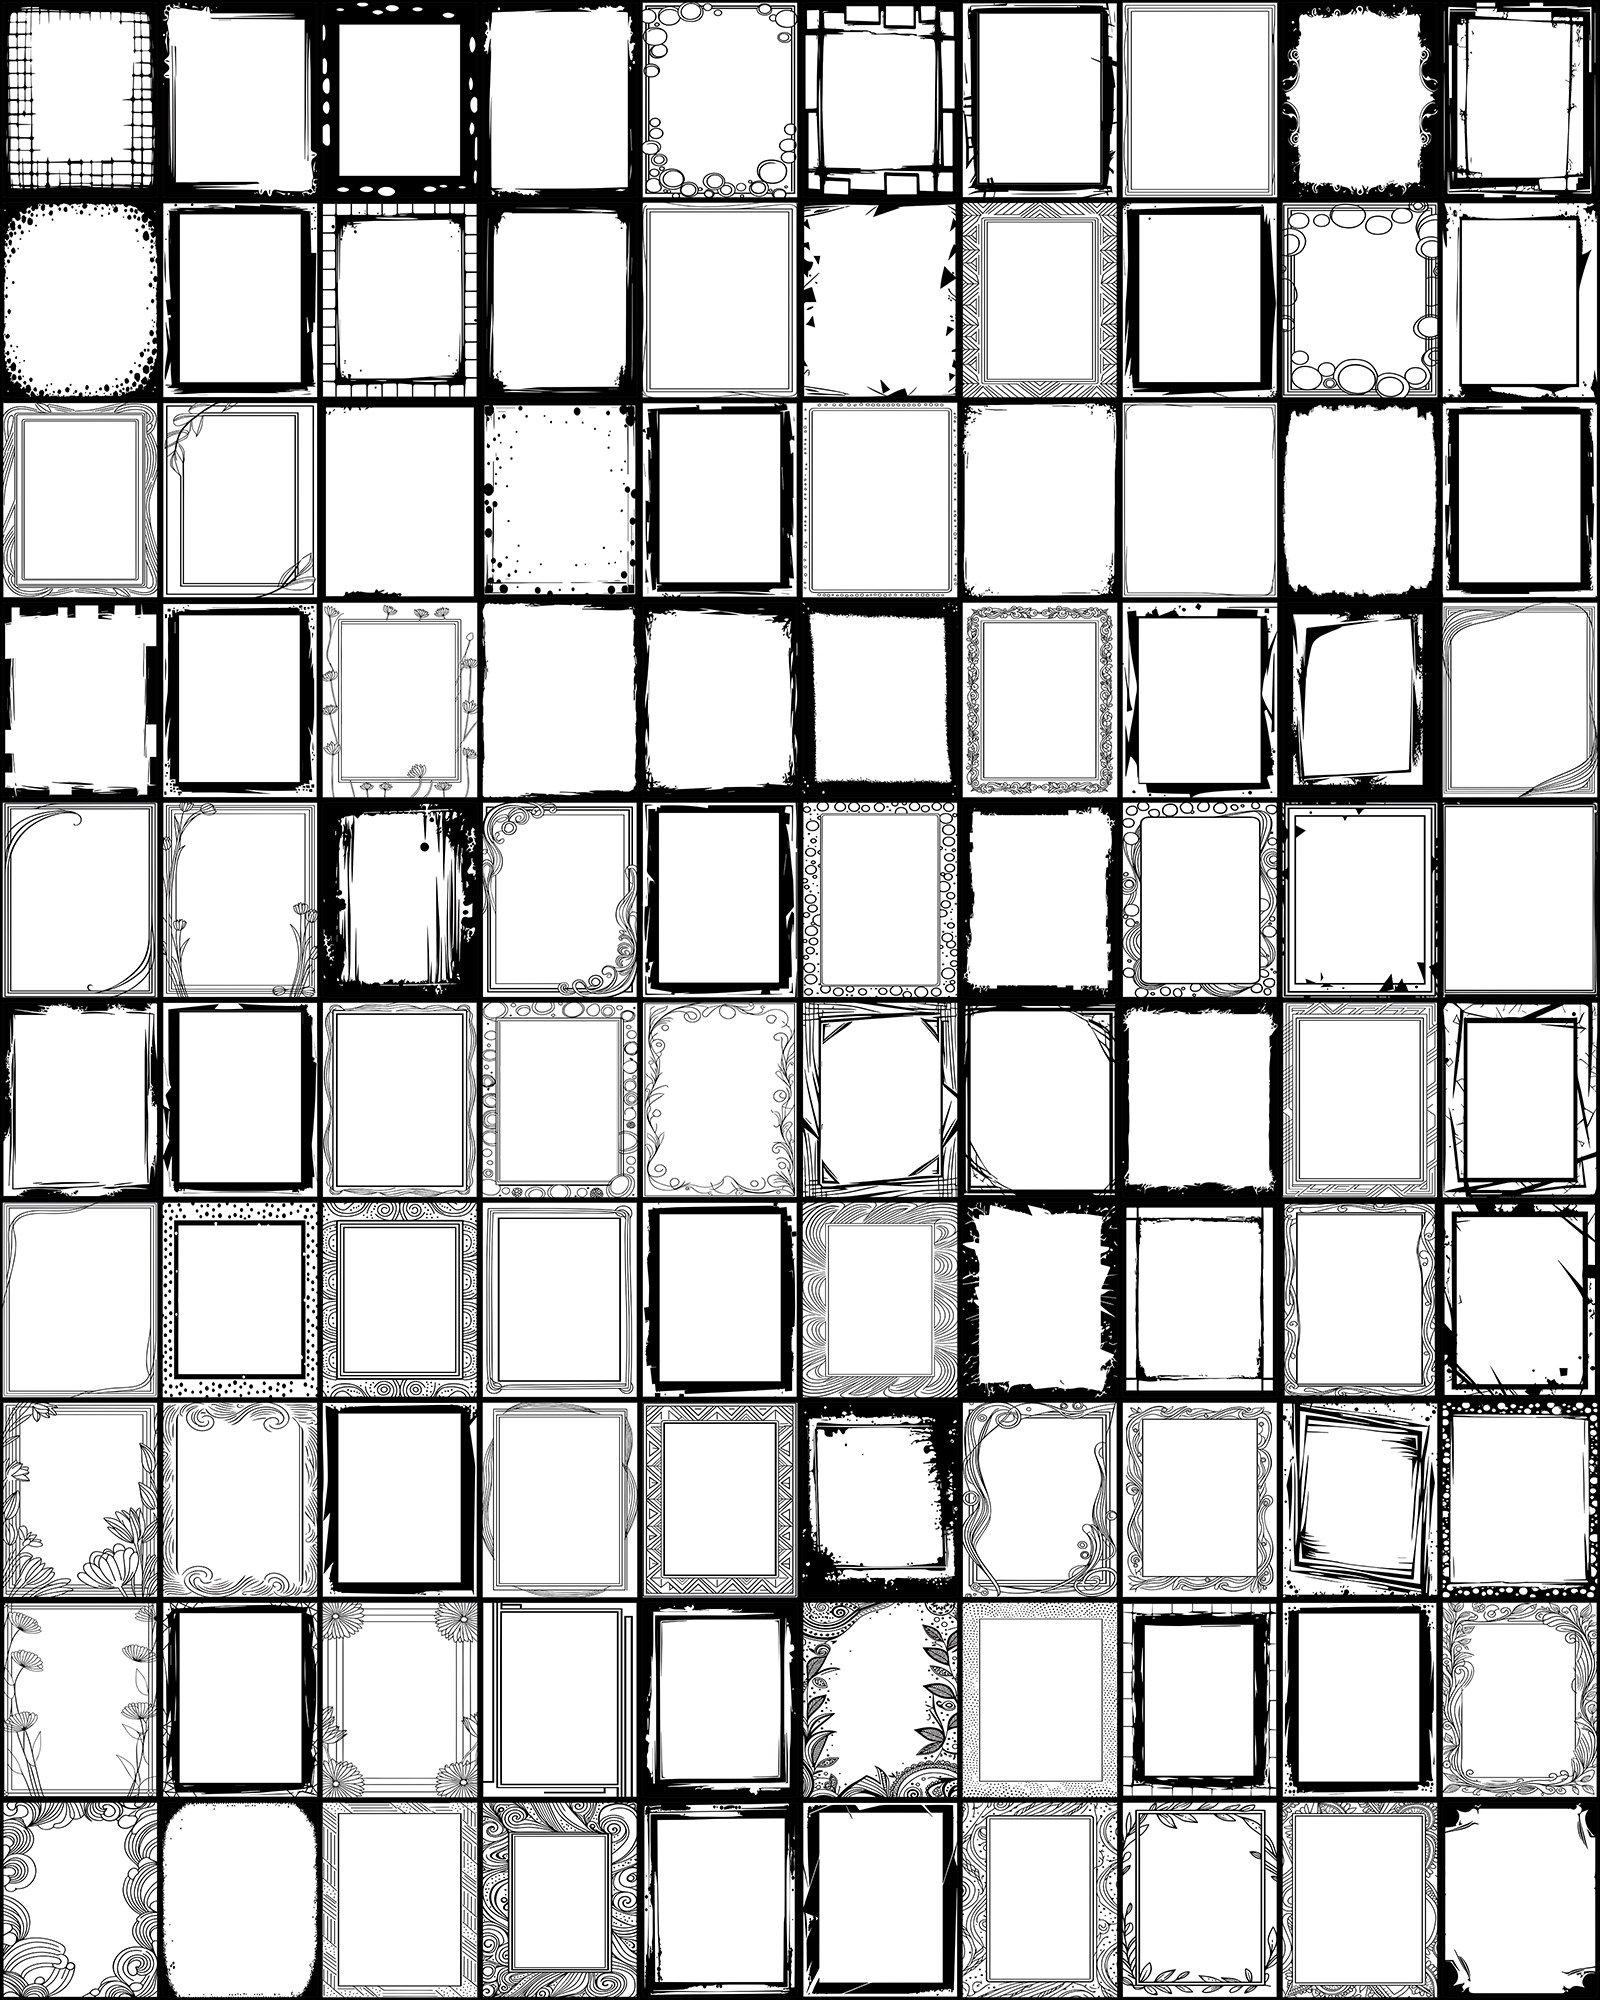
Learn how to add a photo to a frame and mask it so it looks like it’s coming out of the frame (a “spilling frame” technique).


Create a textured portrait using advanced blending techniques to remove the texture from part of the image without removing the blended effects, such as color and tone.
… PLUS MANY MORE!

About Nicole Young
Hi there! I’m Nicole Young and I’ve been a Photoshop user for more than 20 years. I once worked as a Kelby Training as a Photoshop customer support “help desk” pro, where I helped troubleshoot photographers’ questions about Photoshop. You might also recognize me from my in-app Photoshop and Lightroom tutorials, where you can follow step-by-step instructions using Adobe products right inside of the app.
In 2005 I started my first blog, which launched my career as a photography educator. I THRIVE on teaching photography and post-processing! The best part of my job is when someone tells me that they FINALLY understand something they were struggling with for years, and I get to see that lightbulb “CLICK!” in their brains when it finally sinks in.
I’ve created DOZENS of photography products and my customers are SO HAPPY with their investments.
So … if you’ve been looking for the RIGHT TRAINING to help you to FINALLY understand LAYERS & MASKS in Photoshop, then why not take the leap today?!
Customer Reviews


Layers and Marks course review
Nicole is an excellent teacher who combines clear descriptions, lessons in bite-sized chunks, and an enthusiasm for learning. The results are a comprehensive, novel approach to the description of Layers and Masks in the world of Photoshop. This course would benefit a user of this Photoshop at any skill level. Layers, masking, channels, blend modes, luminosity, opacity, stamp layers, and clipping are just some of the useful skills covered in depth. Learning is supplemented with a workbook, lesson quizzes, and guided projects. The capstone is the coaching sessions with Nicole. The bottom line is this course provides a valuable understanding of the layer and mask principles. As the course progresses Nicole then demonstrates practical applications and at each turn builds new levels of understanding while reinforcing earlier learning. This course is well worth the money that not only offers a chance to up one's Photoshop game but will be a reference that can be utilized in the future. Worth the money and time investment!
Layers and Masks
The program clearly reviews all the benefits of learning and using Photoshop. The benefits of going back and reviewing the different videos to answer questions you may have. Really like this program.
Layer Upon Layer
This is not the first, or probably the last, Photoshop learning program I have used. Photoshop is a huge program filled with many different features to help you improve your pictures. If you are not skilled in the use of complex programs such as this you will not be aware of the many, many things you can do with Photoshop. Having someone explain many of the features and how to use them is absolutely essential. Each new course I use opens new uses to me. I plan to go back and improve many of my earlier efforts. Thanks for providing this class for me.

Great Class
Each lesson is very short and to the point. Nicole explains everything in very easy to understand terms. I bought the class because I am weak on masking.
I recommend Layers and Masks 100%
I recommend Layers and Masks 100% to beginners and experienced Photoshop users who have had questions but weren’t sure where to turn. Nicole’s videos give information about layers and masks and then shows how everything fits together step-by-step. Whenever I watch a masks and layers video, I don’t have questions related to the content because Nicole’s videos are professional and clear and frankly a joy to watch!

Best Photoshop Course Ever
Over the years I have taken several Photoshop on-line courses. This course is, by far, the best. What makes it the best? (1) It is technically superior; sound quality and display are first rate, (2) It is divided into short modules which makes it easy to remember and a lot easier to find what you want when you want to review material, (3) Nicole's soft style is pleasant to listen to listen to; no jarring movements or harsh sounds, (4) and most important, the editing is superb; it is clear the Nicole put a lot of thought and time into the entire course; very professional and very user friendly.
An excellent source for learning Photoshop masking
This course is excellent. There is no better online photography teacher than Nicolesy. The course content, Nicolesy's teaching methodology, and clarity of her course materials are unparallel online.
Featured Products