
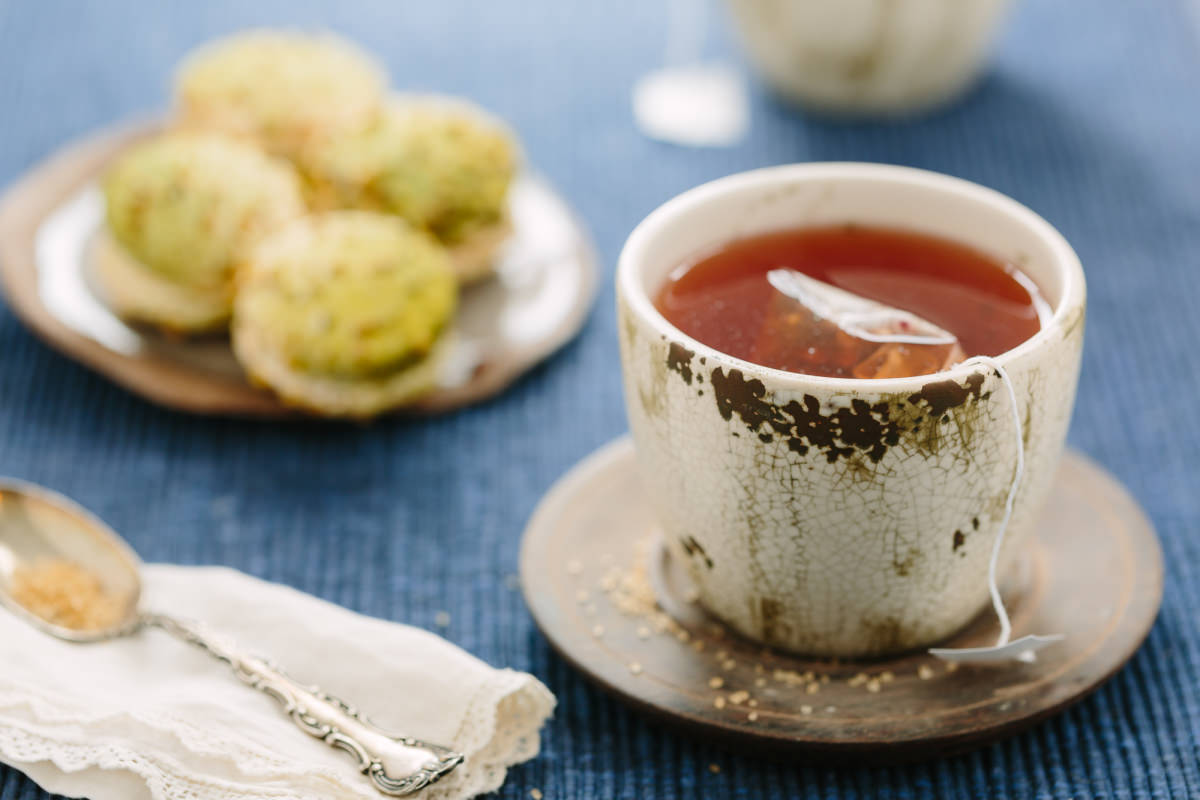
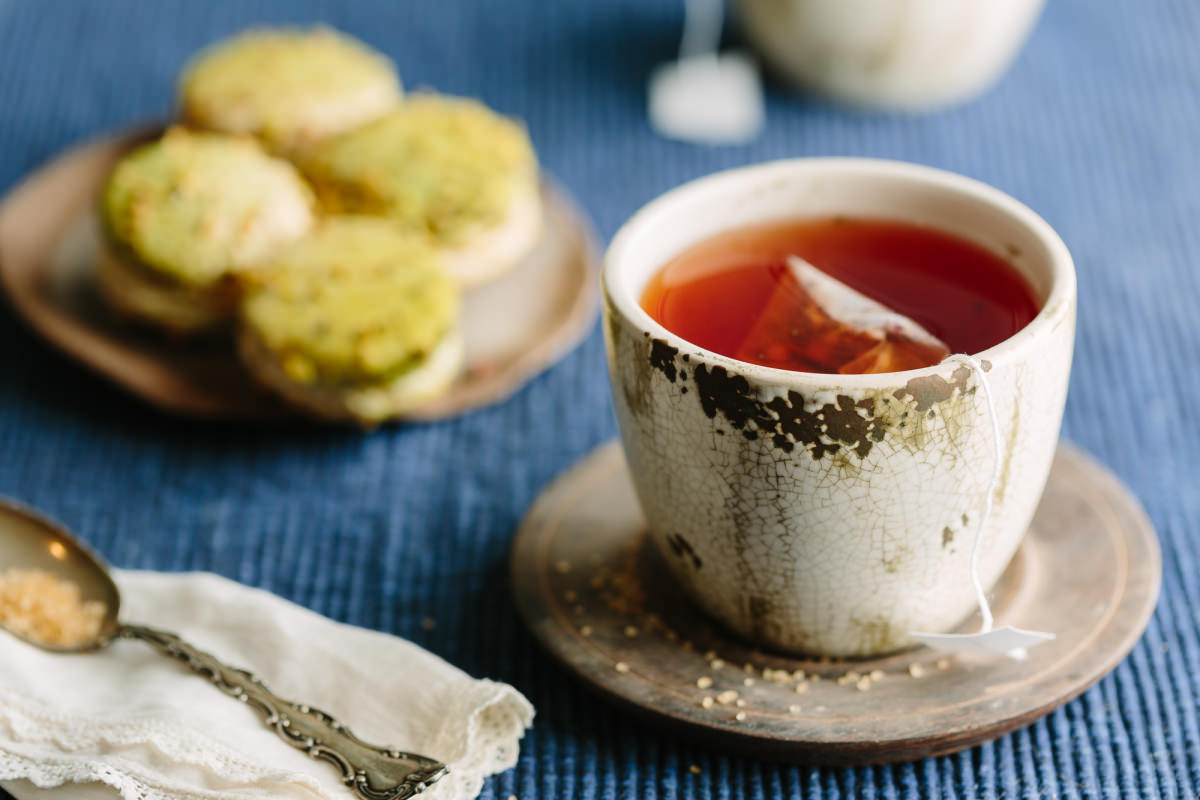
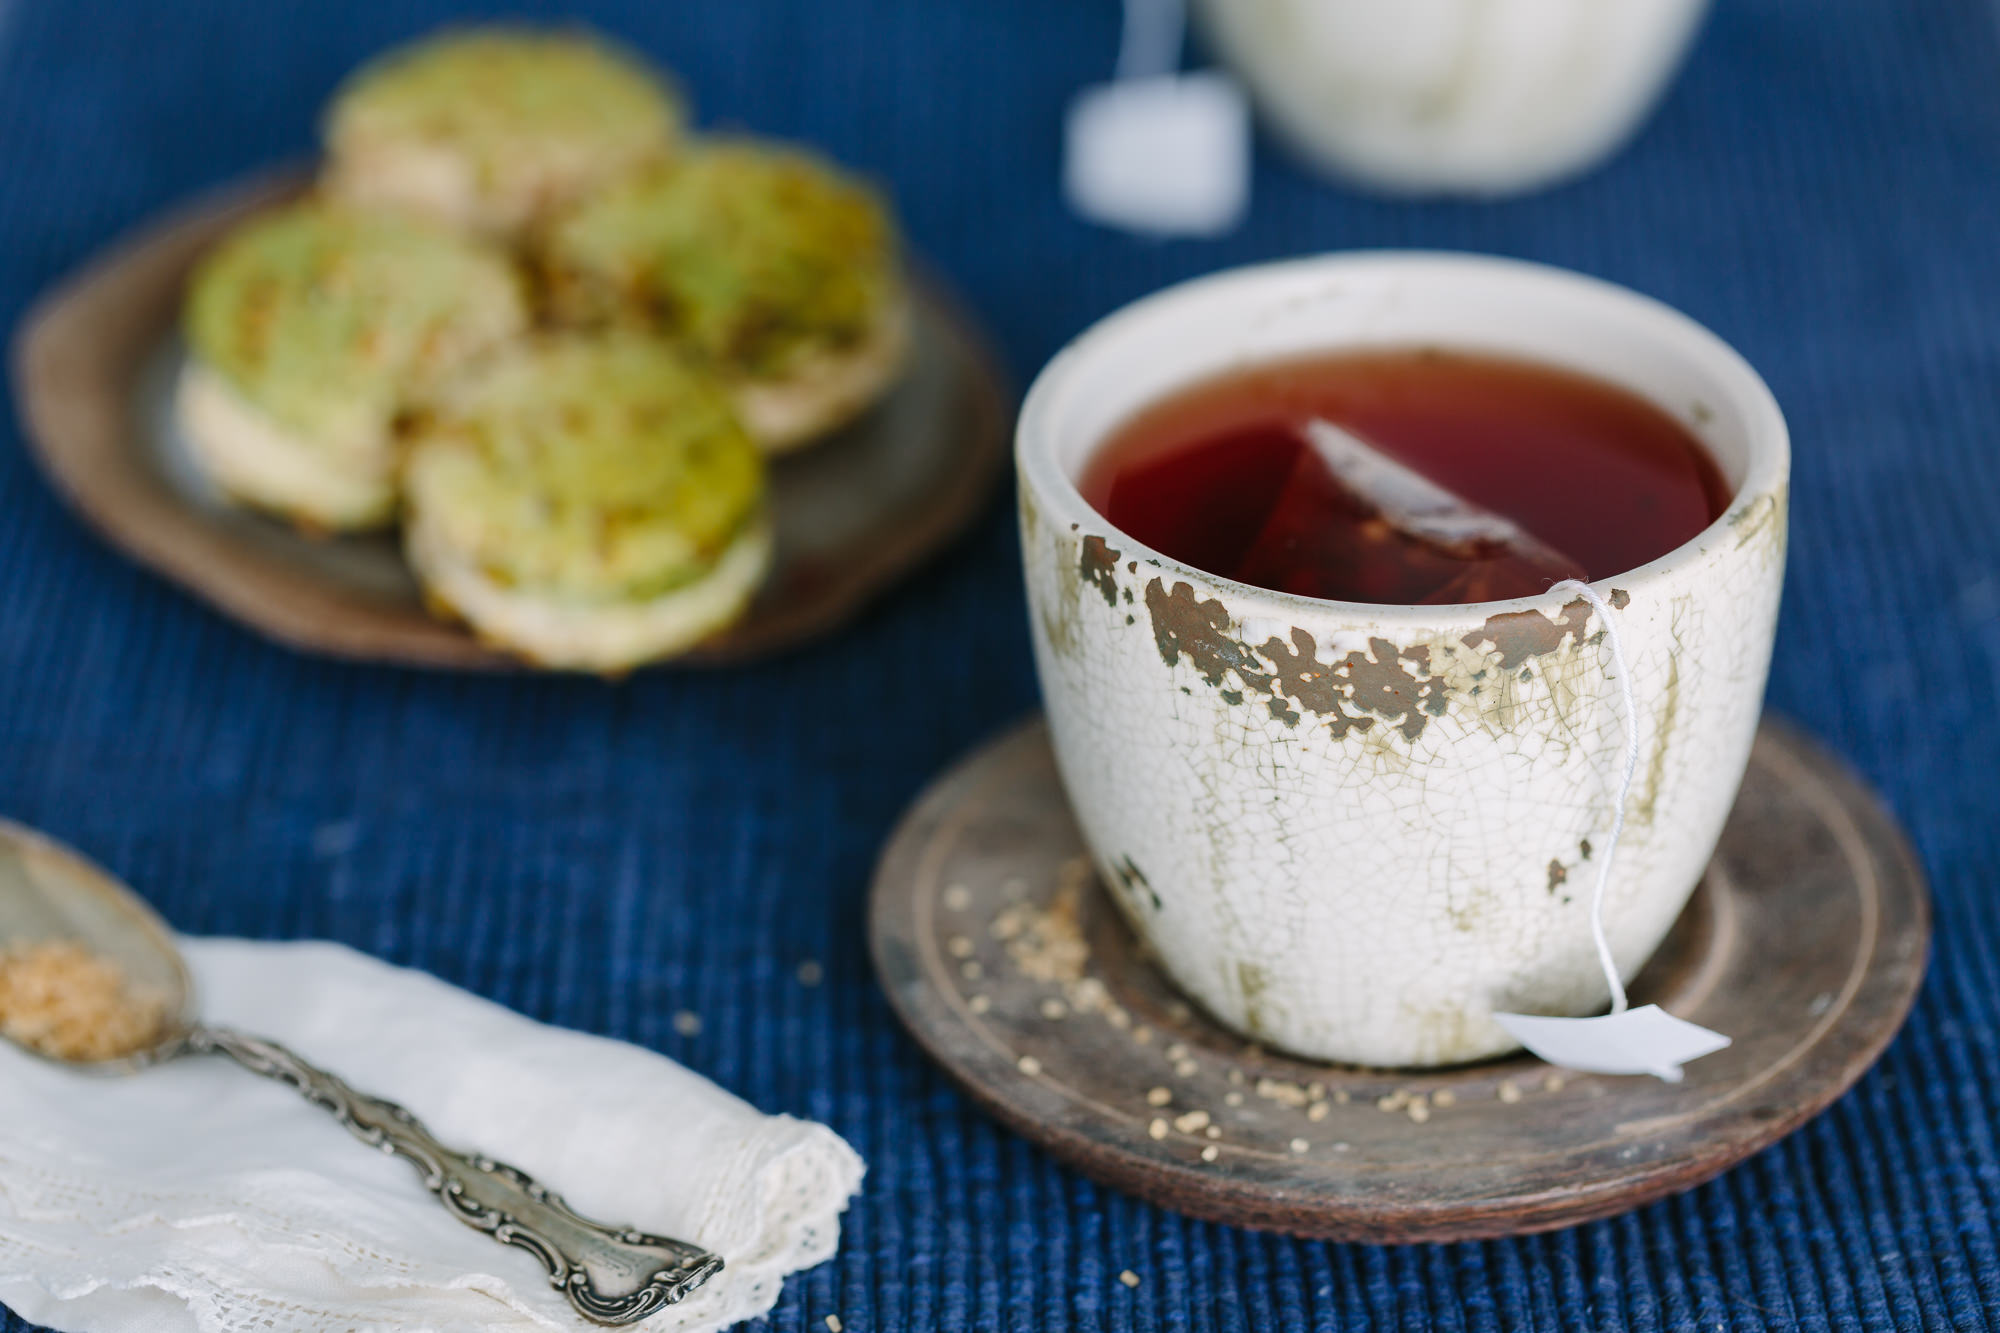
Do you have a blog, social media account, or online store, but are struggling with creating great product shots? A well-composed and beautifully-lit photograph can draw a reader or customer in, and the good news is that you don’t need a fancy studio (or even an expensive camera) to create these images yourself. In this article I’m going to show you the basics of a very simple, natural-light setup, using a small area of your room and simple camera gear. (By the way, this setup is nearly identical to the lighting setup I use for much of my food photography, and can be easily adapted to photograph any small items as well.) Please note: This article contains affiliate links.
Jump to the resources section for links to gear and other items mentioned in this article.
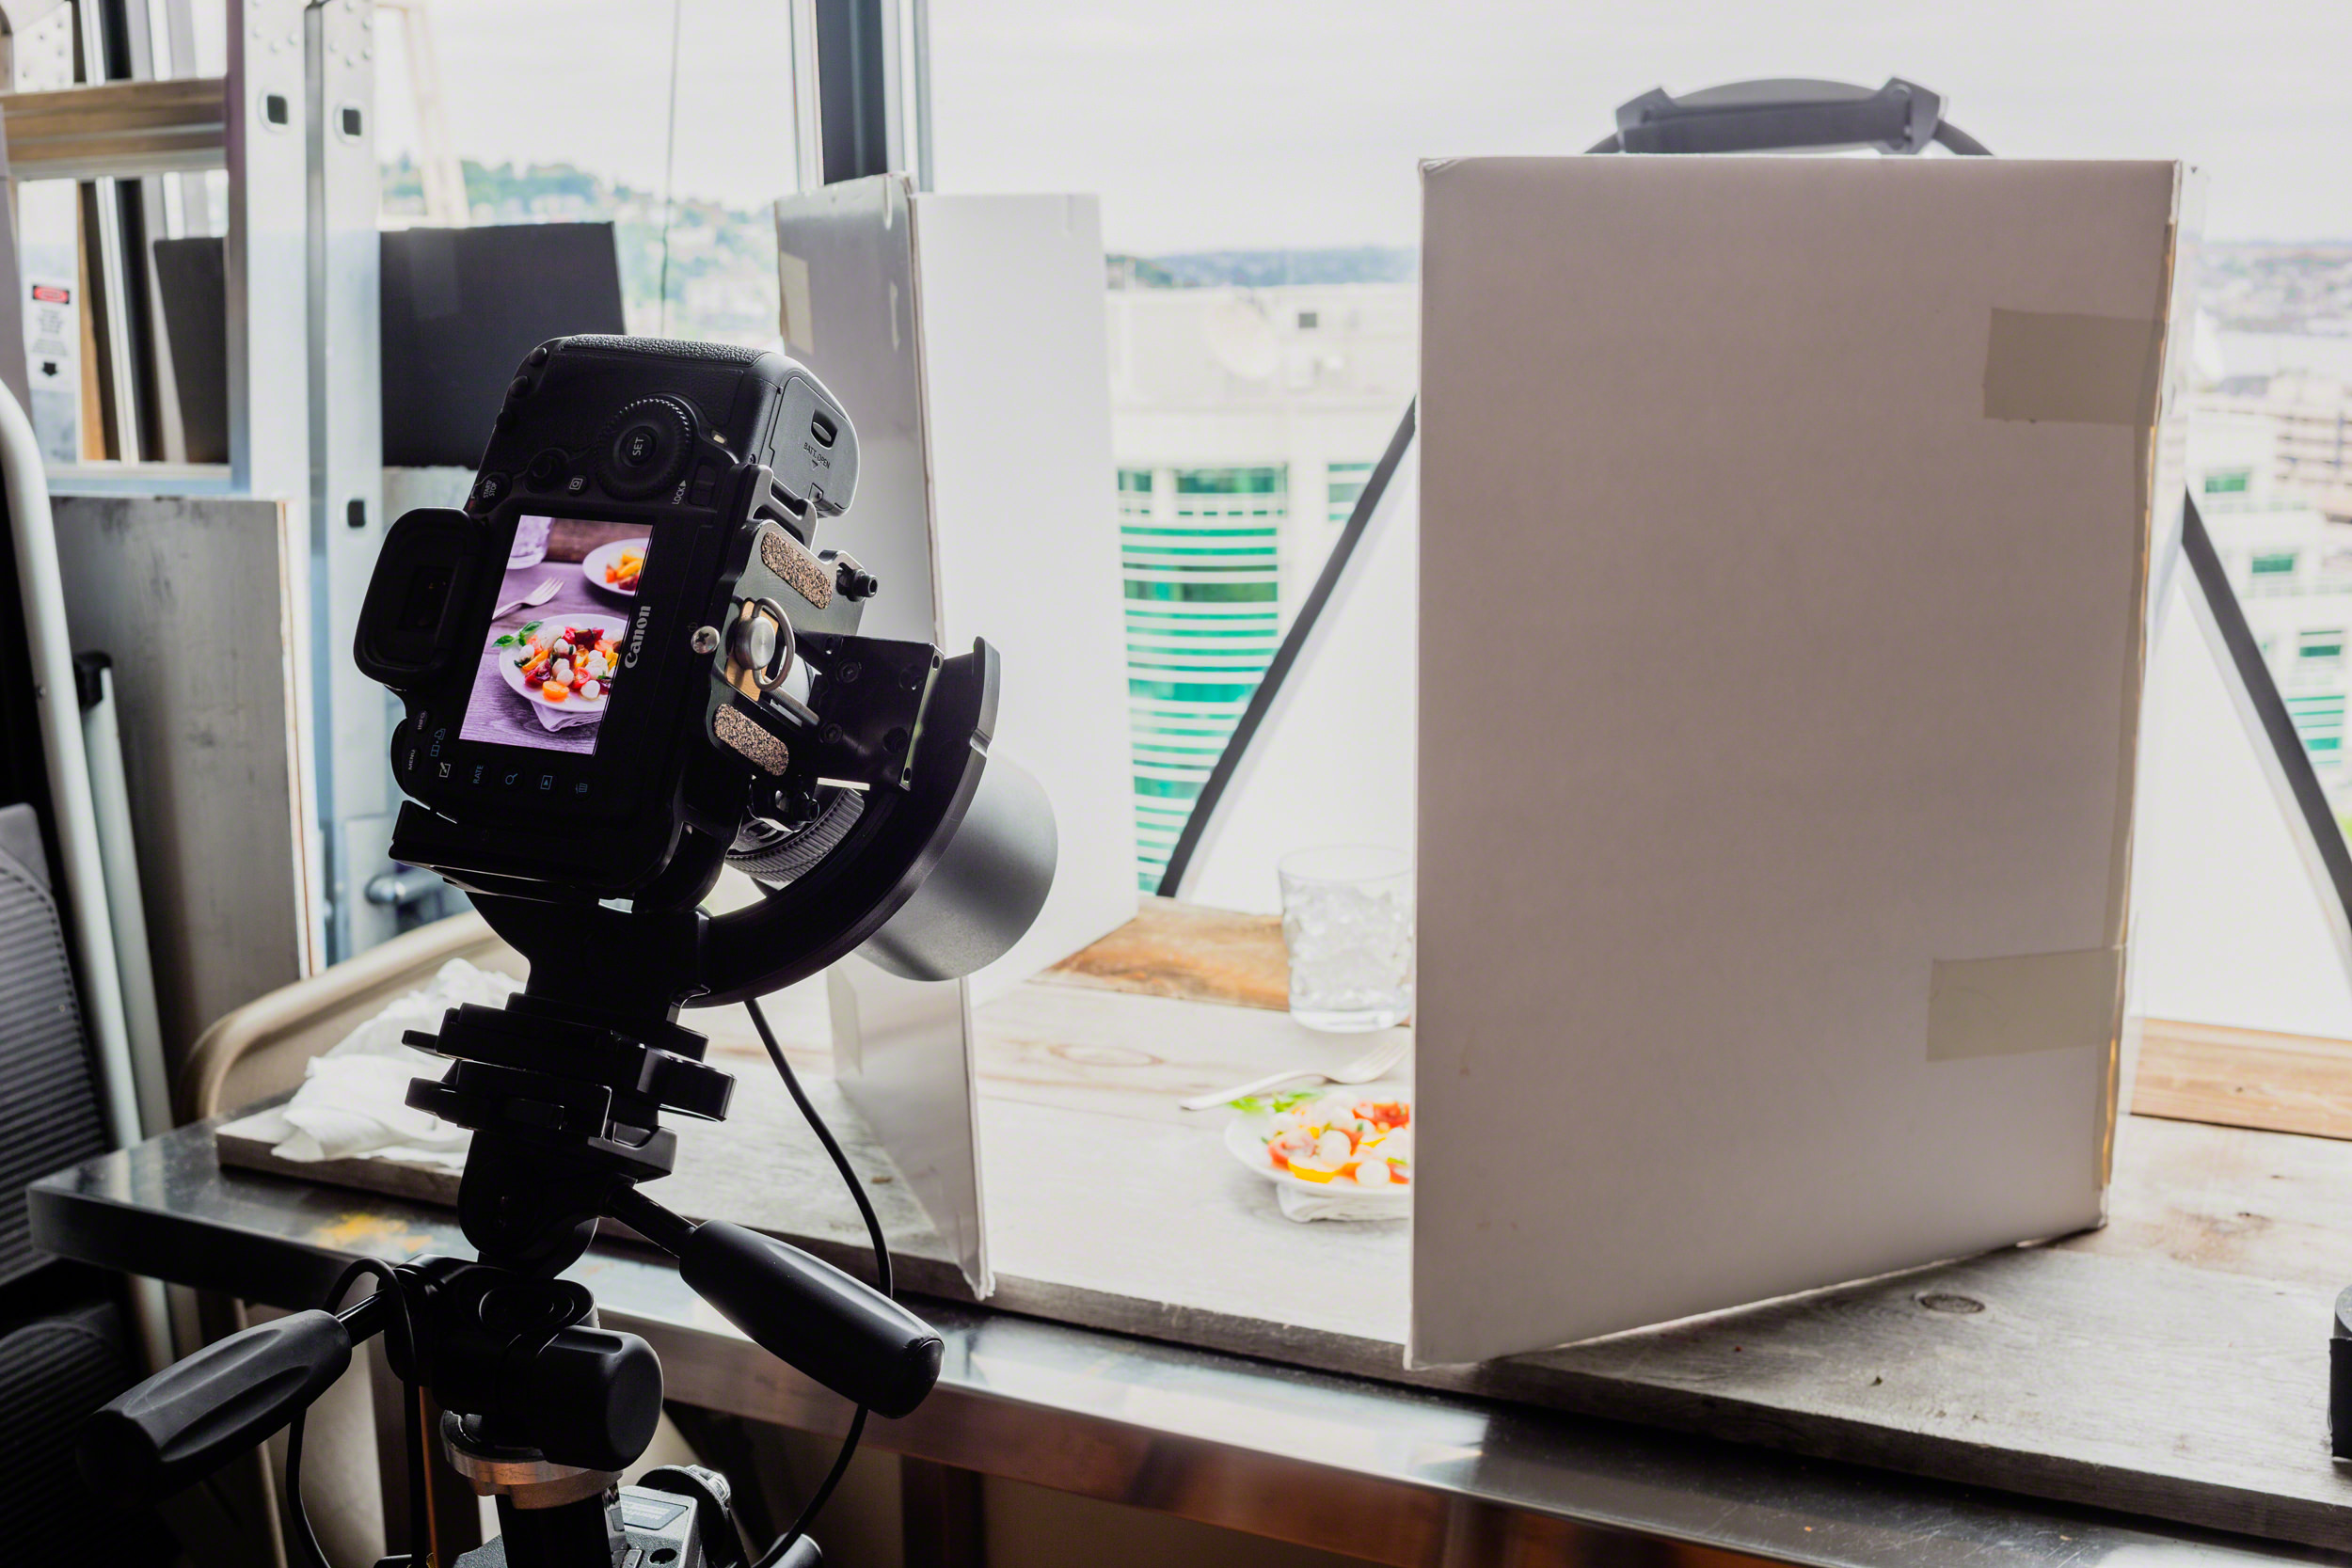
Table Setup and Location
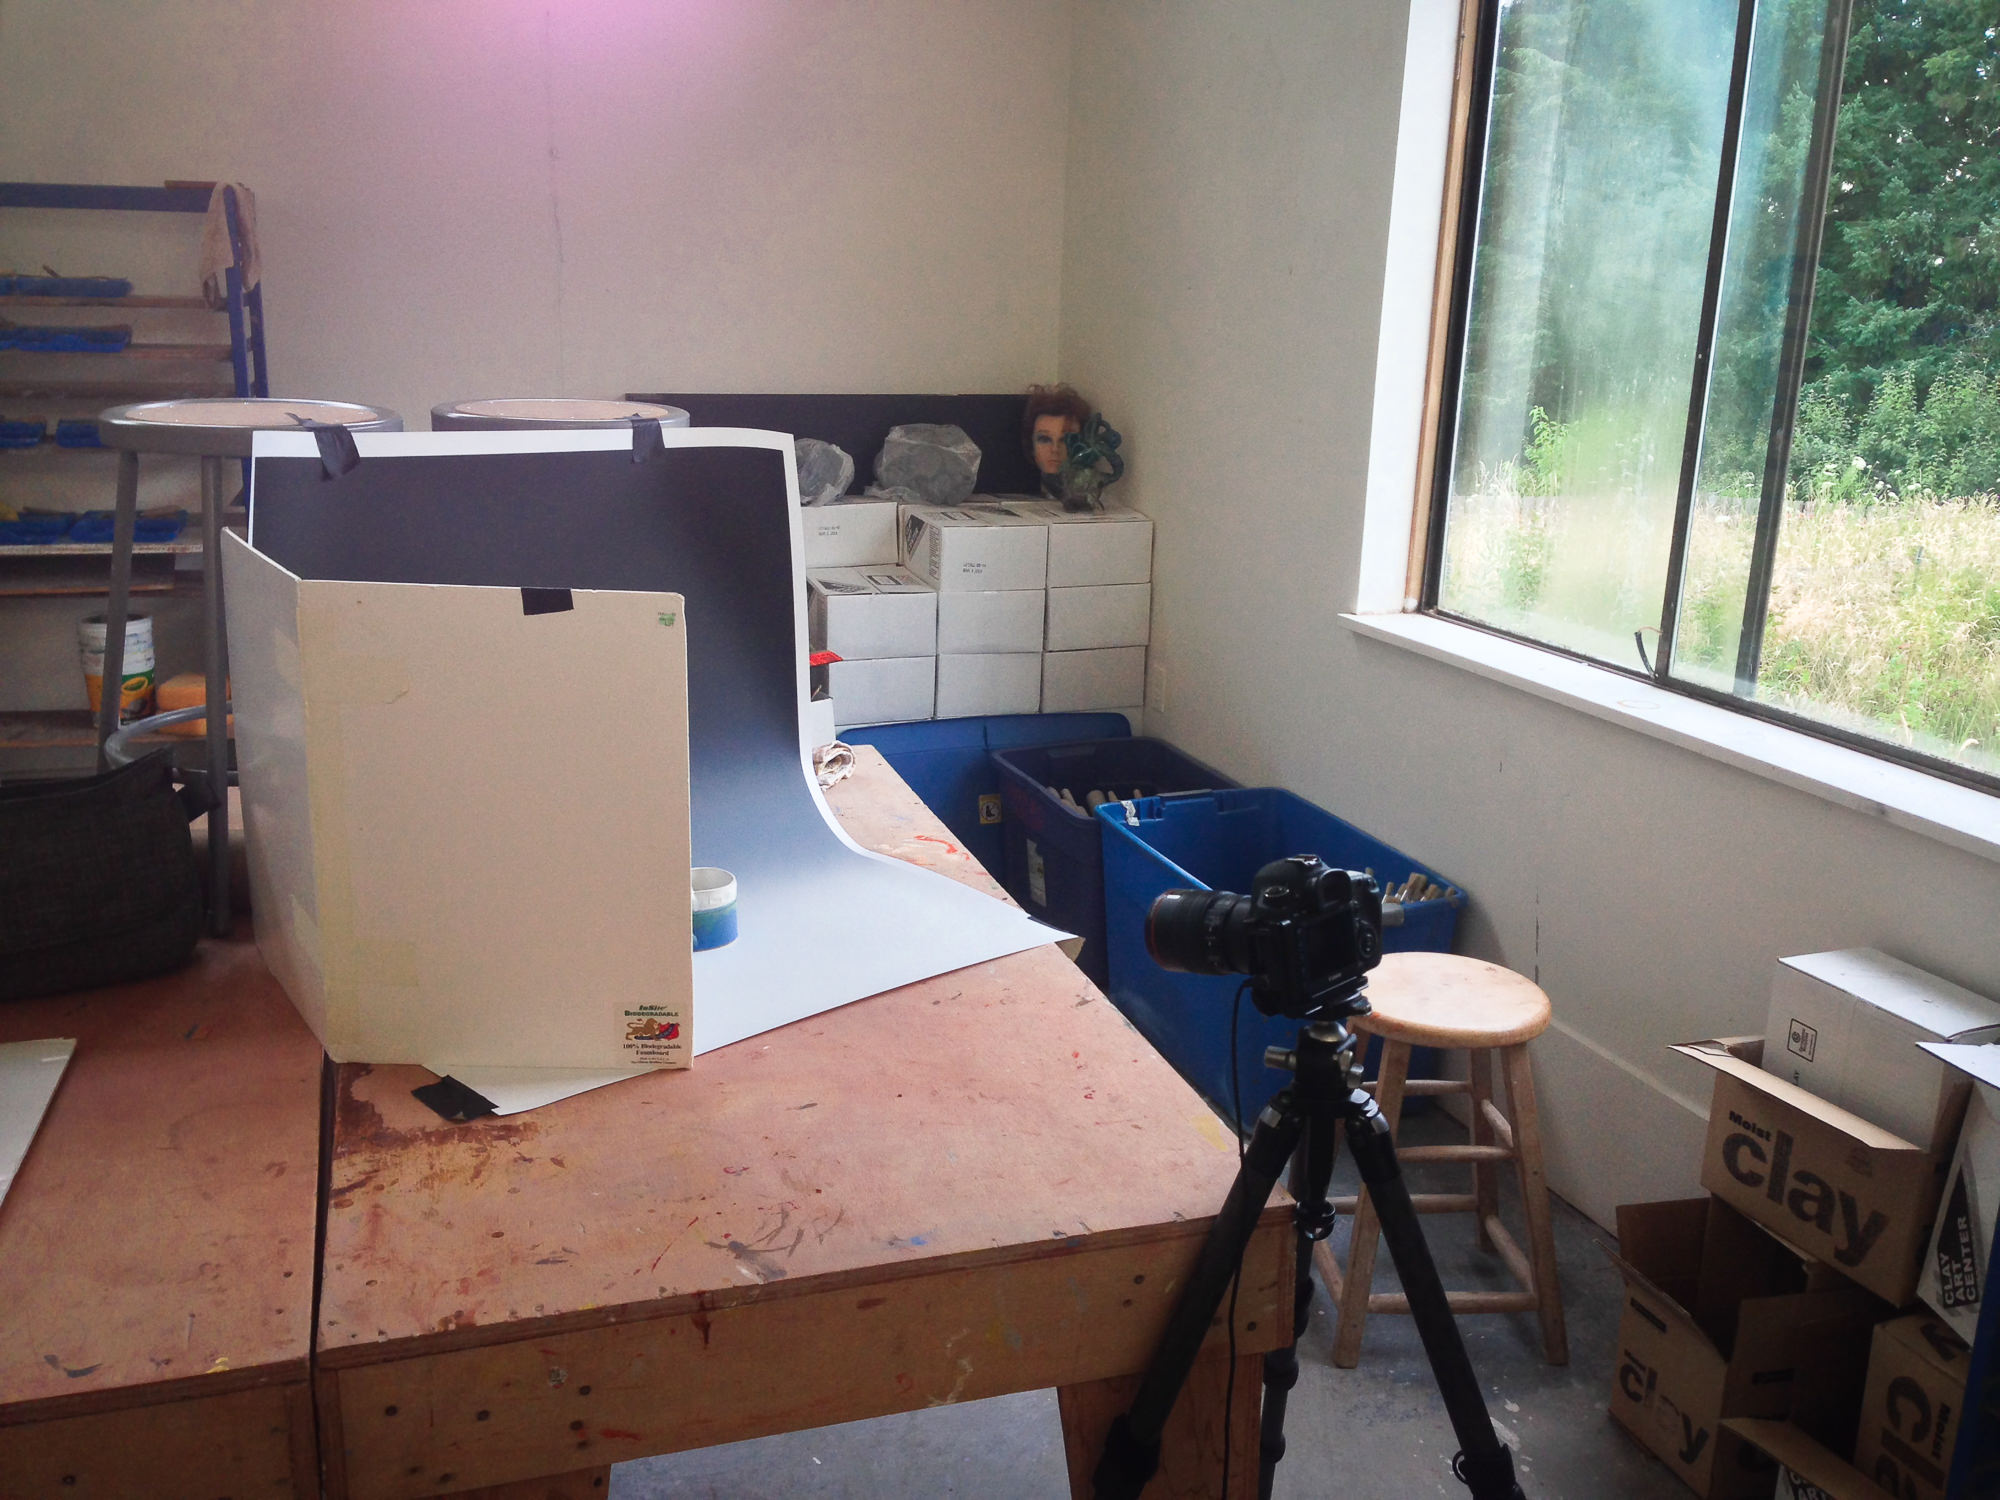
The first thing you will want to do is establish a location and tabletop to use for your photography. This can be a permanent setup, or something you put together temporarily as the need arises.
- Window: Finding an ideal location in your home or office is the first step in creating your photographs. Locate a window with sufficient light coming, but and try to avoid one with too much shade, such as a window in a basement beneath a patio. If you happen to have a North-facing window (for those on the Northern-hemisphere) that will be a good start, because the light coming through will never be direct sunlight. However any window with decent sunlight coming through in your home will work, provided that you can add diffusion when necessary (which I’ll get into later on in this article).
- Tabletop: For your work/shooting surface, any sturdy table will do. I tend to stay away from folding tables, or anything too flimsy, because they can wobble or even fall over much more easily than a standard table. For the height of the table, this will be up to you. If you plan on photographing your items at eye-level, a normal sturdy table will do just fine. However if you prefer to do “lay flat” style (where you point the camera straight down on the items from above) then a coffee-table height—or a nice arrangement on the floor—might be best for your setup.
-
- This is an example of a “lay-flat” photography setup. Here I set the items on the floor, but you can also use a coffee-table height surface as well.
-

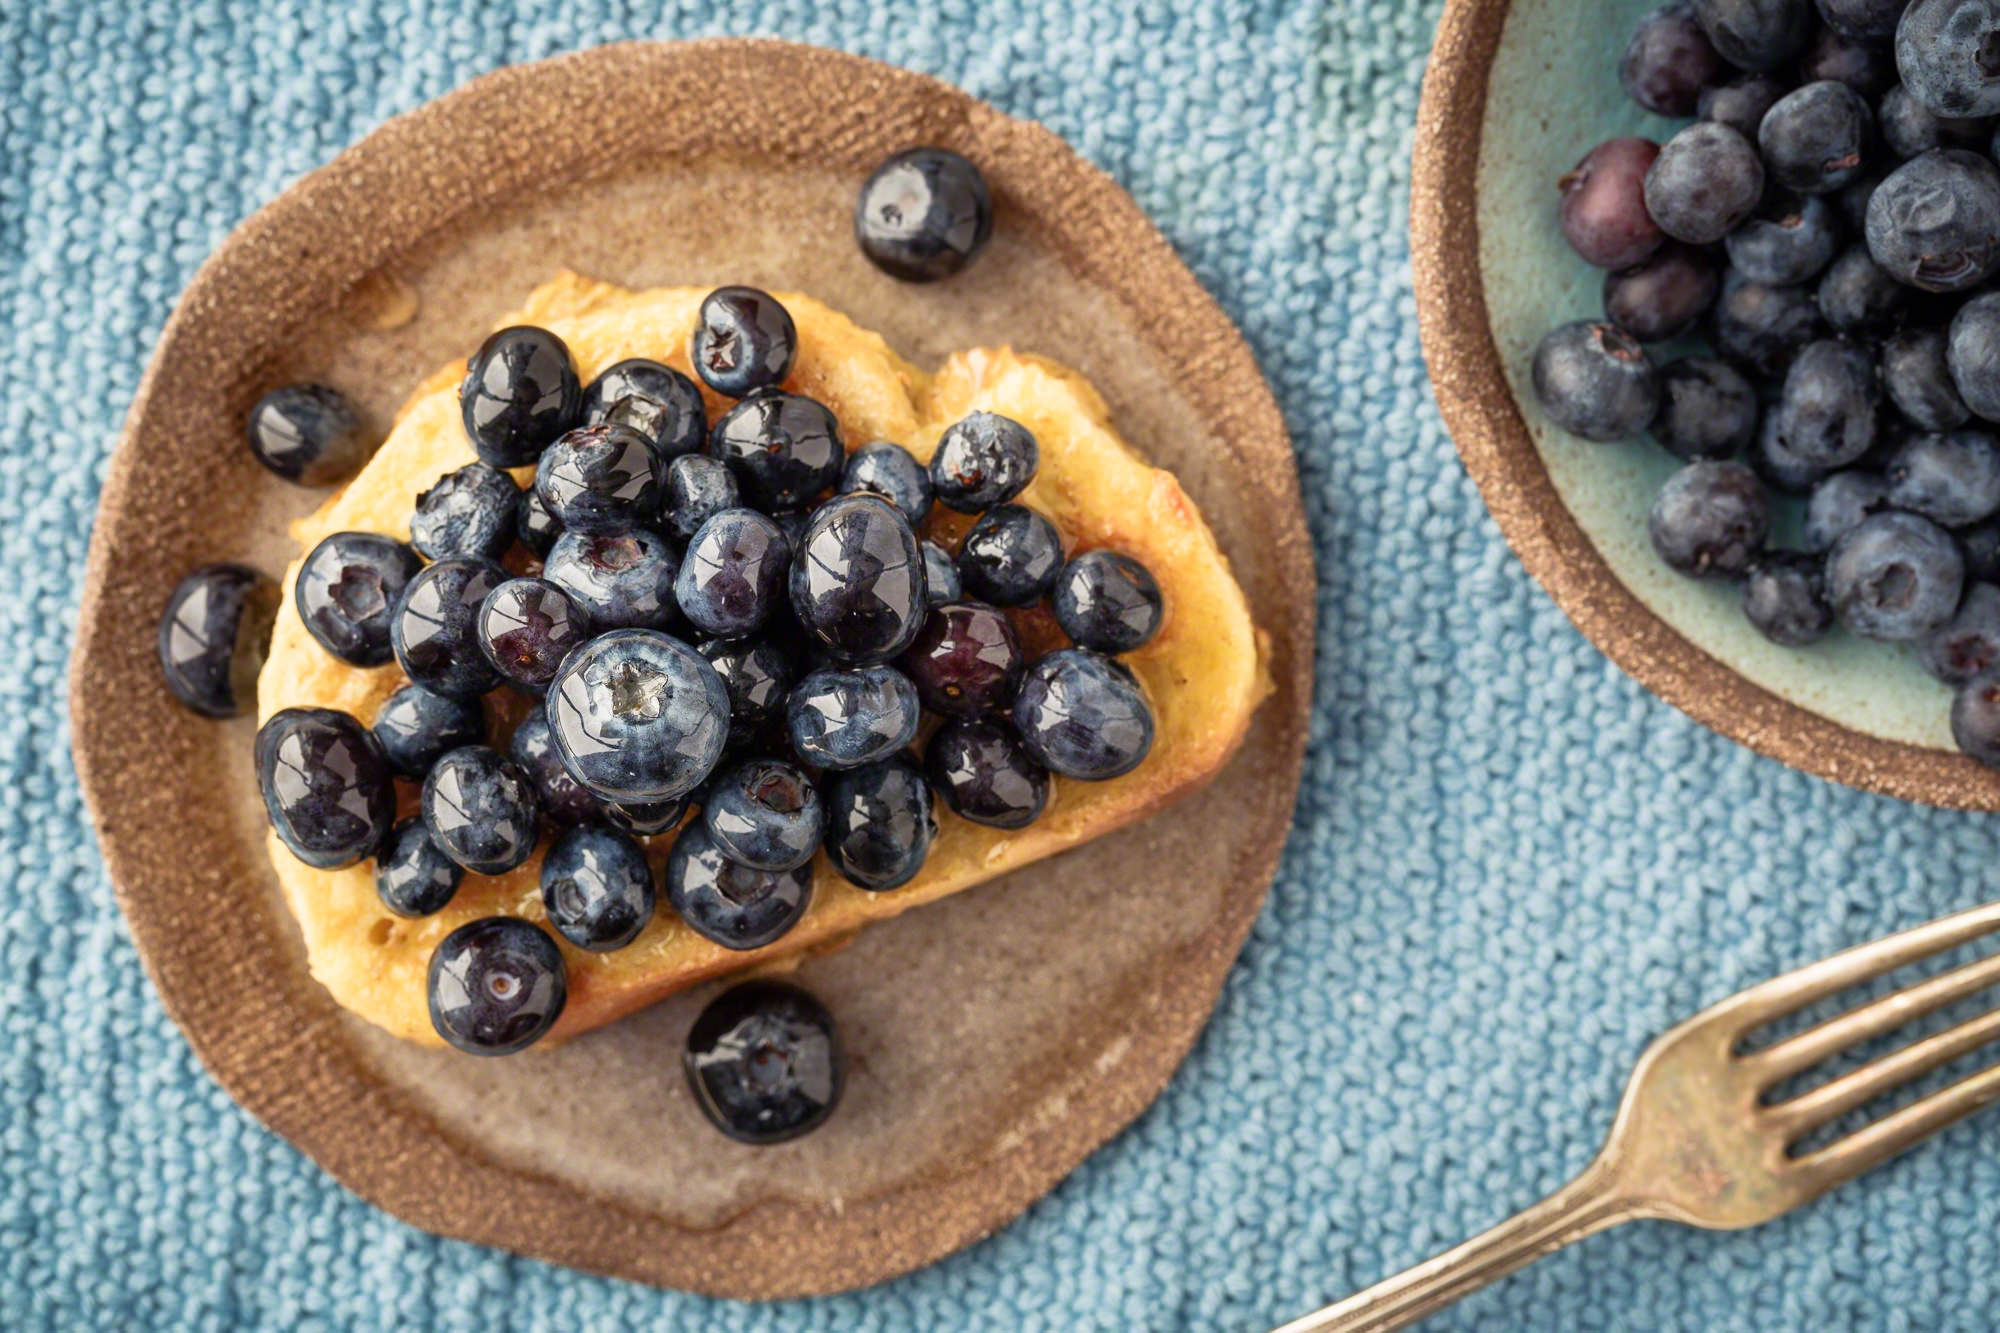
- This is my resulting image from being inspired by my Instagram photograph. (© Nicole S. Young — nicolesy.com)
-
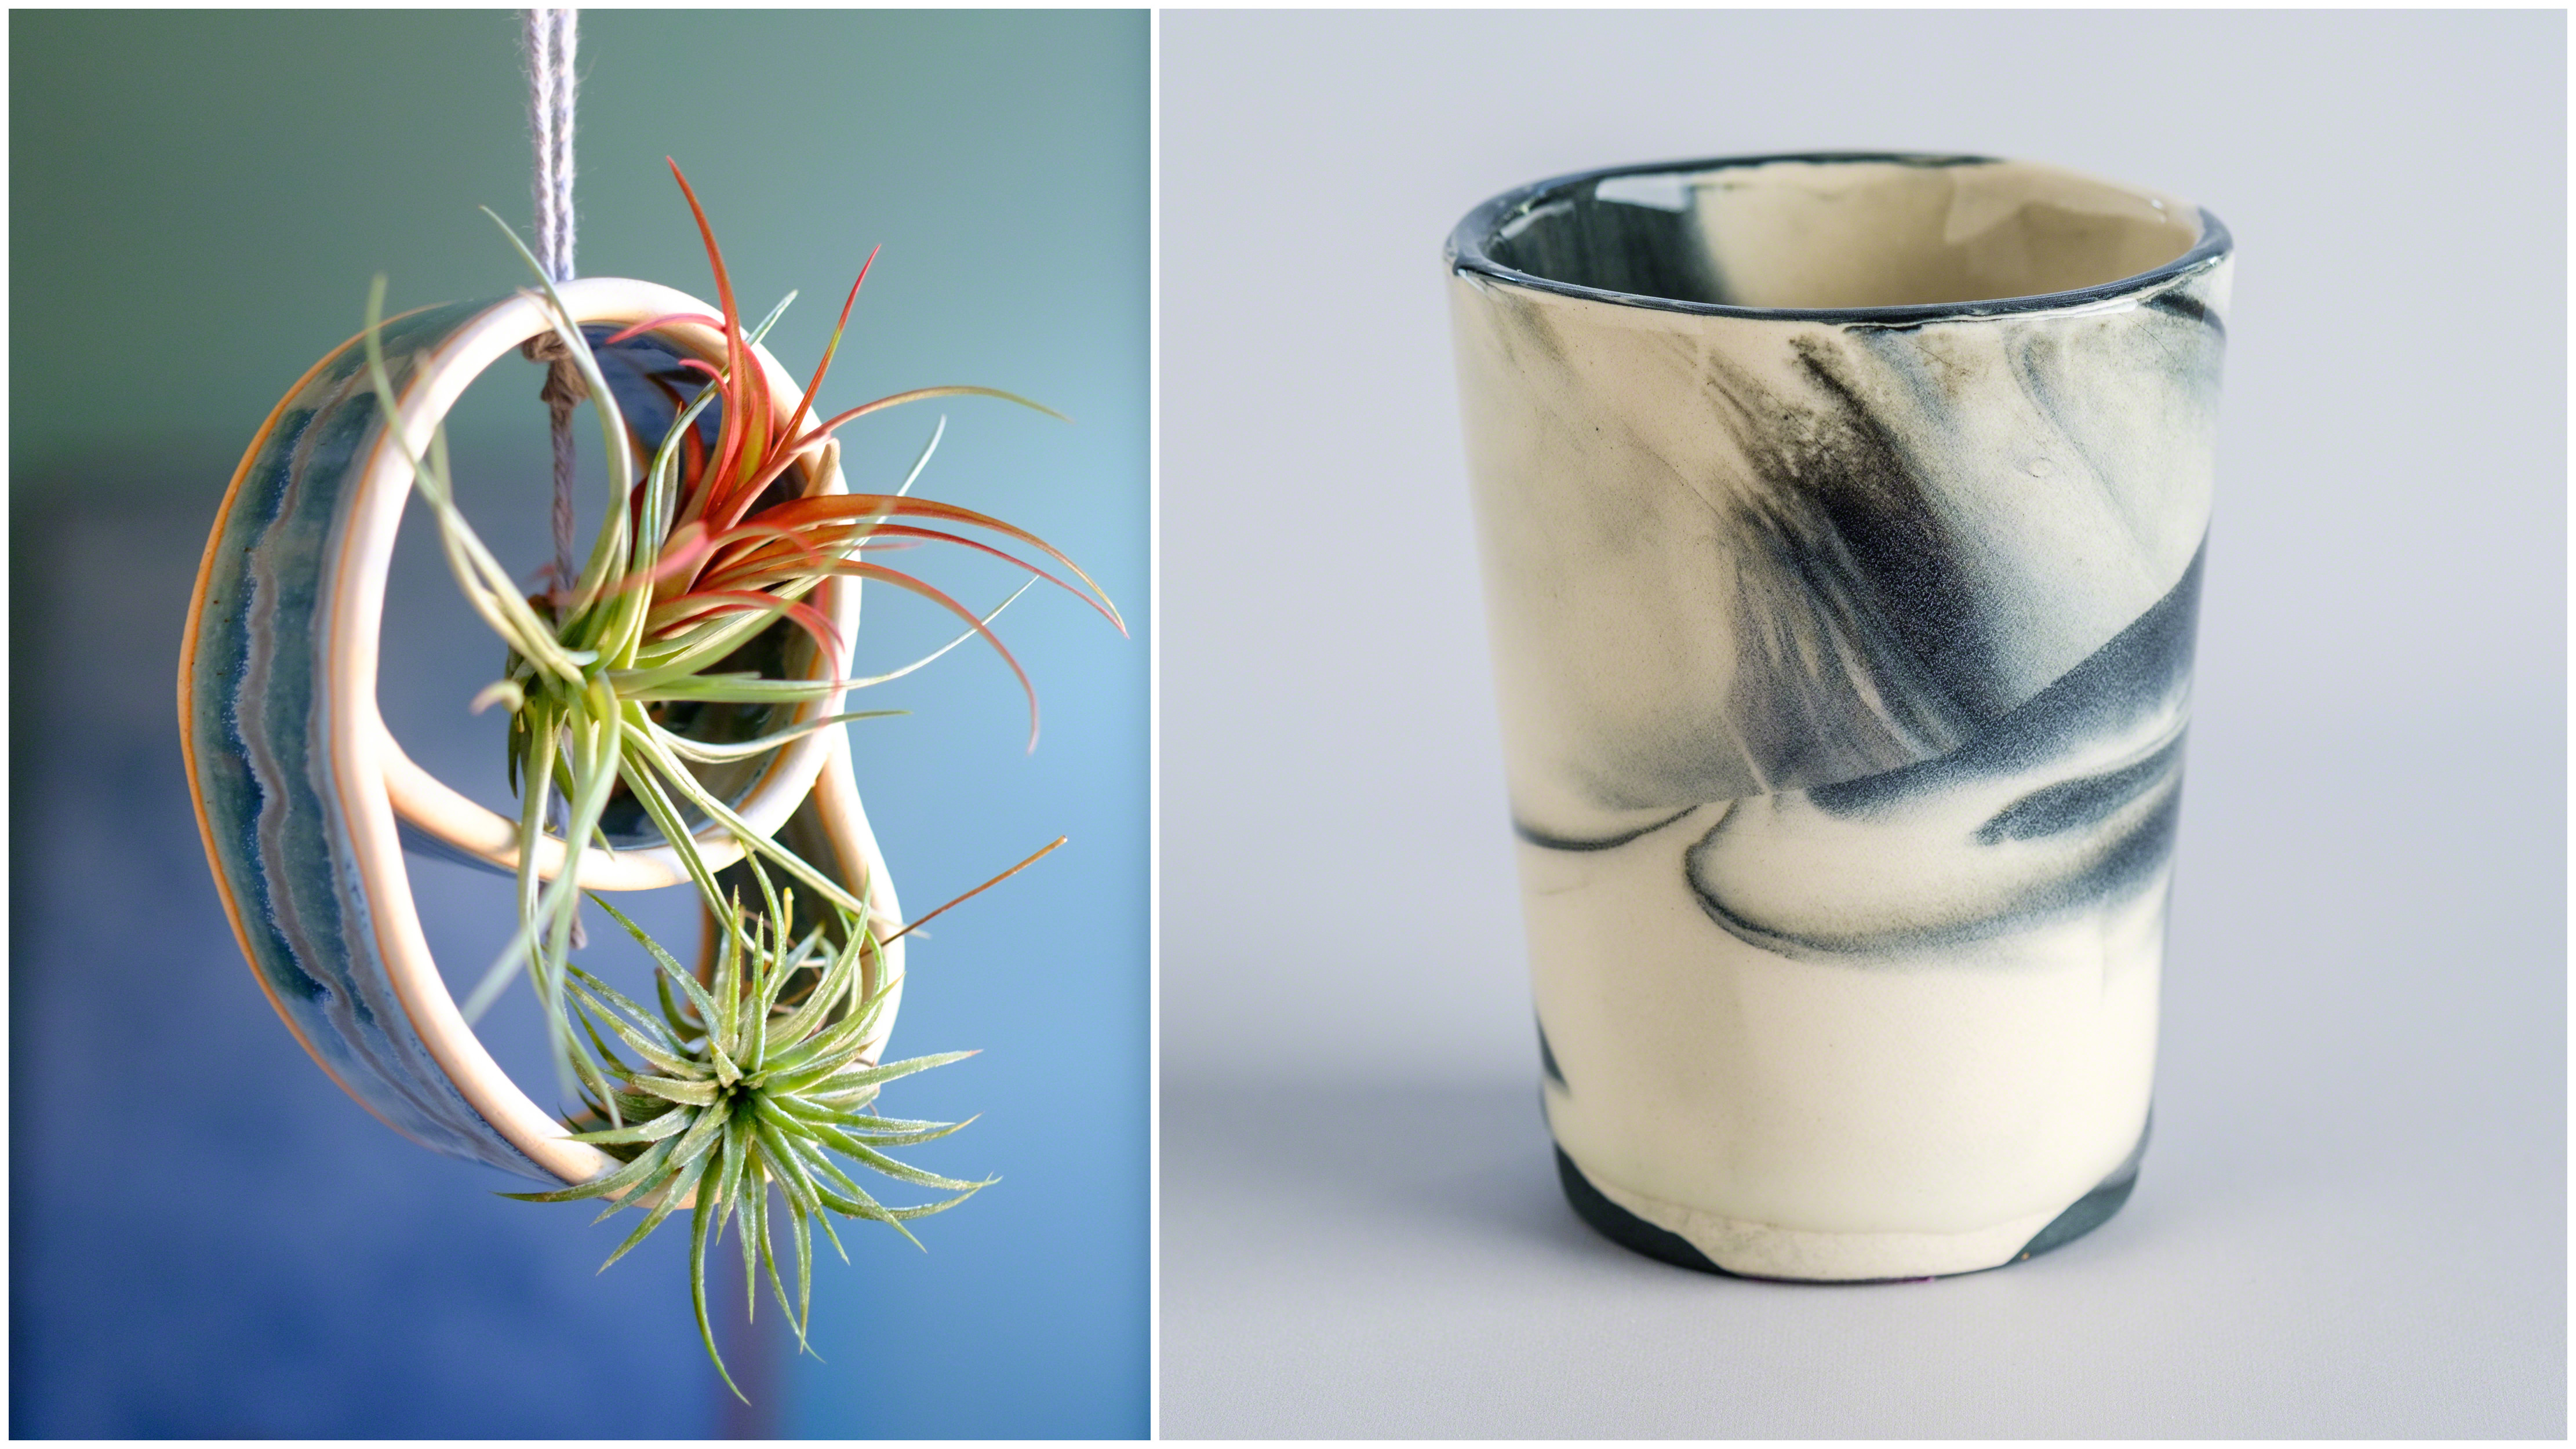
- Background: Don’t feel that you need to get too fancy with your backdrop. For the most part, the simpler the background the more your product will stand out. If you require a fully white background setup then you will probably want to look into a lighting setup that uses off-camera strobes or lights, unless you’re okay with the background not being pure white (window-light tends to make white backgrounds more grey). For all other setups a simple backdrop (or a wall) on a nice table is likely all you’ll need. Another option you could consider is a graduated backdrop. You can find them online and they work well for simple small products.

-
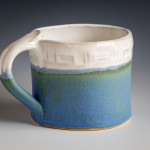
- This ceramic mug was photographed on a black/white graduated paper backdrop.

-
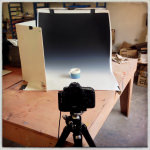
- This shows my graduated background window-light setup.

-
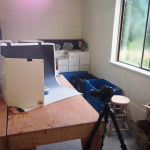
- This shows my graduated background window-light setup.
Camera Gear
Now let’s discuss camera gear. Here are some of the things you might need (or will want to consider using) for product photographs:
- A good-quality camera: An expensive SLR or interchangeable lens camera is not necessarily required to get good product shots. Many of the point-and-shoot cameras and mobile phones today might be all you need to get a good image. However, a camera that allows you to swap out lenses will also give you more opportunity to blur your background, hide elements to the left and right of your subject, or even photograph up close (macro) for smaller items. If all you have is a mobile phone, you may want to try using one of the many interchangeable lens options, such as Olloclip or Moment. And, if you’re not sure what camera or lens to use, try renting from your local camera shop (or an online site such as Borrowlenses.com or Adorama Rentals) before you splurge and commit to something.
- An appropriate lens: If you do have a camera where you can swap out lenses, then you’ll want to invest in a lens appropriate for the type of images you are photographing. More importantly, if you want to photograph small items (such as jewelry, for example), then you will want to use a macro lens. This will allow you to get in very close to your items and show their fine details. If your products are a bit larger, then you can likely get by with a mid-range zoom (such as an 18–55mm or 24–70mm lens).
- A tripod: I highly recommend a tripod for tabletop work. When using natural window light there may not be enough light to hand-hold the camera without introducing camera shake, so a tripod is a requirement for most work.
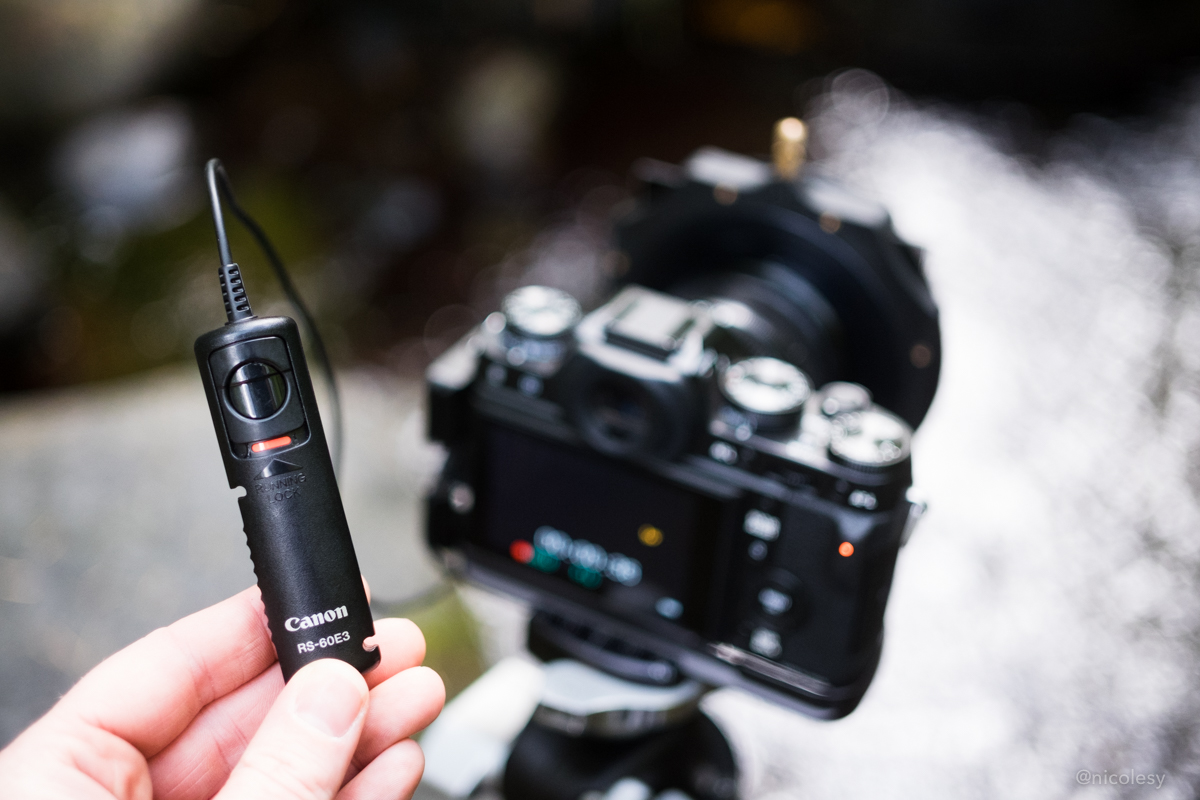
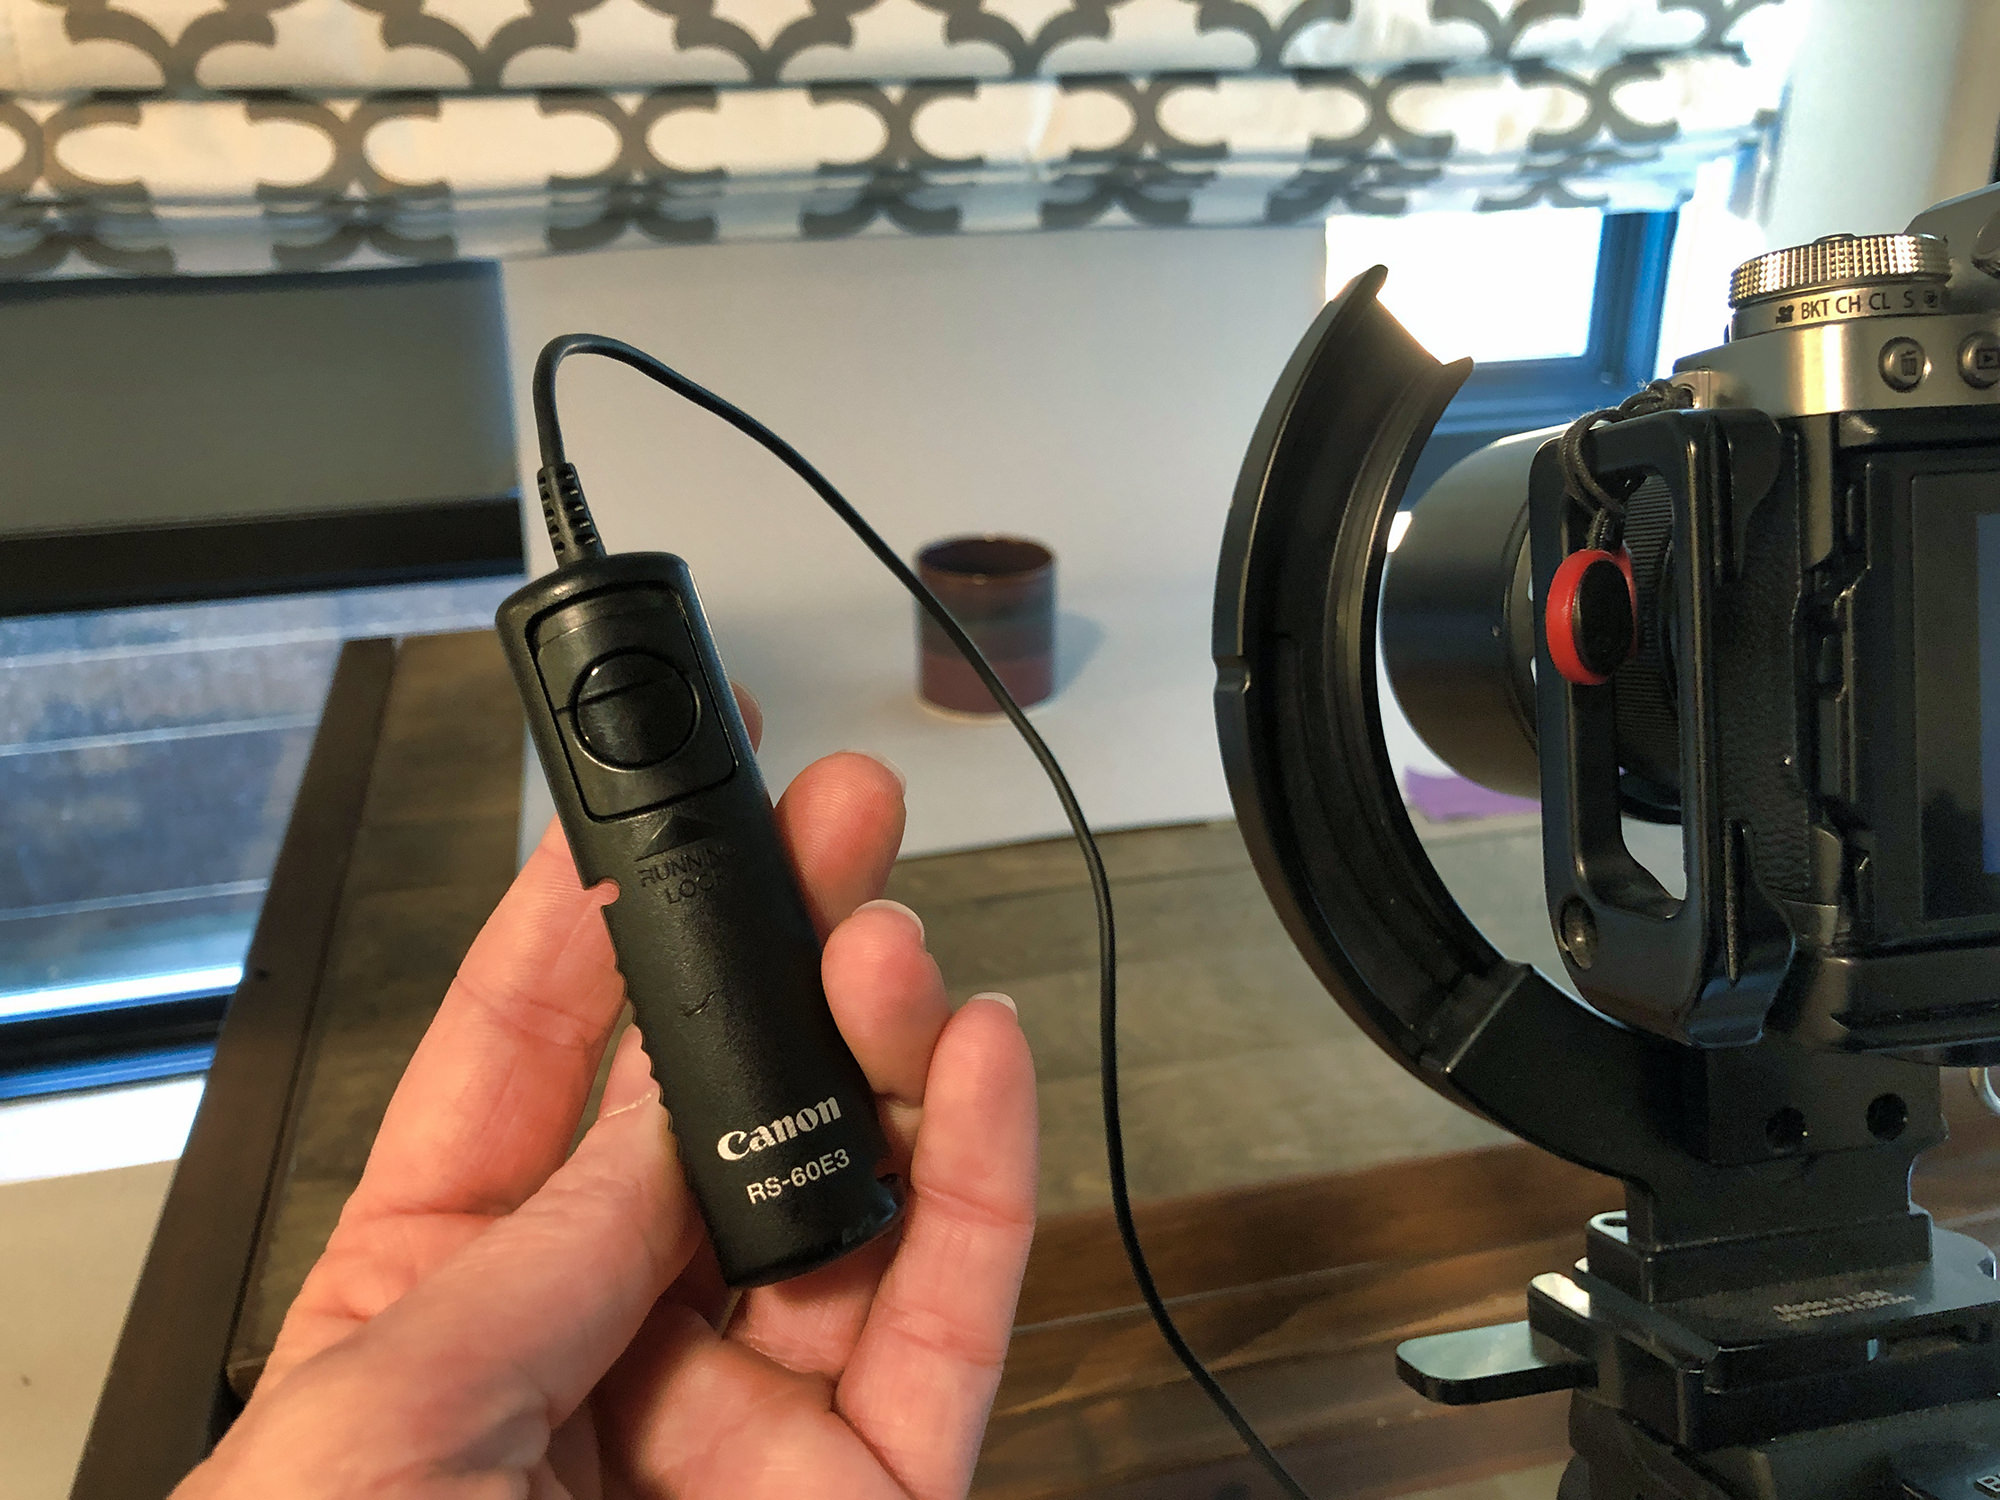
- Cable Release or Self Timer: If you are using a camera on a tripod, you’ll want to consider either remotely triggering the shutter or using a self-timer. This will allow you to trigger the shutter without touching the camera and will prevent camera shake if your shutter speed is a bit on the slow side.
-
- This is a cable/remote release I use with my Fujifilm camera. I use this both for indoor tabletop work, as well as landscape photography.
-

- This is a cable/remote release I use with my Fujifilm camera. I use this both for indoor tabletop work, as well as landscape photography.
-
Lighting
Now, let’s discuss the best way to light your products.
- Diffused window light: Make sure that the light from your window is not harsh. If your window has light-beams coming through on sunny days, then you may need to use a diffuser to subdue it.
- Constant LED Lights: If you don’t have sufficient window light then you will need to create the light. This is a great alternative to using window-light because the light behaves similarly and is easy to manipulate. With constant lights you can spend as much or as little as you would like. I have a few I got on Amazon that are not very pricey, and they do a good job of adding fill light or even fully-lighting a small scene when I need to. (Please scroll to the resources section at the bottom to get links to these products.)
-
- This is a simple two-light setup with inexpensive constant LED lights.
-
- A Diffuser: A translucent white diffuser is a great item to have handy, and can help soften the light coming through your window. This will help prevent harsh shadows on your subject and will give you a more even light across your scene. In fact, even with the diffused light coming in from my window, I still use one or two diffusers to further soften and spread the light. Diffusers go in-between the light source (in this case, a window) and the subject. You can purchase diffusers in a camera store or online, or you can create your own using sheer, translucent, white fabric. This video shows one way you can use diffusers with tabletop photography.
- A Reflector: You may find that there are too many shadows on your subject, so one way to bring that detail back is to use a reflector. You don’t need anything fancy, in fact most of the time I use a piece of white foam board that I cut in half and taped back together (this way it forms a “bookend” and stands up on its own). I do have some hand-held silver reflectors to bounce light into the front if-needed, but if you don’t feel like getting anything fancy, just tape some tin-foil over a piece of cardboard.
- Lighting Direction: The location of your light in relation to your camera can make a difference in what the photo looks like. With food photography, I prefer either a back-lit or side-lit subject, however what you choose will differ based on your subject’s size, color, and shape. Click here to read an article here on my blog that discusses three different lighting setups (back, front, and side light).
-
- Back light
-
- Side light
-

- Front light
-
- Turn of all interior lights! When using daylight as your main light source, it’s important to make sure that no other light is “leaking” into your scene. This will not only affect the light and shadows in your scene, but it can also add unwanted color-casts to your images.


Camera Settings
Now that we have the setup and camera gear ready to go, let’s discuss the camera settings to use in order to get the best quality photos possible.
- Consider photographing in the RAW format: If you are new to photography, then this might be a little intimidating. When you photograph in raw, you will then be required to edit the photograph on your computer using an application such as Lightroom or Photoshop. This file format gives you a lot of flexibility with your editing, particularly with the white balance. However, if you’re not quite ready to jump into raw, then at least consider the RAW+JPEG format, if it is an option for your camera mode. This way you can still quickly use the JPEG images, while still retaining the raw files for future use if required. The raw format is a larger file size and will take up more space on both your card and camera, so that’s something to keep in mind if drive space is important to you.
- Use Aperture Priority or Manual Mode: All DSLRs and Mirrorless cameras allow you to have complete control over the camera settings. I suggest either going into full manual mode, or use Aperture Priority (my personal preference). This will ensure that your aperture, ISO, and shutter speed settings are all at the best settings for your setup.
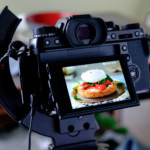
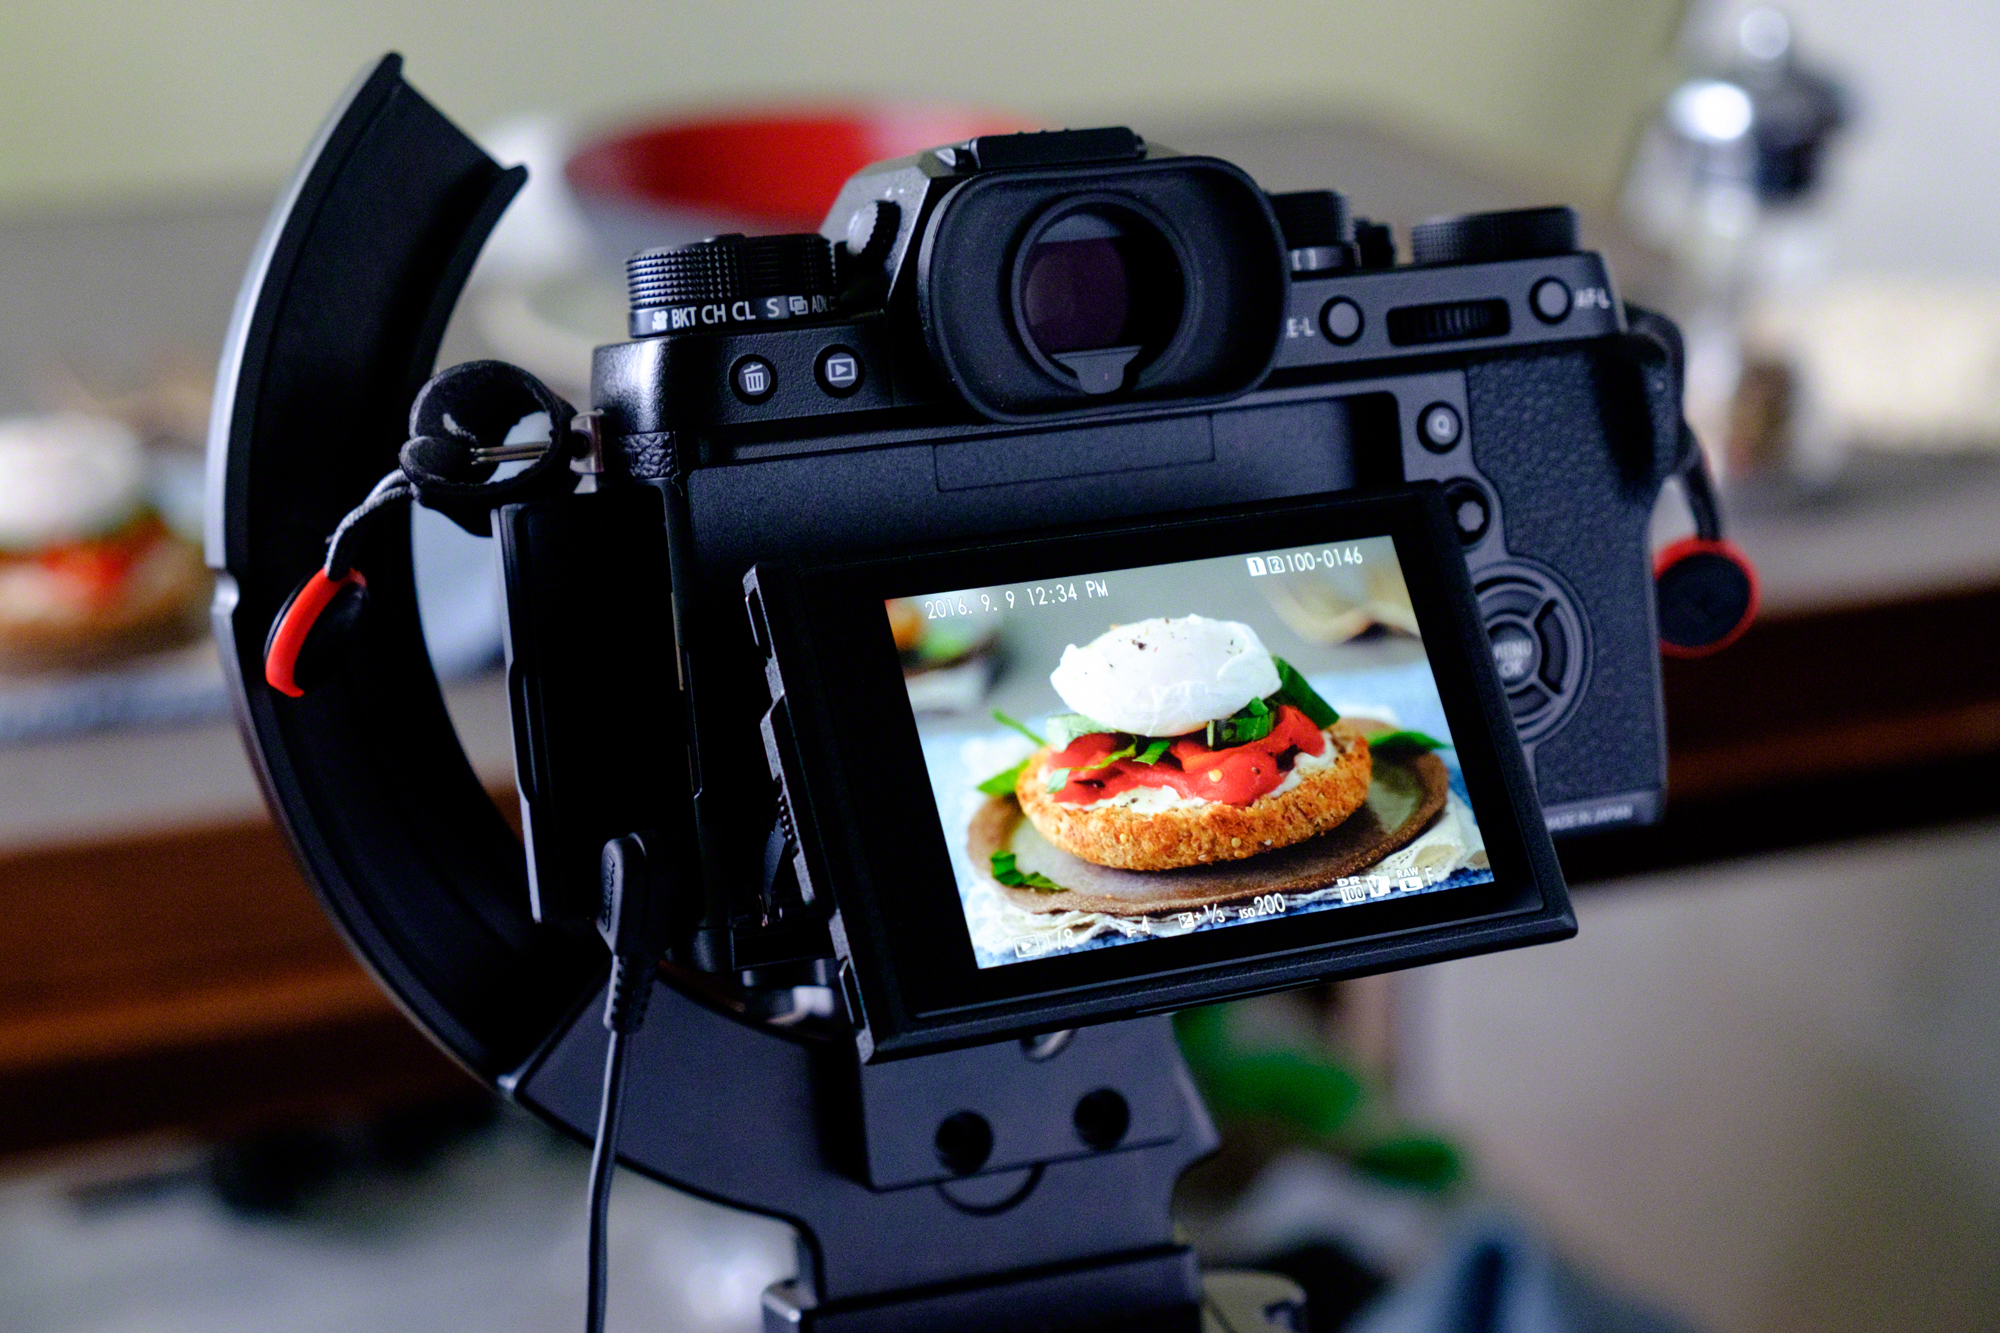
- Take advantage of live view: If you have a camera that allows you to view the image on the LCD when photographing, use it! Nearly all modern cameras have this feature, and mirrorless cameras will show you a “live preview” by default. This will help give you the best instant feedback for setting up your shot. Note that you might need to go into the settings to make sure that the changes you make reflect in the live image; some cameras are set to always show a “nicely exposed” preview on the back, regardless of your camera’s settings.
-
- The Fujifilm X Series cameras allow me to easily view the scene through the back of my camera.
-
- Use a low ISO: To get the clearest photos possible, use the lowest native ISO setting on your camera. For many cameras this will be either 100 or 200. This will ensure that you have the least amount of camera noise (or grain) in your images.
- Set your aperture appropriately: The aperture is one element that controls the amount of blur in a photograph (the technical term for the amount of focus area in a photograph is “depth of field”). When the aperture set to a low number (such as f/2.8 or f/4) your background (and foreground) are going to be much more out of focus, giving you a small/narrow depth of field. At a higher setting (such as f/8 or f/11) your entire image will be more in focus giving you a large/wide depth of field. If you want your entire subject in focus then you may need to play around with this setting until you get it balanced properly. Alternately, if you want to blur your background, you’ll want to be careful to not always set the aperture too low or too much of your subject will be blurry. Keep in mind that focal length also plays a role in how much blur is added to the image, which is referred to as “lens compression”. For example, at any given aperture, a long lens (100mm) will add more blur to the background than a wider lens (24mm). If you’d like to learn more, please read this article on lens compression.
- Don’t worry about the shutter speed: For natural-light still-life tabletop setups photographed from a tripod, there’s no need to worry about the shutter speed. I would suggest that you at least be aware of it, because you’ll want to make sure you are not touching or bumping the camera (or table) if the exposure is a few seconds long (which is not uncommon for natural-light indoor exposures with a low ISO setting). Doing so could add camera shake to the photo, making it appear blurry.
- Use a proper white balance: The white balance is the setting that tells the camera what the proper colors in the scene should be, based on the type of light you are using to light your subject. Most new cameras will do a good job in the “auto” setting, so you can probably set that and let it work its magic. If you want to be especially accurate, or have a product where the specific color is very important, then you might want to use the Raw format and also consider using an X-Rite Color Checker Passport.
- Photographing with a mobile phone? Use a dedicated camera app: The native camera apps on most phones do not have full manual capabilities. I would suggest using a separate camera app that allows you to manually set the exposure, ISO, white balance, etc. Some even allow you to photograph in Raw, such as the Adobe® Lightroom® CC app.
Resources:
- Backdrops:
- Diffusers and reflectors:
- Off-camera lights:
- Other gear and equipment:
- Articles and other learning resources:
- My Food Photography book on Amazon
- My article on Lens Compression
- Photigy.com — If you are interested in commercial product photography, check out Alex Koloskov’s site Photigy. He is a master at creating beautiful product images with splashes and more.
View all of my camera equipment on Amazon
I hope you found this information useful! Please feel free to comment below if you have any questions about this type of setup.
Do you have a blog, social media account, or online store, but are struggling with creating great product shots? A well-composed and beautifully-lit photograph can draw a reader or customer in, and the good news is that you don’t need a fancy studio (or even an expensive camera) to create these images yourself. In this article I’m going to show you the basics of a very simple, natural-light setup, using a small area of your room and simple camera gear. (By the way, this setup is nearly identical to the lighting setup I use for much of my food photography, and can be easily adapted to photograph any small items as well.) Please note: This article contains affiliate links.
Jump to the resources section for links to gear and other items mentioned in this article.
Table Setup and Location
The first thing you will want to do is establish a location and tabletop to use for your photography. This can be a permanent setup, or something you put together temporarily as the need arises.
- Window: Finding an ideal location in your home or office is the first step in creating your photographs. Locate a window with sufficient light coming, but and try to avoid one with too much shade, such as a window in a basement beneath a patio. If you happen to have a North-facing window (for those on the Northern-hemisphere) that will be a good start, because the light coming through will never be direct sunlight. However any window with decent sunlight coming through in your home will work, provided that you can add diffusion when necessary (which I’ll get into later on in this article).
- Tabletop: For your work/shooting surface, any sturdy table will do. I tend to stay away from folding tables, or anything too flimsy, because they can wobble or even fall over much more easily than a standard table. For the height of the table, this will be up to you. If you plan on photographing your items at eye-level, a normal sturdy table will do just fine. However if you prefer to do “lay flat” style (where you point the camera straight down on the items from above) then a coffee-table height—or a nice arrangement on the floor—might be best for your setup.
-
- This is an example of a “lay-flat” photography setup. Here I set the items on the floor, but you can also use a coffee-table height surface as well.
-
- This is my resulting image from being inspired by my Instagram photograph. (© Nicole S. Young — nicolesy.com)
-
- Background: Don’t feel that you need to get too fancy with your backdrop. For the most part, the simpler the background the more your product will stand out. If you require a fully white background setup then you will probably want to look into a lighting setup that uses off-camera strobes or lights, unless you’re okay with the background not being pure white (window-light tends to make white backgrounds more grey). For all other setups a simple backdrop (or a wall) on a nice table is likely all you’ll need. Another option you could consider is a graduated backdrop. You can find them online and they work well for simple small products.
-
- This ceramic mug was photographed on a black/white graduated paper backdrop.
-
- This shows my graduated background window-light setup.
-
- This shows my graduated background window-light setup.
Camera Gear
Now let’s discuss camera gear. Here are some of the things you might need (or will want to consider using) for product photographs:
- A good-quality camera: An expensive SLR or interchangeable lens camera is not necessarily required to get good product shots. Many of the point-and-shoot cameras and mobile phones today might be all you need to get a good image. However, a camera that allows you to swap out lenses will also give you more opportunity to blur your background, hide elements to the left and right of your subject, or even photograph up close (macro) for smaller items. If all you have is a mobile phone, you may want to try using one of the many interchangeable lens options, such as Olloclip or Moment. And, if you’re not sure what camera or lens to use, try renting from your local camera shop (or an online site such as Borrowlenses.com or Adorama Rentals) before you splurge and commit to something.
- An appropriate lens: If you do have a camera where you can swap out lenses, then you’ll want to invest in a lens appropriate for the type of images you are photographing. More importantly, if you want to photograph small items (such as jewelry, for example), then you will want to use a macro lens. This will allow you to get in very close to your items and show their fine details. If your products are a bit larger, then you can likely get by with a mid-range zoom (such as an 18–55mm or 24–70mm lens).
- A tripod: I highly recommend a tripod for tabletop work. When using natural window light there may not be enough light to hand-hold the camera without introducing camera shake, so a tripod is a requirement for most work.
- Cable Release or Self Timer: If you are using a camera on a tripod, you’ll want to consider either remotely triggering the shutter or using a self-timer. This will allow you to trigger the shutter without touching the camera and will prevent camera shake if your shutter speed is a bit on the slow side.
-
- This is a cable/remote release I use with my Fujifilm camera. I use this both for indoor tabletop work, as well as landscape photography.
-
- This is a cable/remote release I use with my Fujifilm camera. I use this both for indoor tabletop work, as well as landscape photography.
-
Lighting
Now, let’s discuss the best way to light your products.
- Diffused window light: Make sure that the light from your window is not harsh. If your window has light-beams coming through on sunny days, then you may need to use a diffuser to subdue it.
- Constant LED Lights: If you don’t have sufficient window light then you will need to create the light. This is a great alternative to using window-light because the light behaves similarly and is easy to manipulate. With constant lights you can spend as much or as little as you would like. I have a few I got on Amazon that are not very pricey, and they do a good job of adding fill light or even fully-lighting a small scene when I need to. (Please scroll to the resources section at the bottom to get links to these products.)
-
- This is a simple two-light setup with inexpensive constant LED lights.
-
- A Diffuser: A translucent white diffuser is a great item to have handy, and can help soften the light coming through your window. This will help prevent harsh shadows on your subject and will give you a more even light across your scene. In fact, even with the diffused light coming in from my window, I still use one or two diffusers to further soften and spread the light. Diffusers go in-between the light source (in this case, a window) and the subject. You can purchase diffusers in a camera store or online, or you can create your own using sheer, translucent, white fabric. This video shows one way you can use diffusers with tabletop photography.
- A Reflector: You may find that there are too many shadows on your subject, so one way to bring that detail back is to use a reflector. You don’t need anything fancy, in fact most of the time I use a piece of white foam board that I cut in half and taped back together (this way it forms a “bookend” and stands up on its own). I do have some hand-held silver reflectors to bounce light into the front if-needed, but if you don’t feel like getting anything fancy, just tape some tin-foil over a piece of cardboard.
- Lighting Direction: The location of your light in relation to your camera can make a difference in what the photo looks like. With food photography, I prefer either a back-lit or side-lit subject, however what you choose will differ based on your subject’s size, color, and shape. Click here to read an article here on my blog that discusses three different lighting setups (back, front, and side light).
-
- Back light
-
- Side light
-
- Front light
-
- Turn of all interior lights! When using daylight as your main light source, it’s important to make sure that no other light is “leaking” into your scene. This will not only affect the light and shadows in your scene, but it can also add unwanted color-casts to your images.
Camera Settings
Now that we have the setup and camera gear ready to go, let’s discuss the camera settings to use in order to get the best quality photos possible.
- Consider photographing in the RAW format: If you are new to photography, then this might be a little intimidating. When you photograph in raw, you will then be required to edit the photograph on your computer using an application such as Lightroom or Photoshop. This file format gives you a lot of flexibility with your editing, particularly with the white balance. However, if you’re not quite ready to jump into raw, then at least consider the RAW+JPEG format, if it is an option for your camera mode. This way you can still quickly use the JPEG images, while still retaining the raw files for future use if required. The raw format is a larger file size and will take up more space on both your card and camera, so that’s something to keep in mind if drive space is important to you.
- Use Aperture Priority or Manual Mode: All DSLRs and Mirrorless cameras allow you to have complete control over the camera settings. I suggest either going into full manual mode, or use Aperture Priority (my personal preference). This will ensure that your aperture, ISO, and shutter speed settings are all at the best settings for your setup.
- Take advantage of live view: If you have a camera that allows you to view the image on the LCD when photographing, use it! Nearly all modern cameras have this feature, and mirrorless cameras will show you a “live preview” by default. This will help give you the best instant feedback for setting up your shot. Note that you might need to go into the settings to make sure that the changes you make reflect in the live image; some cameras are set to always show a “nicely exposed” preview on the back, regardless of your camera’s settings.
-
- The Fujifilm X Series cameras allow me to easily view the scene through the back of my camera.
-
- Use a low ISO: To get the clearest photos possible, use the lowest native ISO setting on your camera. For many cameras this will be either 100 or 200. This will ensure that you have the least amount of camera noise (or grain) in your images.
- Set your aperture appropriately: The aperture is one element that controls the amount of blur in a photograph (the technical term for the amount of focus area in a photograph is “depth of field”). When the aperture set to a low number (such as f/2.8 or f/4) your background (and foreground) are going to be much more out of focus, giving you a small/narrow depth of field. At a higher setting (such as f/8 or f/11) your entire image will be more in focus giving you a large/wide depth of field. If you want your entire subject in focus then you may need to play around with this setting until you get it balanced properly. Alternately, if you want to blur your background, you’ll want to be careful to not always set the aperture too low or too much of your subject will be blurry. Keep in mind that focal length also plays a role in how much blur is added to the image, which is referred to as “lens compression”. For example, at any given aperture, a long lens (100mm) will add more blur to the background than a wider lens (24mm). If you’d like to learn more, please read this article on lens compression.
- Don’t worry about the shutter speed: For natural-light still-life tabletop setups photographed from a tripod, there’s no need to worry about the shutter speed. I would suggest that you at least be aware of it, because you’ll want to make sure you are not touching or bumping the camera (or table) if the exposure is a few seconds long (which is not uncommon for natural-light indoor exposures with a low ISO setting). Doing so could add camera shake to the photo, making it appear blurry.
- Use a proper white balance: The white balance is the setting that tells the camera what the proper colors in the scene should be, based on the type of light you are using to light your subject. Most new cameras will do a good job in the “auto” setting, so you can probably set that and let it work its magic. If you want to be especially accurate, or have a product where the specific color is very important, then you might want to use the Raw format and also consider using an X-Rite Color Checker Passport.
- Photographing with a mobile phone? Use a dedicated camera app: The native camera apps on most phones do not have full manual capabilities. I would suggest using a separate camera app that allows you to manually set the exposure, ISO, white balance, etc. Some even allow you to photograph in Raw, such as the Adobe® Lightroom® CC app.
Resources:
- Backdrops:
- Diffusers and reflectors:
- Off-camera lights:
- Other gear and equipment:
- Articles and other learning resources:
- My Food Photography book on Amazon
- My article on Lens Compression
- Photigy.com — If you are interested in commercial product photography, check out Alex Koloskov’s site Photigy. He is a master at creating beautiful product images with splashes and more.
View all of my camera equipment on Amazon
I hope you found this information useful! Please feel free to comment below if you have any questions about this type of setup.

Nicole is a photographer, published author, and educator specializing in Lightroom, Photoshop, and photography. She is best known for her books on food photography but is widely versed in various photographic genres, including landscape, nature, stock, travel, and experimental imagery.


This was very good. Thanks for your articles and info.
Hi Nicole, this is helpful and interesting for a type of photography I have never tried but may some day.
What’s up to every one, it’s truly a nice for me to
visit this web page, it contains useful Information.
What’s up mates, pleasant paragraph and pleasant urging commented
at this place, I am really enjoying by these.
You ought to be a part of a contest for one of the greatest blogs on the net.
I am going to recommend this web site!
It’s enormous that you are getting ideas from this article as well
as from our argument made here.
Nicole, currently reading your book Food Photography — it has been so helpful to me. So many Ah-aha moments.
Also, thank you for this article! Like your book, it’s a wealth of great tips!
Further, so, so many photographers recommend a North-facing window if you live in the Northern hemisphere. BUT you’re the FIRST to also share why! Curious minds like the full 411.
Can’t wait to retake images for my site with your valuable tips! Now, I might just be able to make the images I envision. Thanks!
Excellent!!! I have been looking for an explanation like this for quite some time. Thank You, Nicole ( ͡° ͜ʖ ͡°)
which mount is this that is attached to your camera
That’s called a “Custom Bracket”, here’s a link for you: https://www.custombrackets.com/products/digital-pro-sv
Thanks a lot for such a great article. this is so useful to me, I am looking forward to many such wonderful articles from you.
Highly appreciated for sharing a nice blog, very professional tutorial. I think this company can be your right choice. They have many experts to do these job.
Great post to set the perfect background for product photography :)