
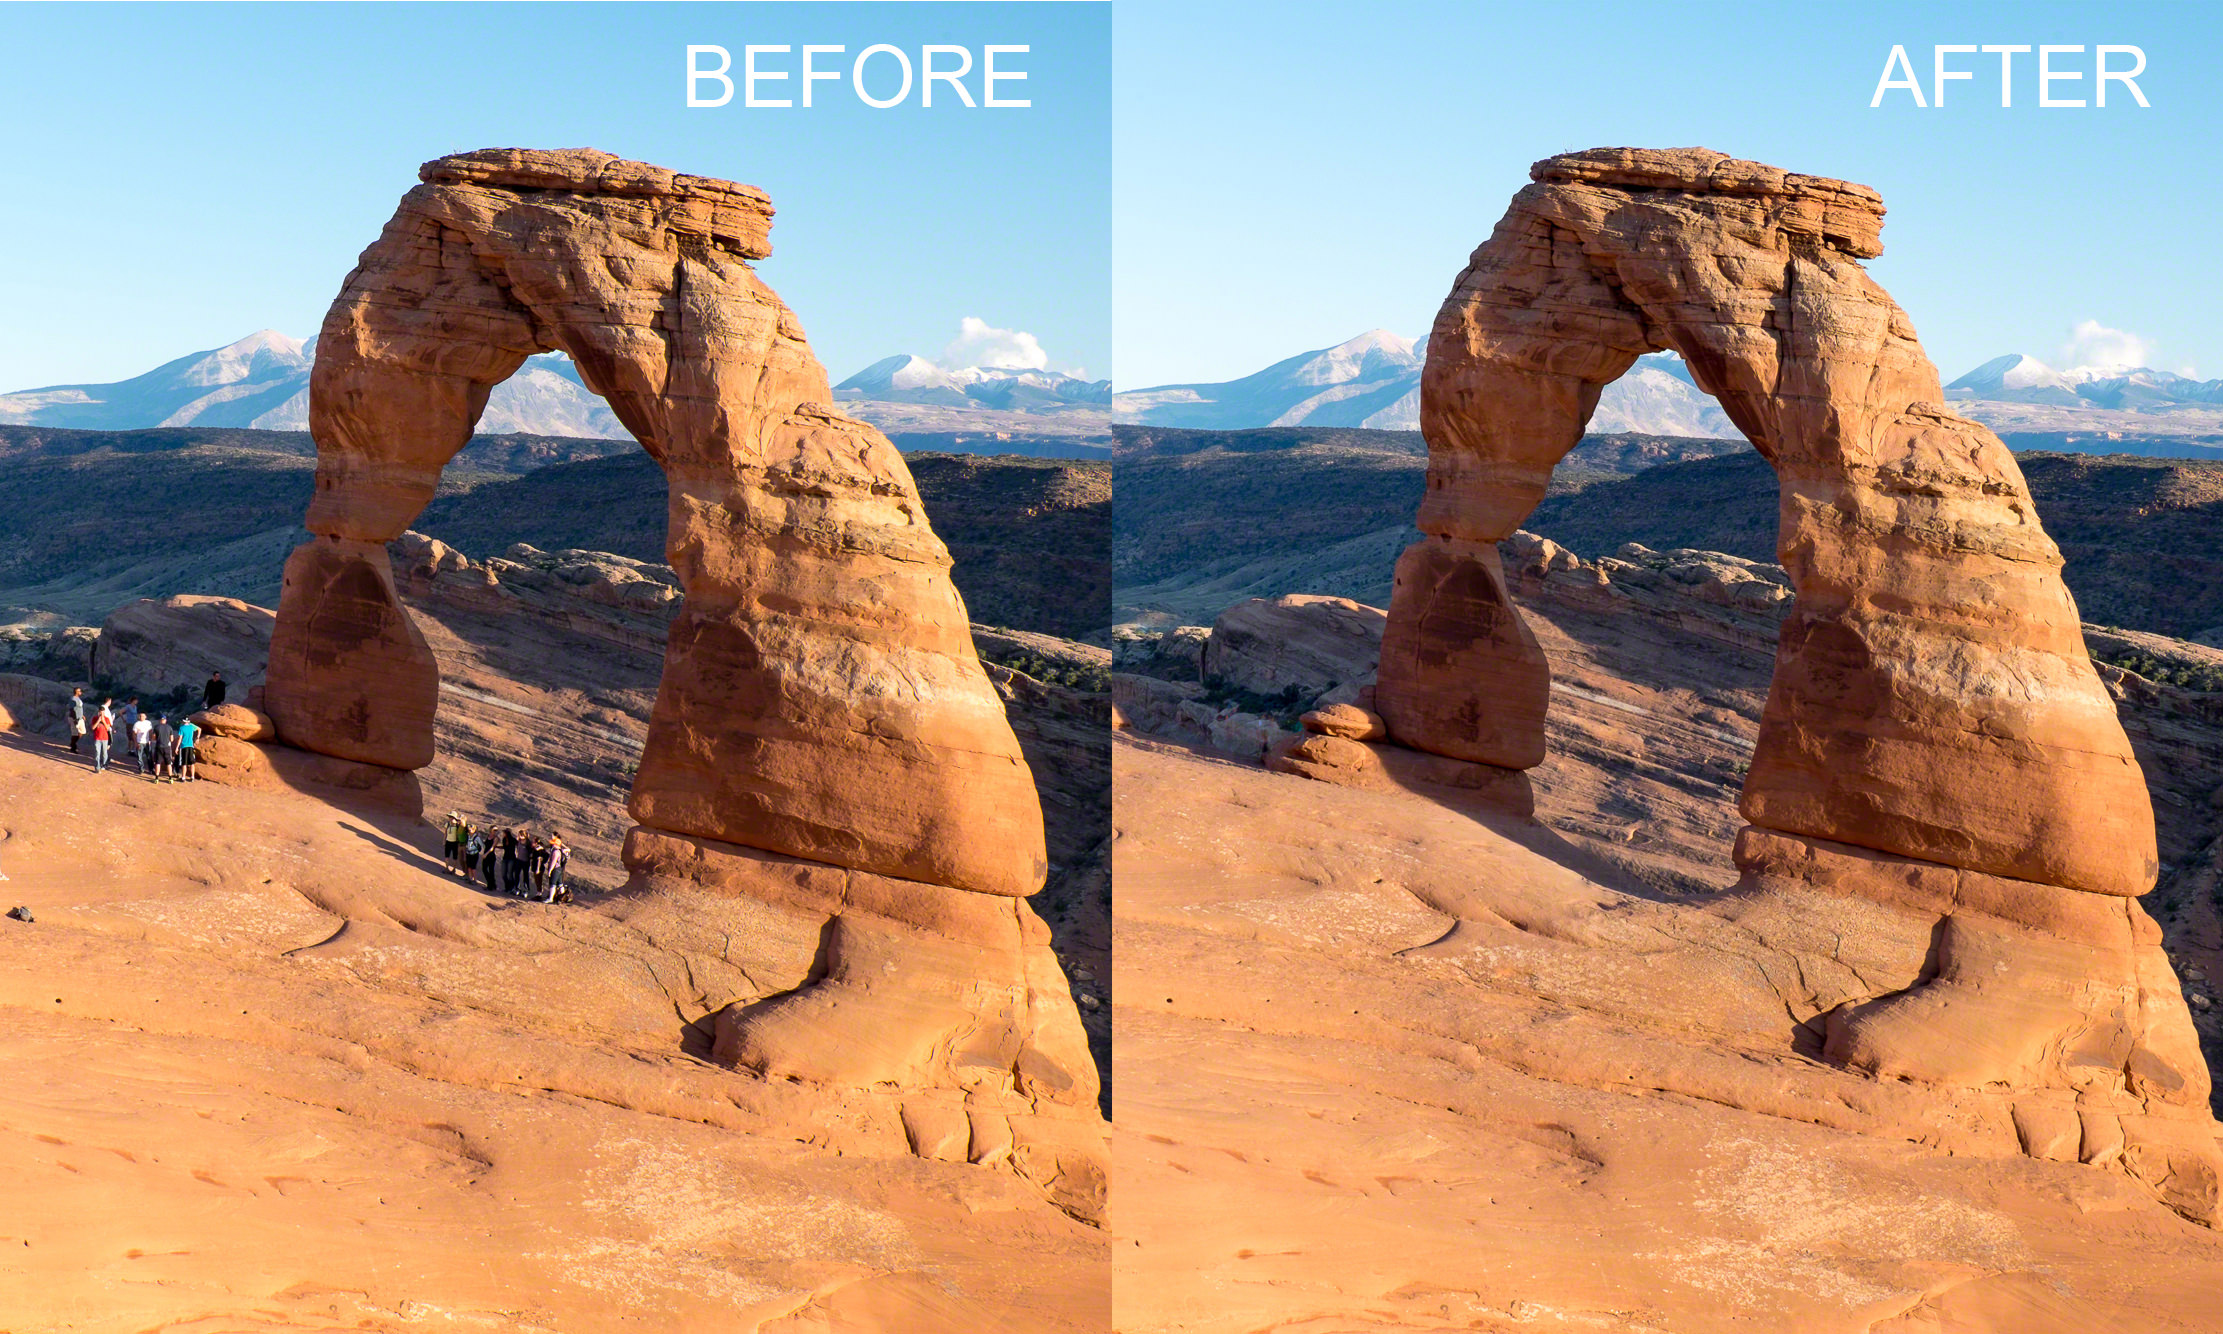
If you have traveled to anywhere considered “touristy”, then you probably already understand the woes of being a photographer who has too many people in the scene they want to photograph. Even if it’s just one person in your way, by the time that person leaves it is usually replaced with another (or more). The good news is, if the people are in constant motion (moving or walking around the scene), then you can set up your shot and use Photoshop to make them disappear!
What you’ll need to get started with this tutorial:
- Camera (set to manual mode)
- Tripod
- Lightroom & Photoshop
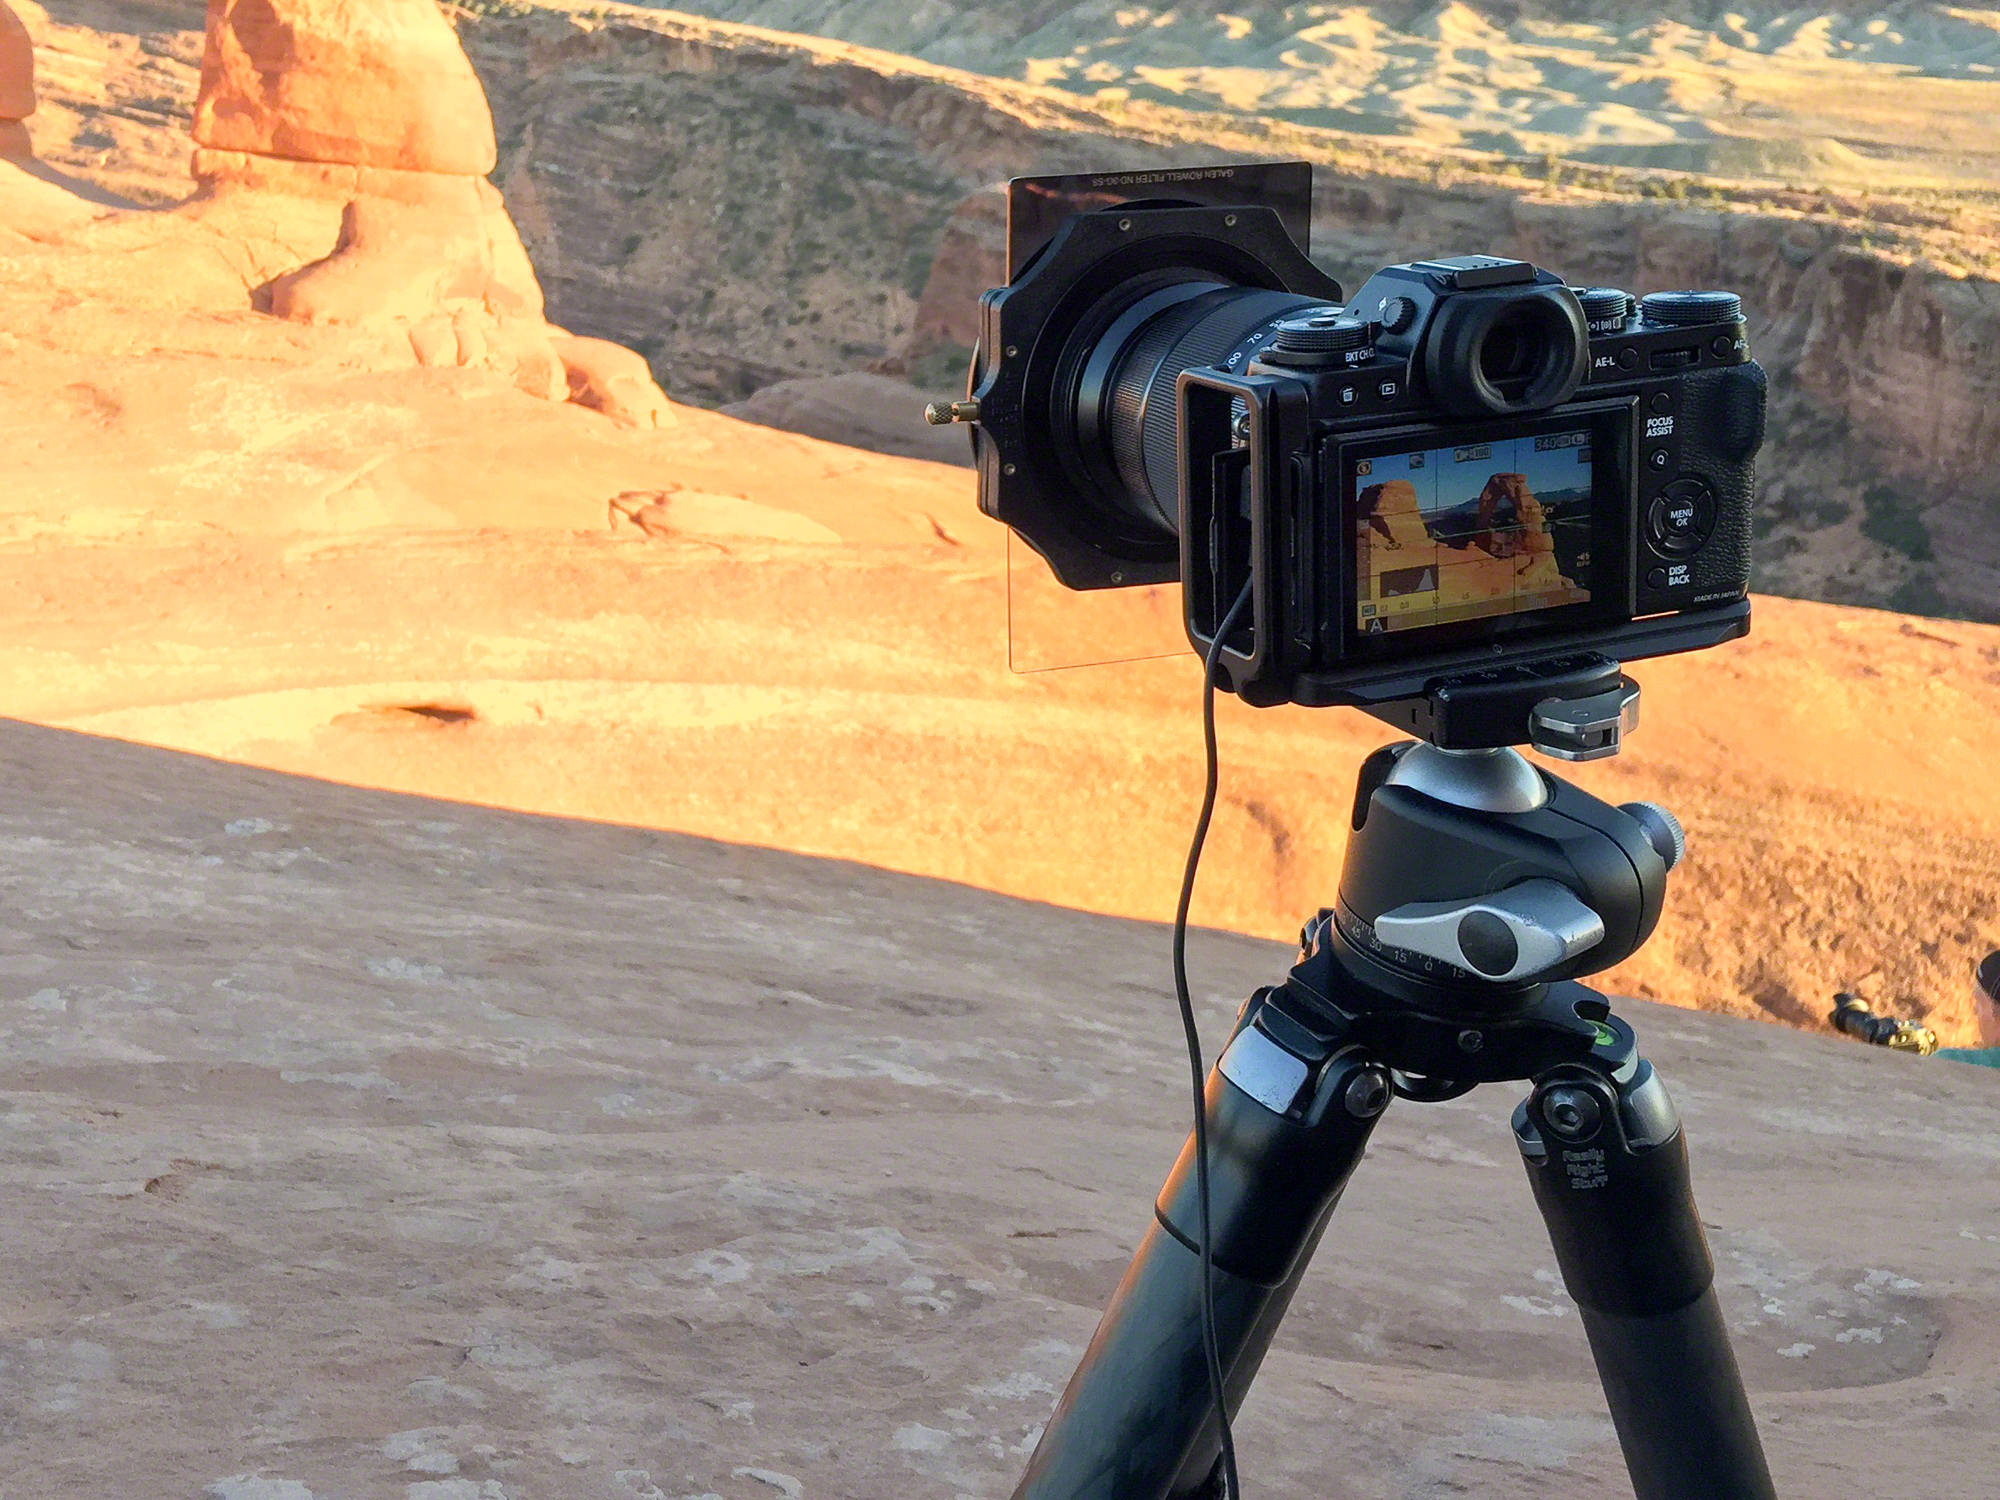
Step 1: Photograph the scene several times
The first step here is to place your camera on a tripod, set it to Manual mode, and create several photographs of the same scene. Try to space them apart a few seconds, and if you have an in-camera intervalometer, that is a good way to set it up and let it create the frames for you. You need at least 10-20 images for this process to work well, and if you choose you can include more.
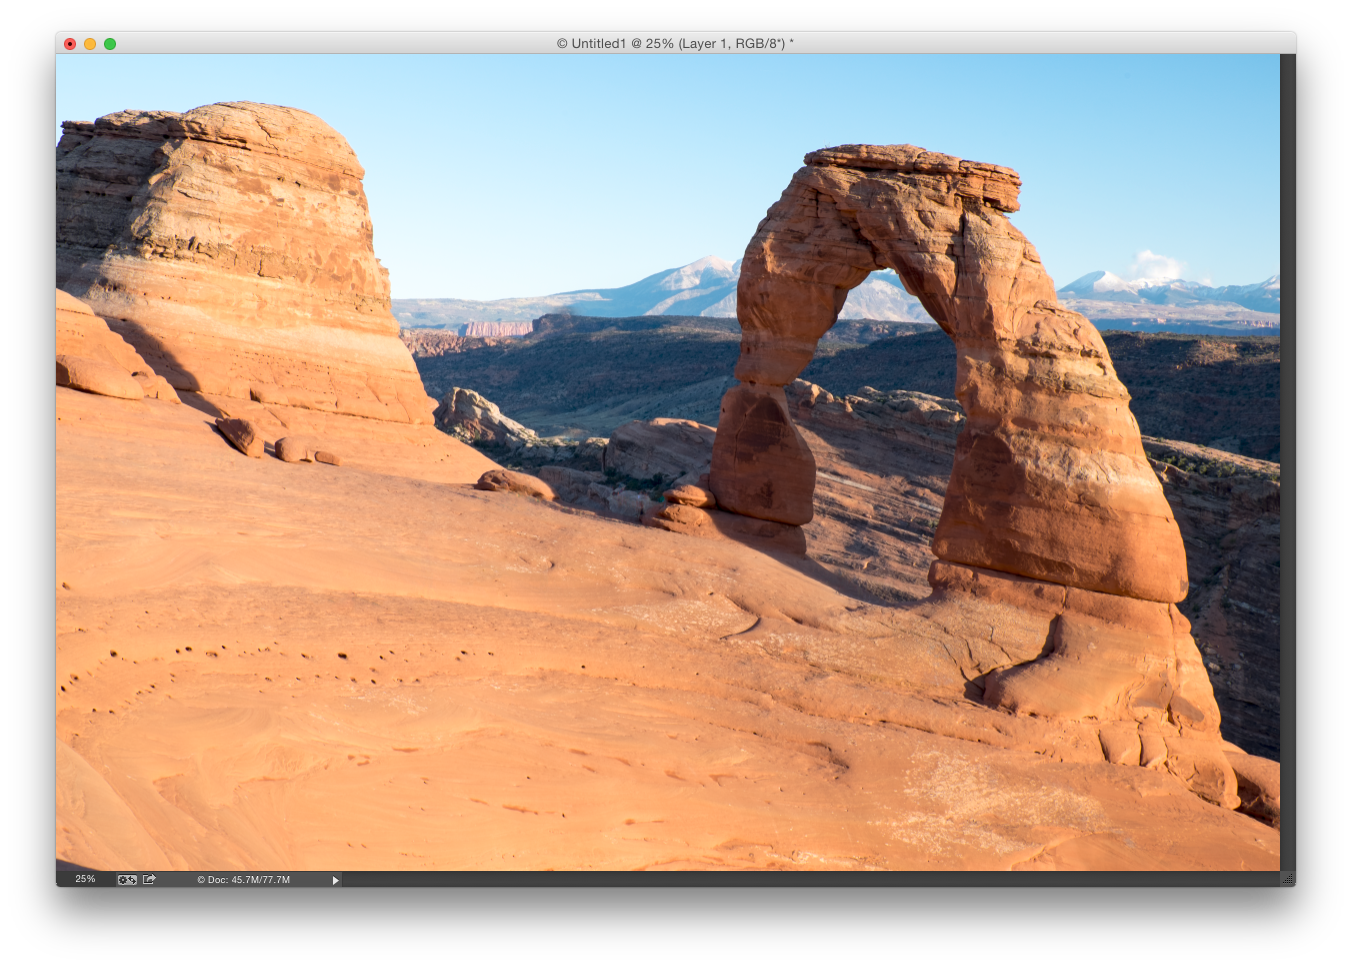
For this example of Delicate Arch in Arches National Park, I created 33 frames, each at 1 second intervals using a Fujifilm X-T1 camera.
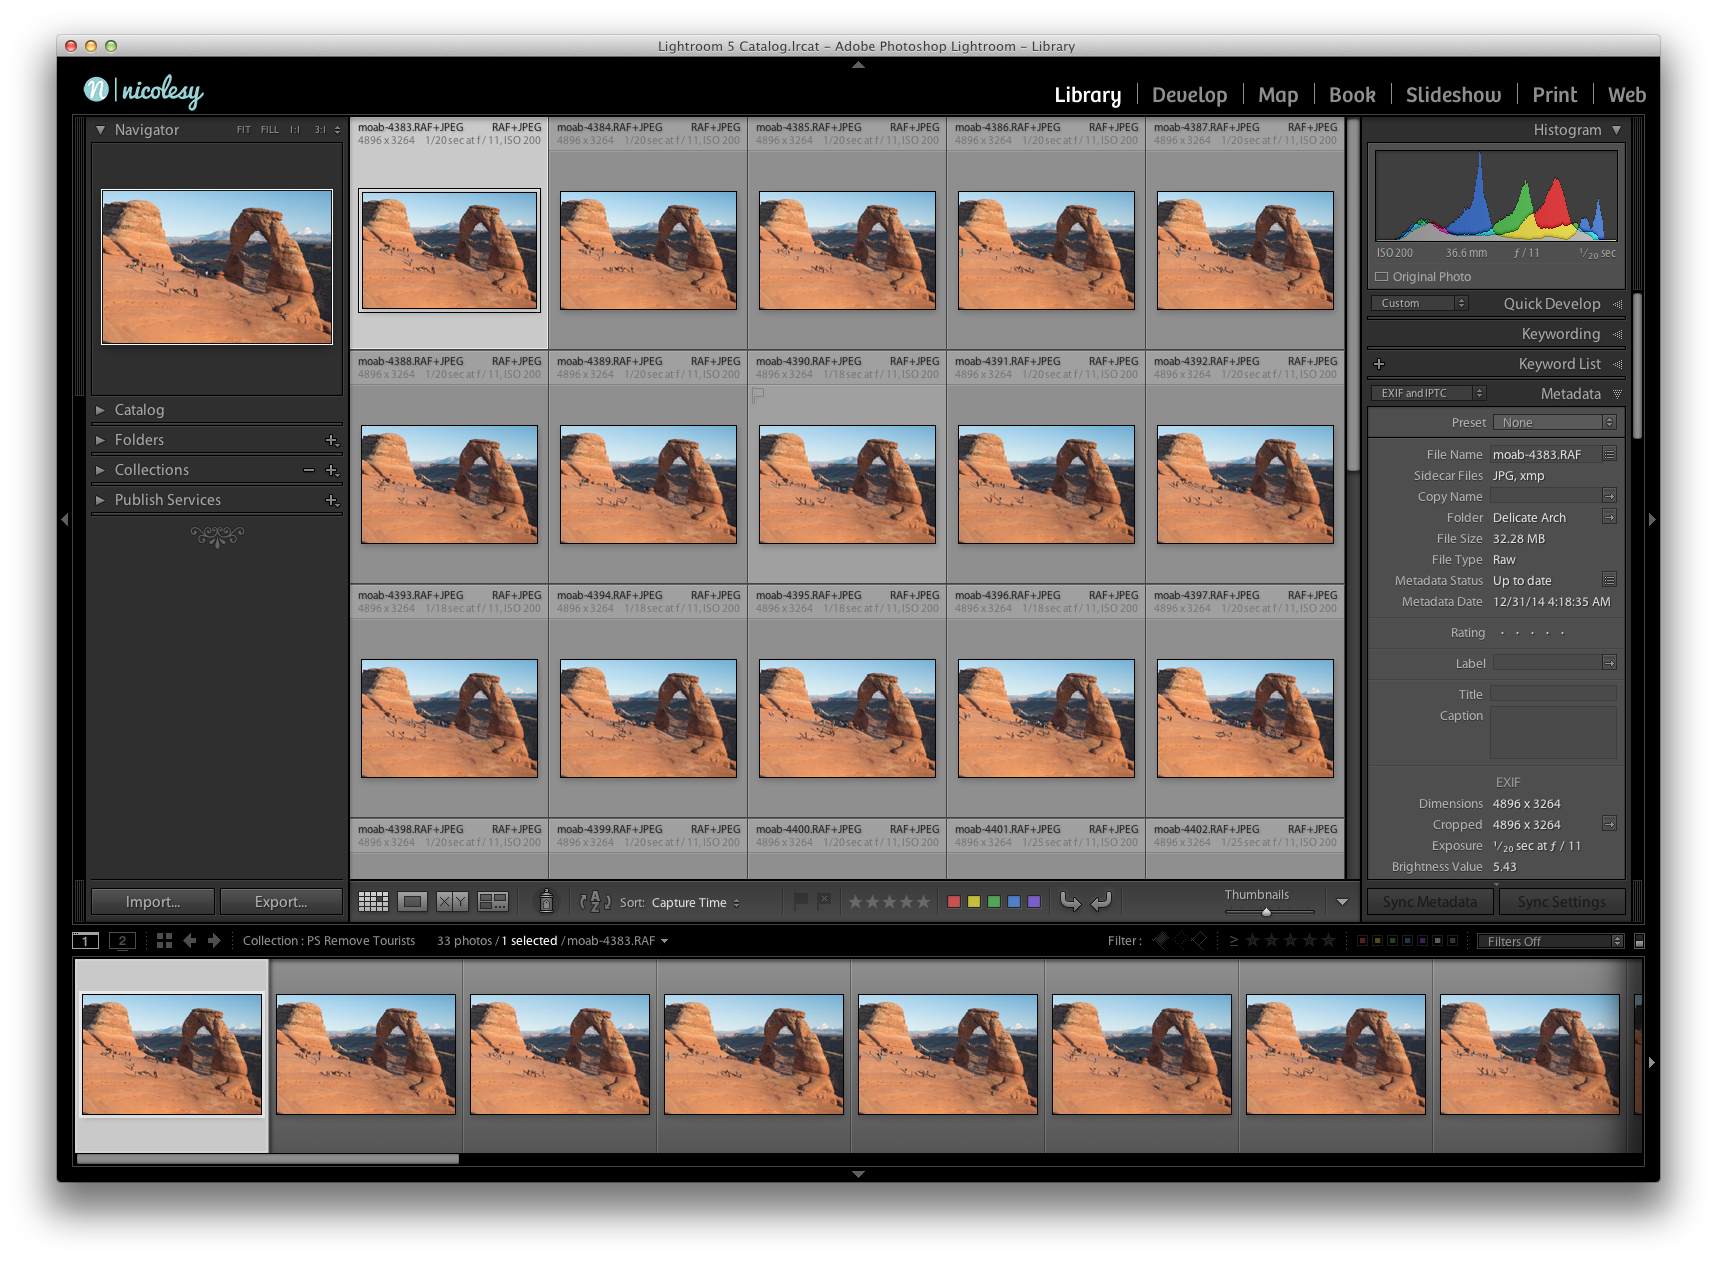
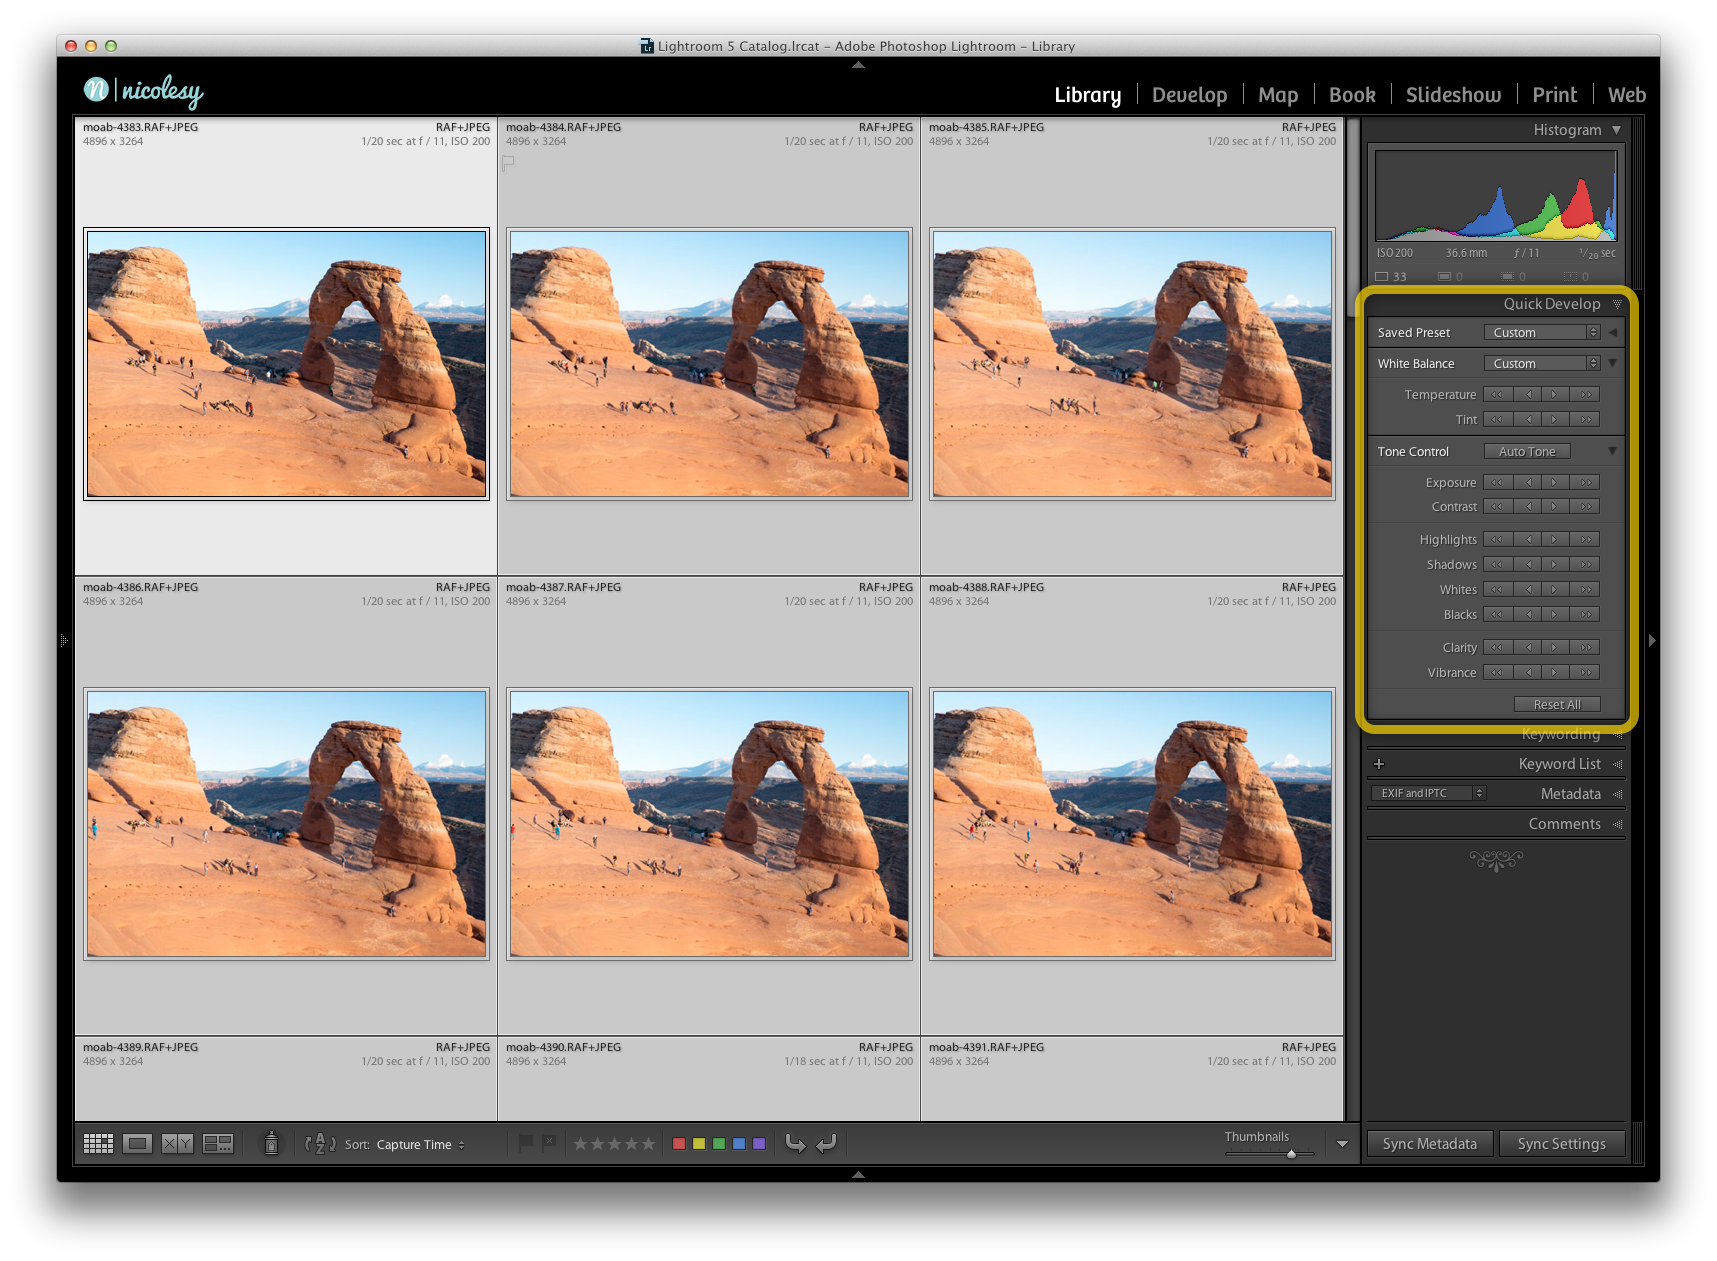
Step 2: Edit the files and sync your settings
Next, make your edits to the RAW files and sync them so that the images are all identical. Here’s how to do this using Lightroom:
- While inside of the Library module, select all of the photographs you are working with.
- Then, using the Quick Develop panel, make your basic RAW edits. (Because all of the images are highlighted, any changes you make will apply to all of your selected images.)
Step 3: Export the images
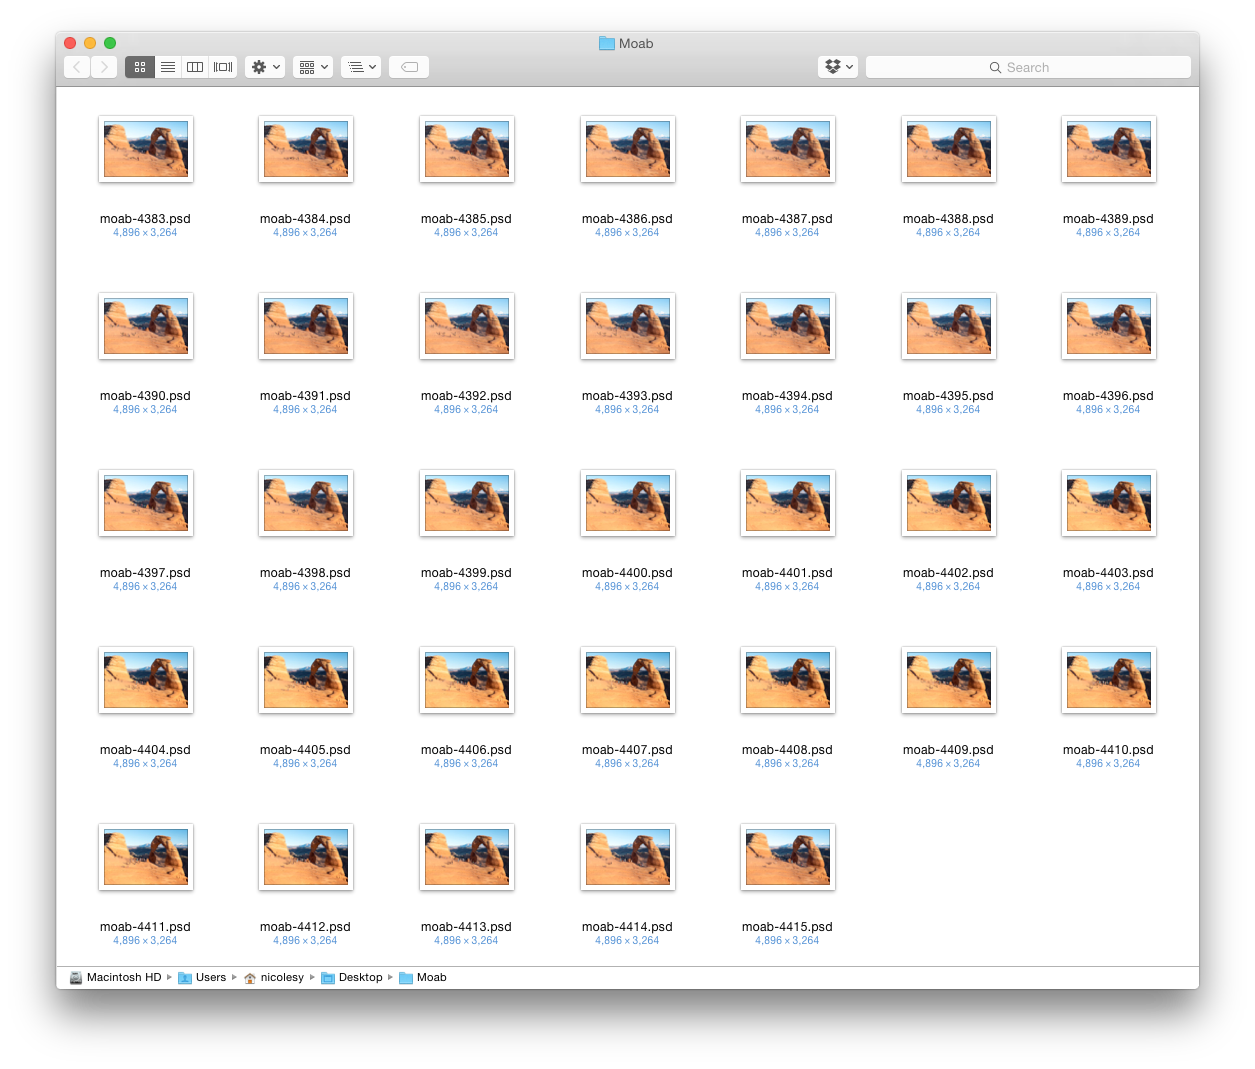
Now, still using Lightroom, export the photos you just processed into their own folder. For this process, I will export the images at full resolution into a folder on my desktop.
Step 4: Remove the tourists!
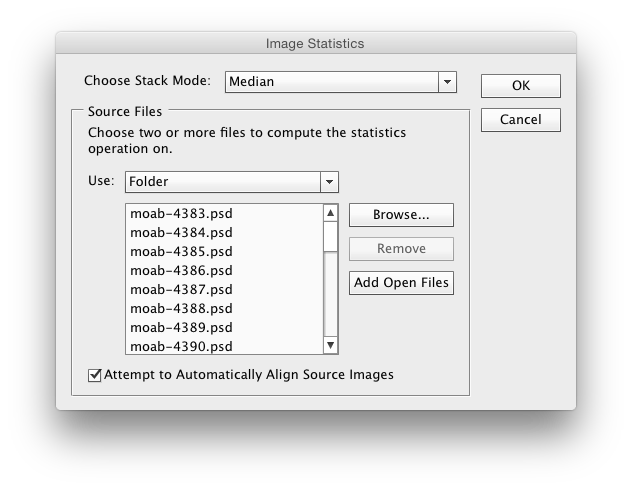
Now, inside of Photoshop, go to File > Scripts > Statistics:
- At the top of the box, choose “Median” from the drop-down.
- Then, using the dialogue box, use the Browse button to select your photos.
- Check the box at the bottom that says “Attempt to Automatically Align Source Images”.
- Click OK and Photoshop will begin the alignment and “disappearing” process, and when finished the photo will open up inside of Photoshop as a single layered document.
Step 5: Clean up image in Photoshop
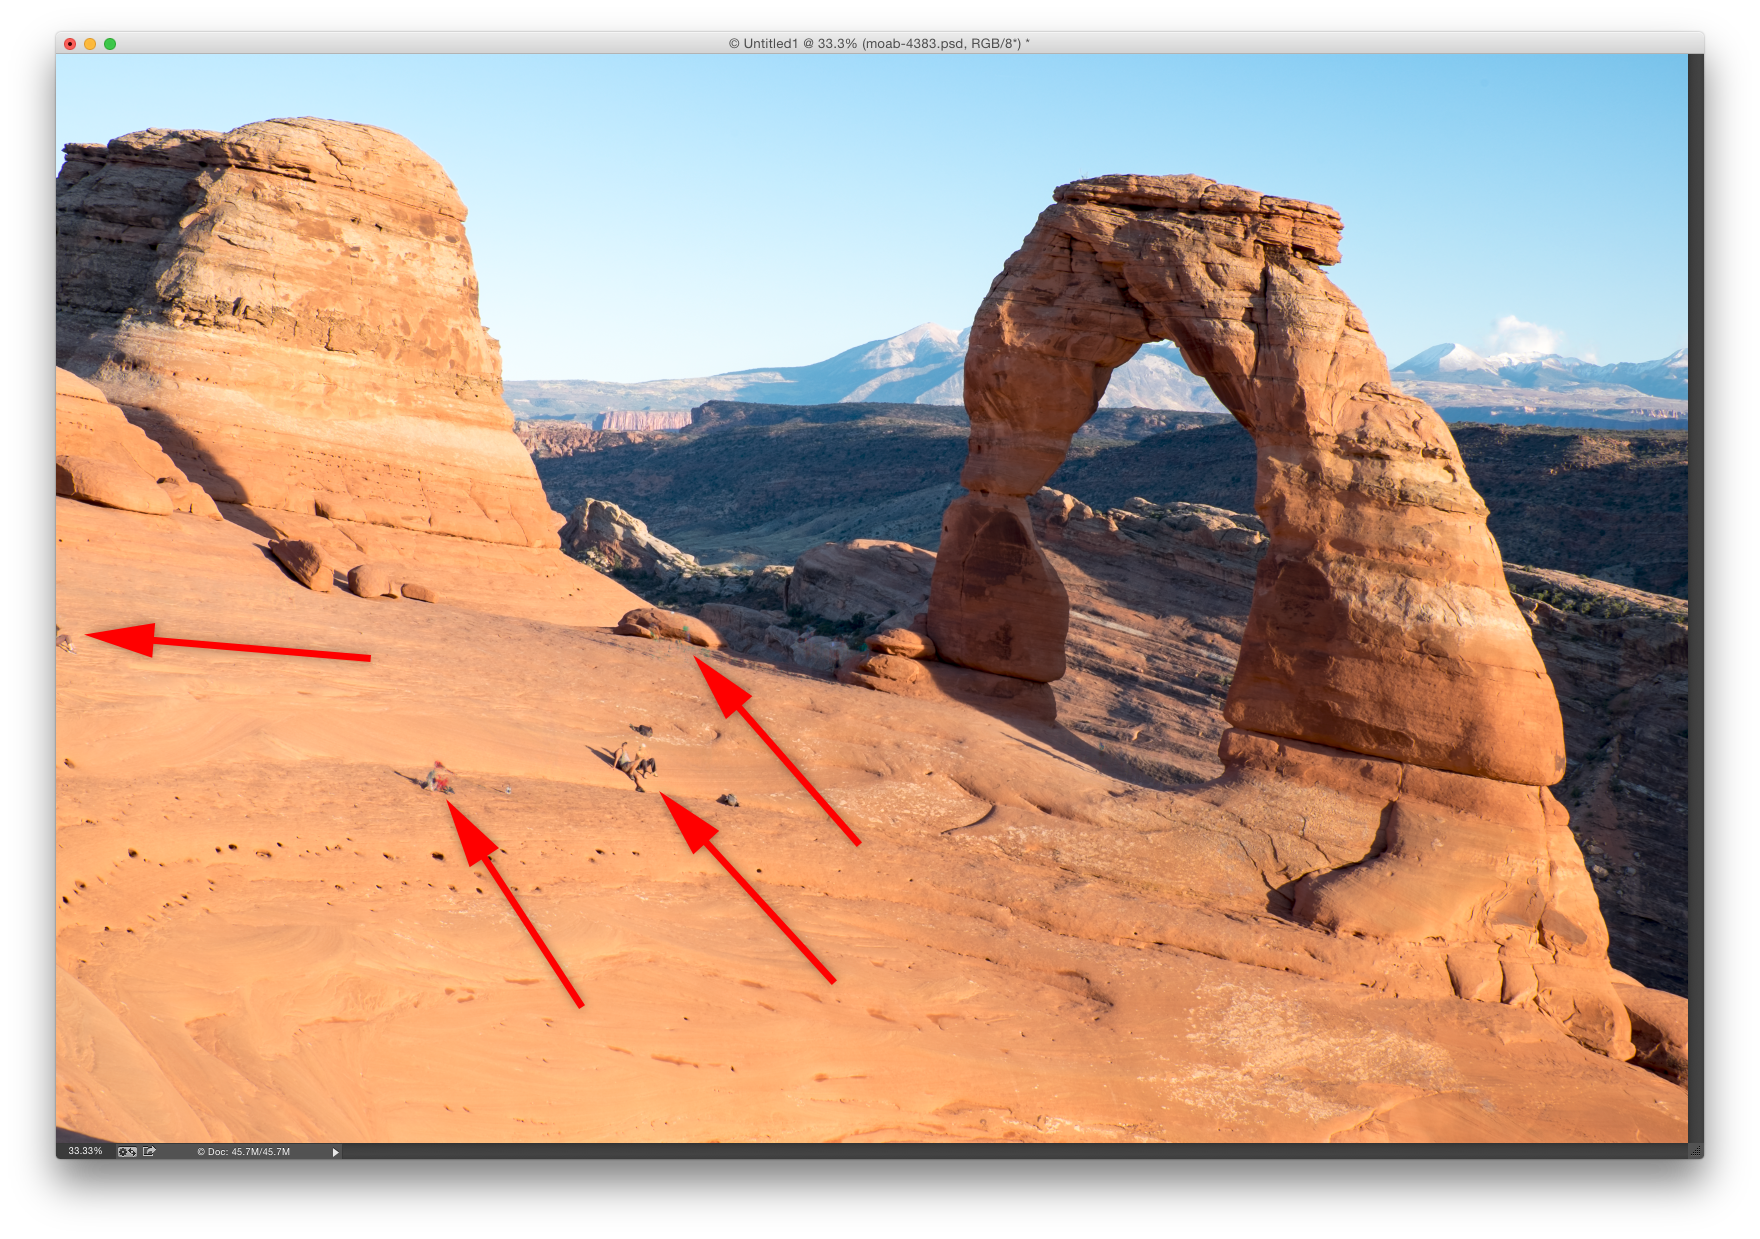
Odds are the previous step will remove most (if not all) of the people from your image. However, there might be some tourists who were not fully removed. This is probably because they did not walk around enough throughout your images, so they were seen as a part of the landscape.

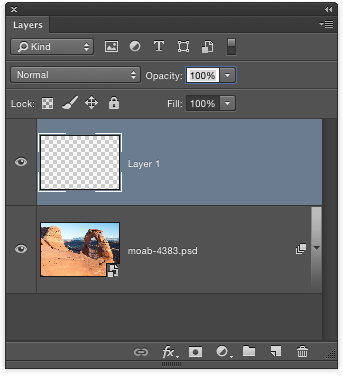
The best way to fix this is to do some old-fashioned cloning and healing. When I’m doing destructive edits to my image (such as when using the Clone Stamp or Healing Brush), I use the following method:
- First, add a new blank layer above the layer you want to mask.

- Next, select the Clone Stamp Tool (or Healing Brush).
- In the Options Bar at the top, select “Current and Below” (or “Sample All Layers” for the Healing Brush).
- Clone out the area you want to remove.
Now you have no tourists in your photo!
If you have traveled to anywhere considered “touristy”, then you probably already understand the woes of being a photographer who has too many people in the scene they want to photograph. Even if it’s just one person in your way, by the time that person leaves it is usually replaced with another (or more). The good news is, if the people are in constant motion (moving or walking around the scene), then you can set up your shot and use Photoshop to make them disappear!
What you’ll need to get started with this tutorial:
- Camera (set to manual mode)
- Tripod
- Lightroom & Photoshop
Step 1: Photograph the scene several times
The first step here is to place your camera on a tripod, set it to Manual mode, and create several photographs of the same scene. Try to space them apart a few seconds, and if you have an in-camera intervalometer, that is a good way to set it up and let it create the frames for you. You need at least 10-20 images for this process to work well, and if you choose you can include more.
For this example of Delicate Arch in Arches National Park, I created 33 frames, each at 1 second intervals using a Fujifilm X-T1 camera.
Step 2: Edit the files and sync your settings
Next, make your edits to the RAW files and sync them so that the images are all identical. Here’s how to do this using Lightroom:
- While inside of the Library module, select all of the photographs you are working with.
- Then, using the Quick Develop panel, make your basic RAW edits. (Because all of the images are highlighted, any changes you make will apply to all of your selected images.)
Step 3: Export the images
Now, still using Lightroom, export the photos you just processed into their own folder. For this process, I will export the images at full resolution into a folder on my desktop.
Step 4: Remove the tourists!
Now, inside of Photoshop, go to File > Scripts > Statistics:
- At the top of the box, choose “Median” from the drop-down.
- Then, using the dialogue box, use the Browse button to select your photos.
- Check the box at the bottom that says “Attempt to Automatically Align Source Images”.
- Click OK and Photoshop will begin the alignment and “disappearing” process, and when finished the photo will open up inside of Photoshop as a single layered document.
Step 5: Clean up image in Photoshop
Odds are the previous step will remove most (if not all) of the people from your image. However, there might be some tourists who were not fully removed. This is probably because they did not walk around enough throughout your images, so they were seen as a part of the landscape.
The best way to fix this is to do some old-fashioned cloning and healing. When I’m doing destructive edits to my image (such as when using the Clone Stamp or Healing Brush), I use the following method:
- First, add a new blank layer above the layer you want to mask.
- Next, select the Clone Stamp Tool (or Healing Brush).
- In the Options Bar at the top, select “Current and Below” (or “Sample All Layers” for the Healing Brush).
- Clone out the area you want to remove.
Now you have no tourists in your photo!

Nicole is a photographer, published author, and educator specializing in Lightroom, Photoshop, and photography. She is best known for her books on food photography but is widely versed in various photographic genres, including landscape, nature, stock, travel, and experimental imagery.


Is it not possible to export directly from Lightroom to Photoshop without creating an intermediate desktop folder?
Thanks
I’m pretty sure that this only works with images that are already on your computer. You could go directly from the RAW files, I guess, which might make the process take a little bit longer.