

When I process photos I go through two main image processing software programs: Adobe Photoshop Lightroom 2![]() & Adobe Photoshop CS4. Lightroom is where I organize the images, pick the ones I want to use and do global RAW adjustments like white-balance and subtle tonal adjustments. After I export the image (as a .psd) I do a LOT of my processing in Photoshop. I thought it would be fun to show some before/after of my images along with a brief description of each of the steps I took to get to the final product.
& Adobe Photoshop CS4. Lightroom is where I organize the images, pick the ones I want to use and do global RAW adjustments like white-balance and subtle tonal adjustments. After I export the image (as a .psd) I do a LOT of my processing in Photoshop. I thought it would be fun to show some before/after of my images along with a brief description of each of the steps I took to get to the final product.
So, to begin, here is the straight-out-of-camera RAW file I started with:
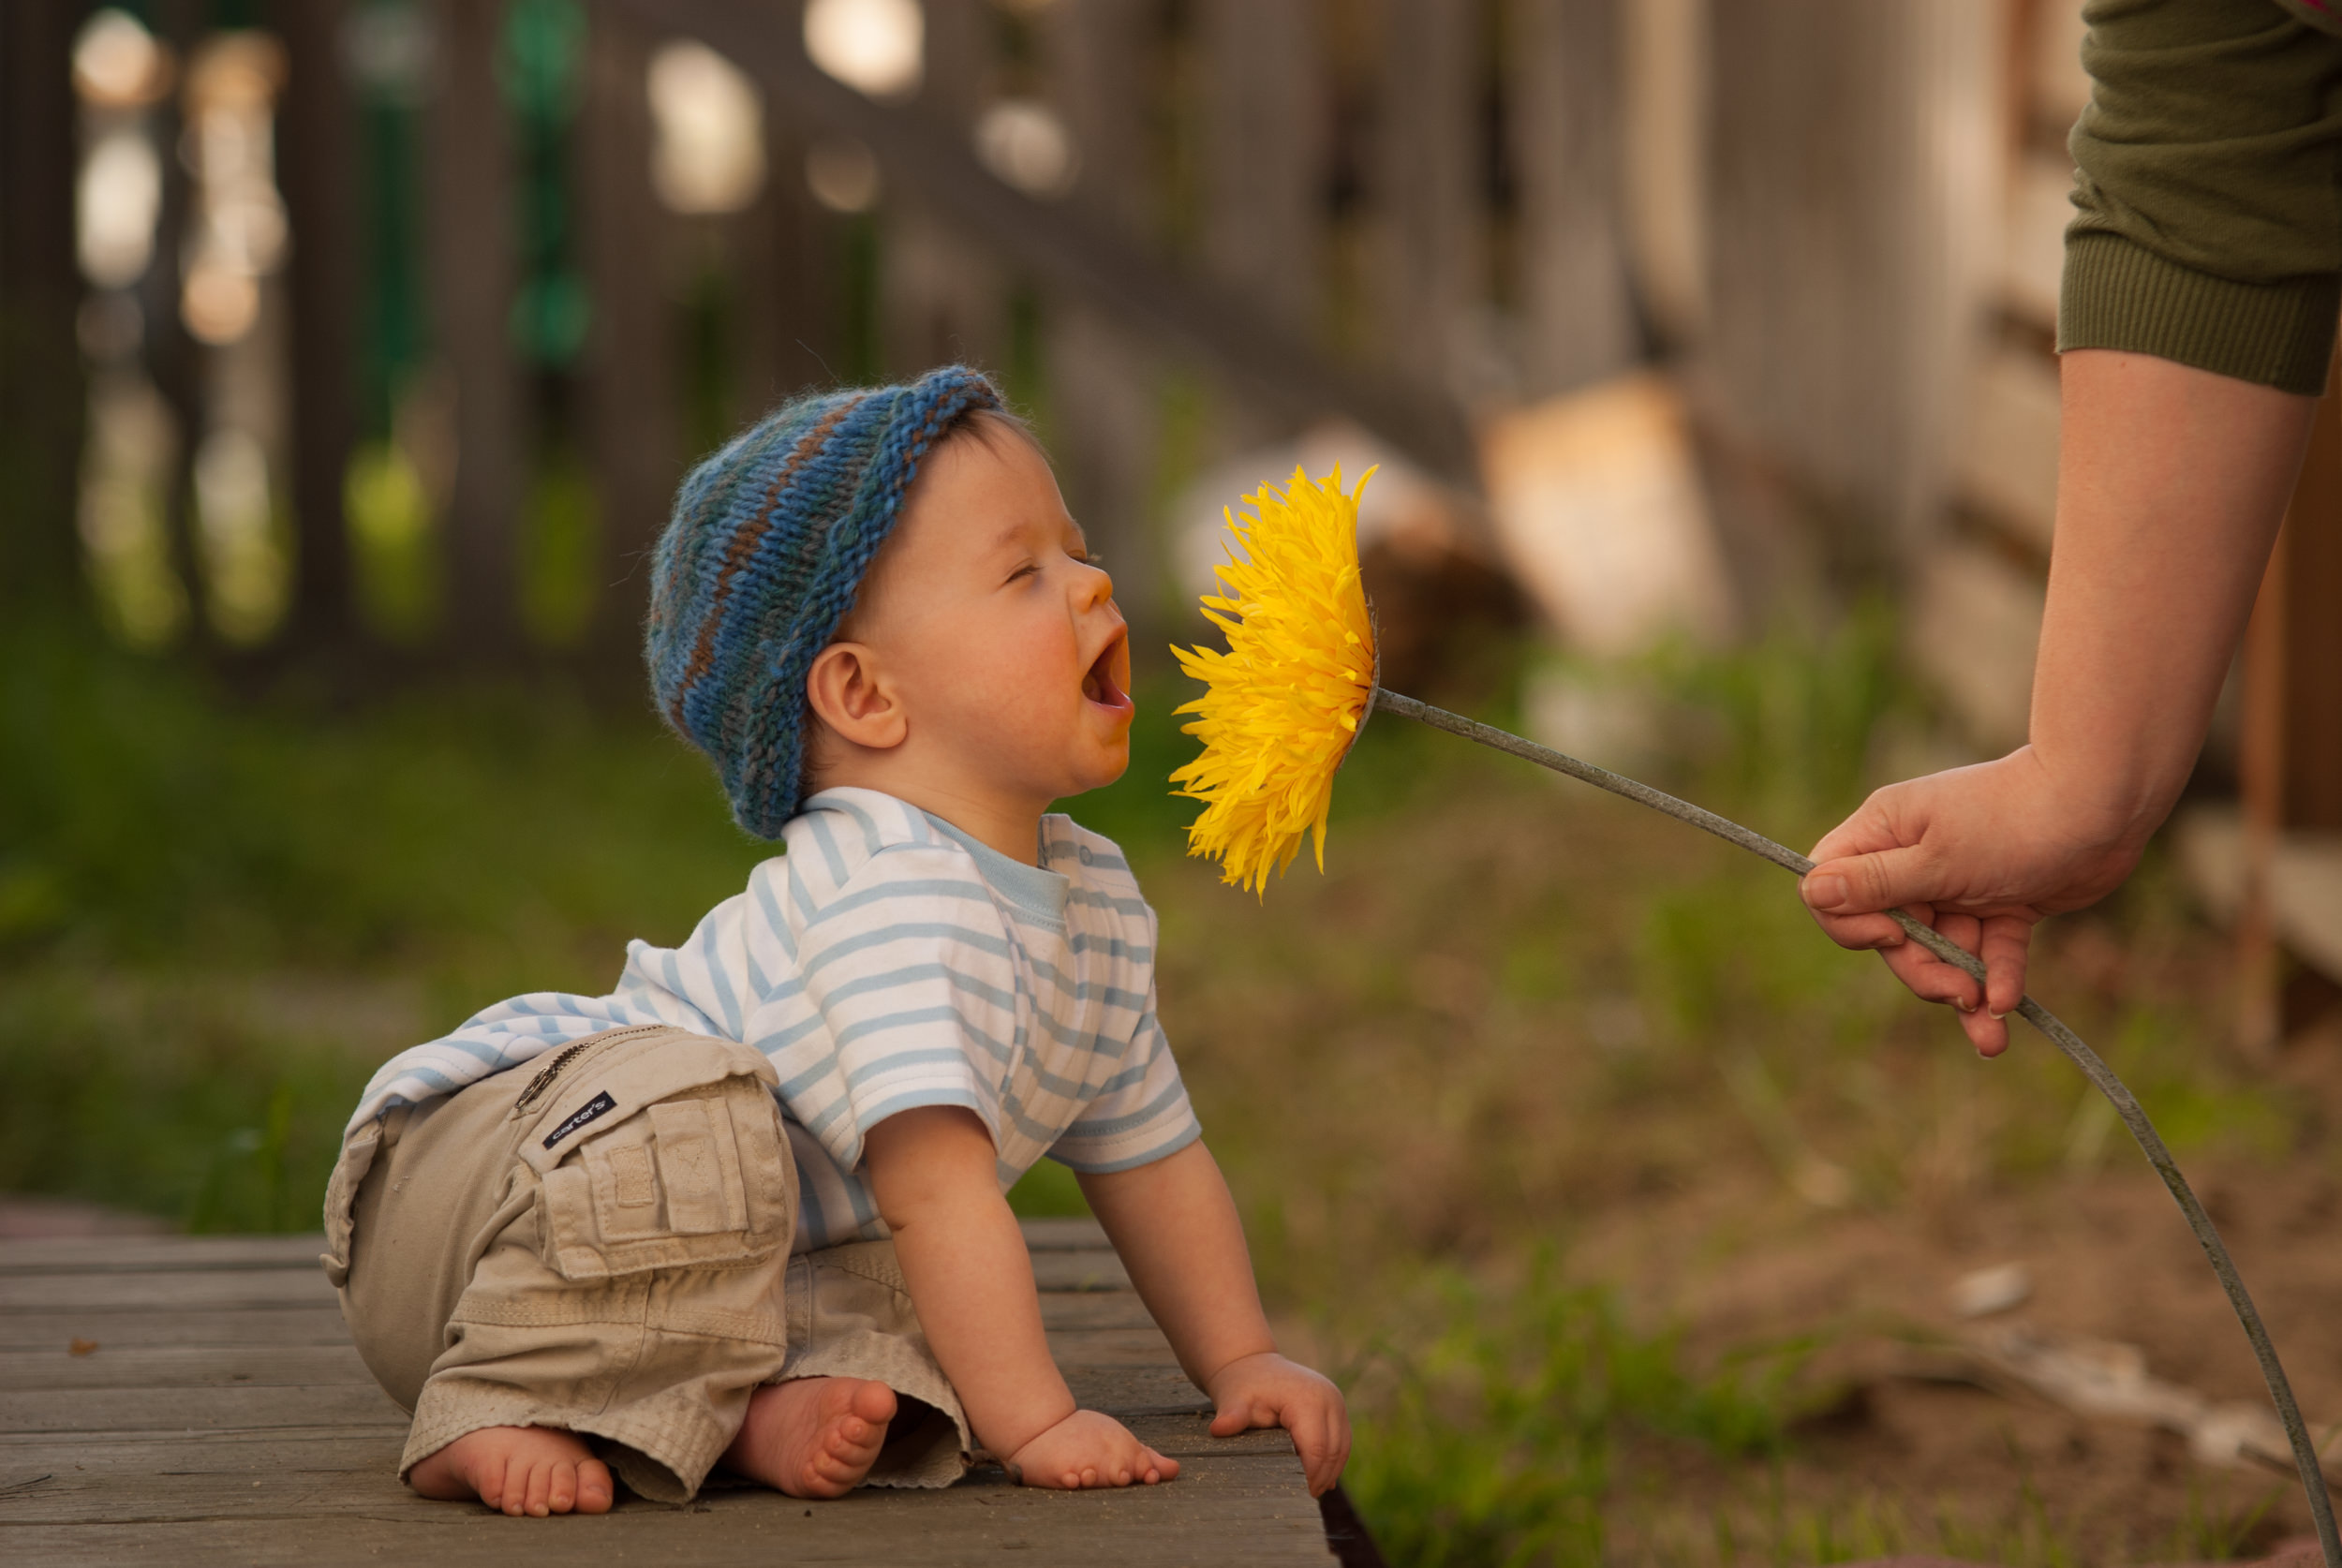
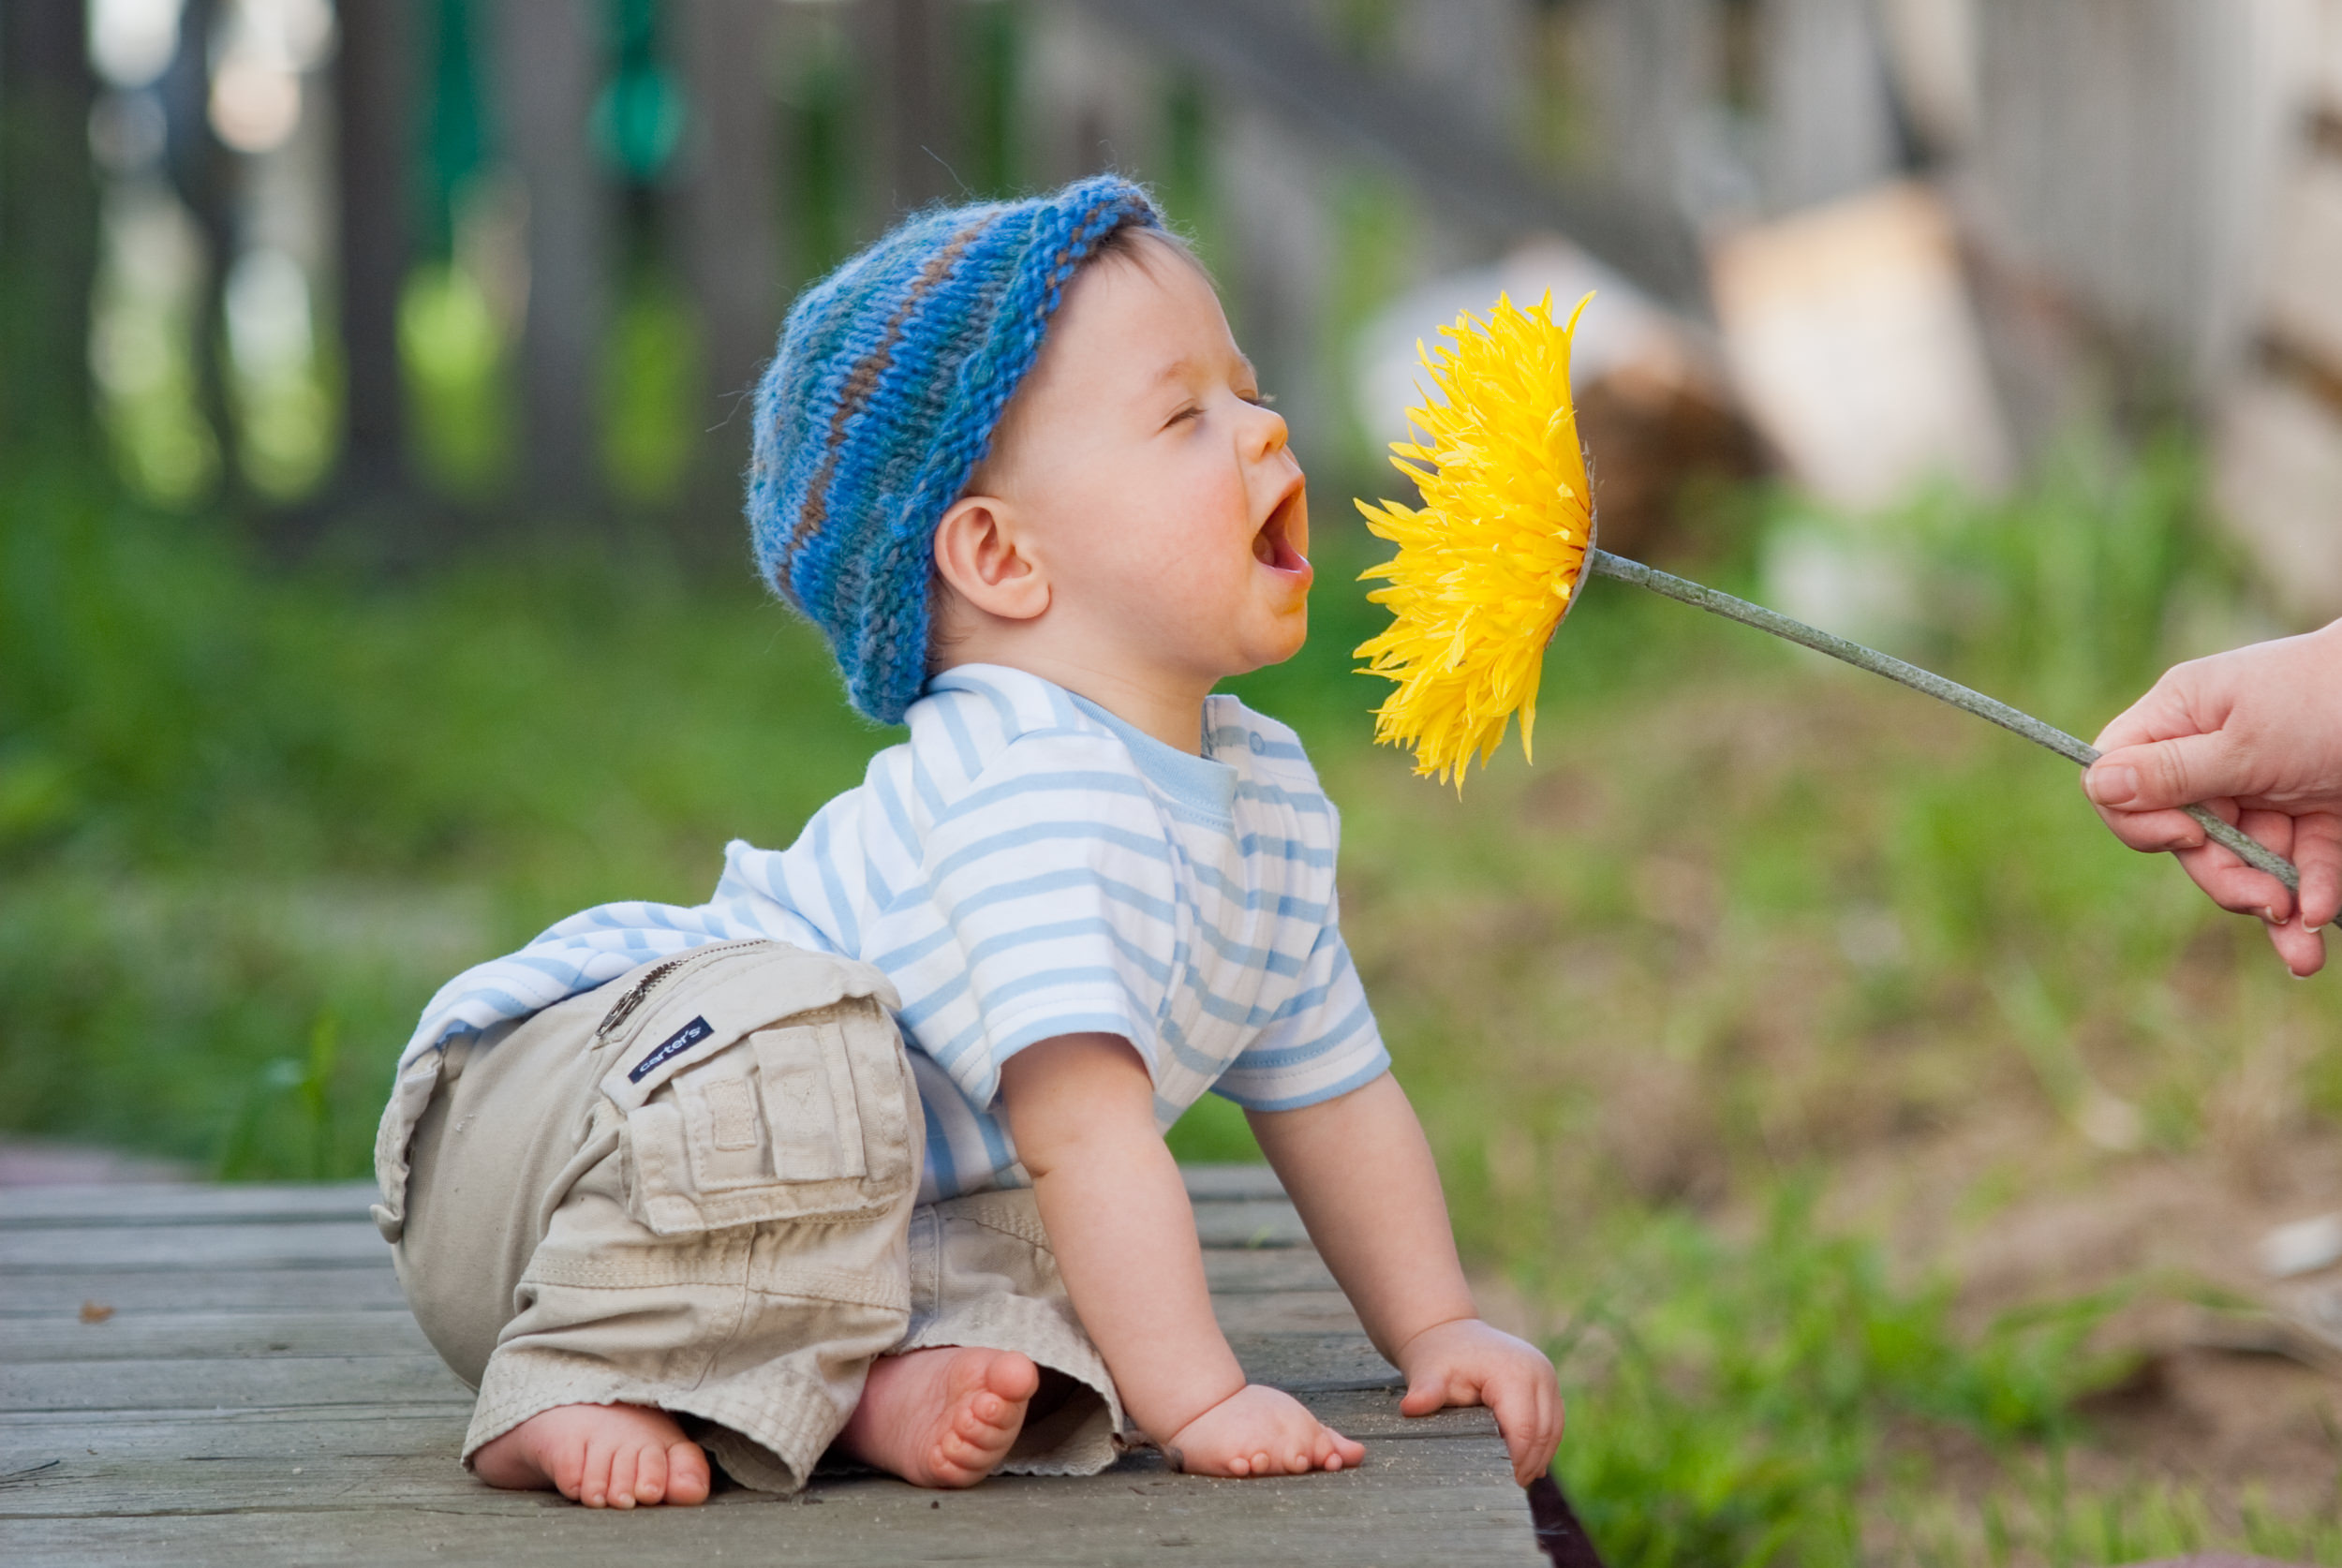
As you can see, the white balance is way off and it’s slightly underexposed. I also wanted to do some cropping to push the focus onto the baby. Here’s what I ended up with after doing some adjustments in Lightroom:
To get to the final image I used several layers in Photoshop. (The image at the top of this post shows each step, or you can click here to see the image on Flickr with notes added to describe each layer.) Here are the steps I took in Photoshop to process this image, starting with the bottom (background) layer moving upwards:
- I started with a DUPLICATE layer of the background to clone out the logo on the pants (necessary for stock images).
- Next is a BLANK layer to do some additional non-destructive cloning.
- There are two LEVELS adjustment layers. The first one is for RGB tonal adjustmens (brightness/contrast), and I did some masking of the shirt area so it wasn’t too bright in the final image.
- The second LEVELS adjustment layer is to tweak the color balance in the image.
- After that was a BLACK & WHITE adjustment layer that I blended using the SOFT LIGHT blending-mode to add some drama to the image. I masked out some of the areas of the flower to balance out the look of the image.
- For the top and final layer I merged of all the layers below it while still keeping them intact (Mac keyboard shortcut: CMD+OPT+SHIFT+E) and added a HIGH-PASS filter to give it some sharpening. I then changed the blend-mode to OVERLAY and used the mask to selectively sharpen certain areas of the image.
Here is the fully-processed photo:
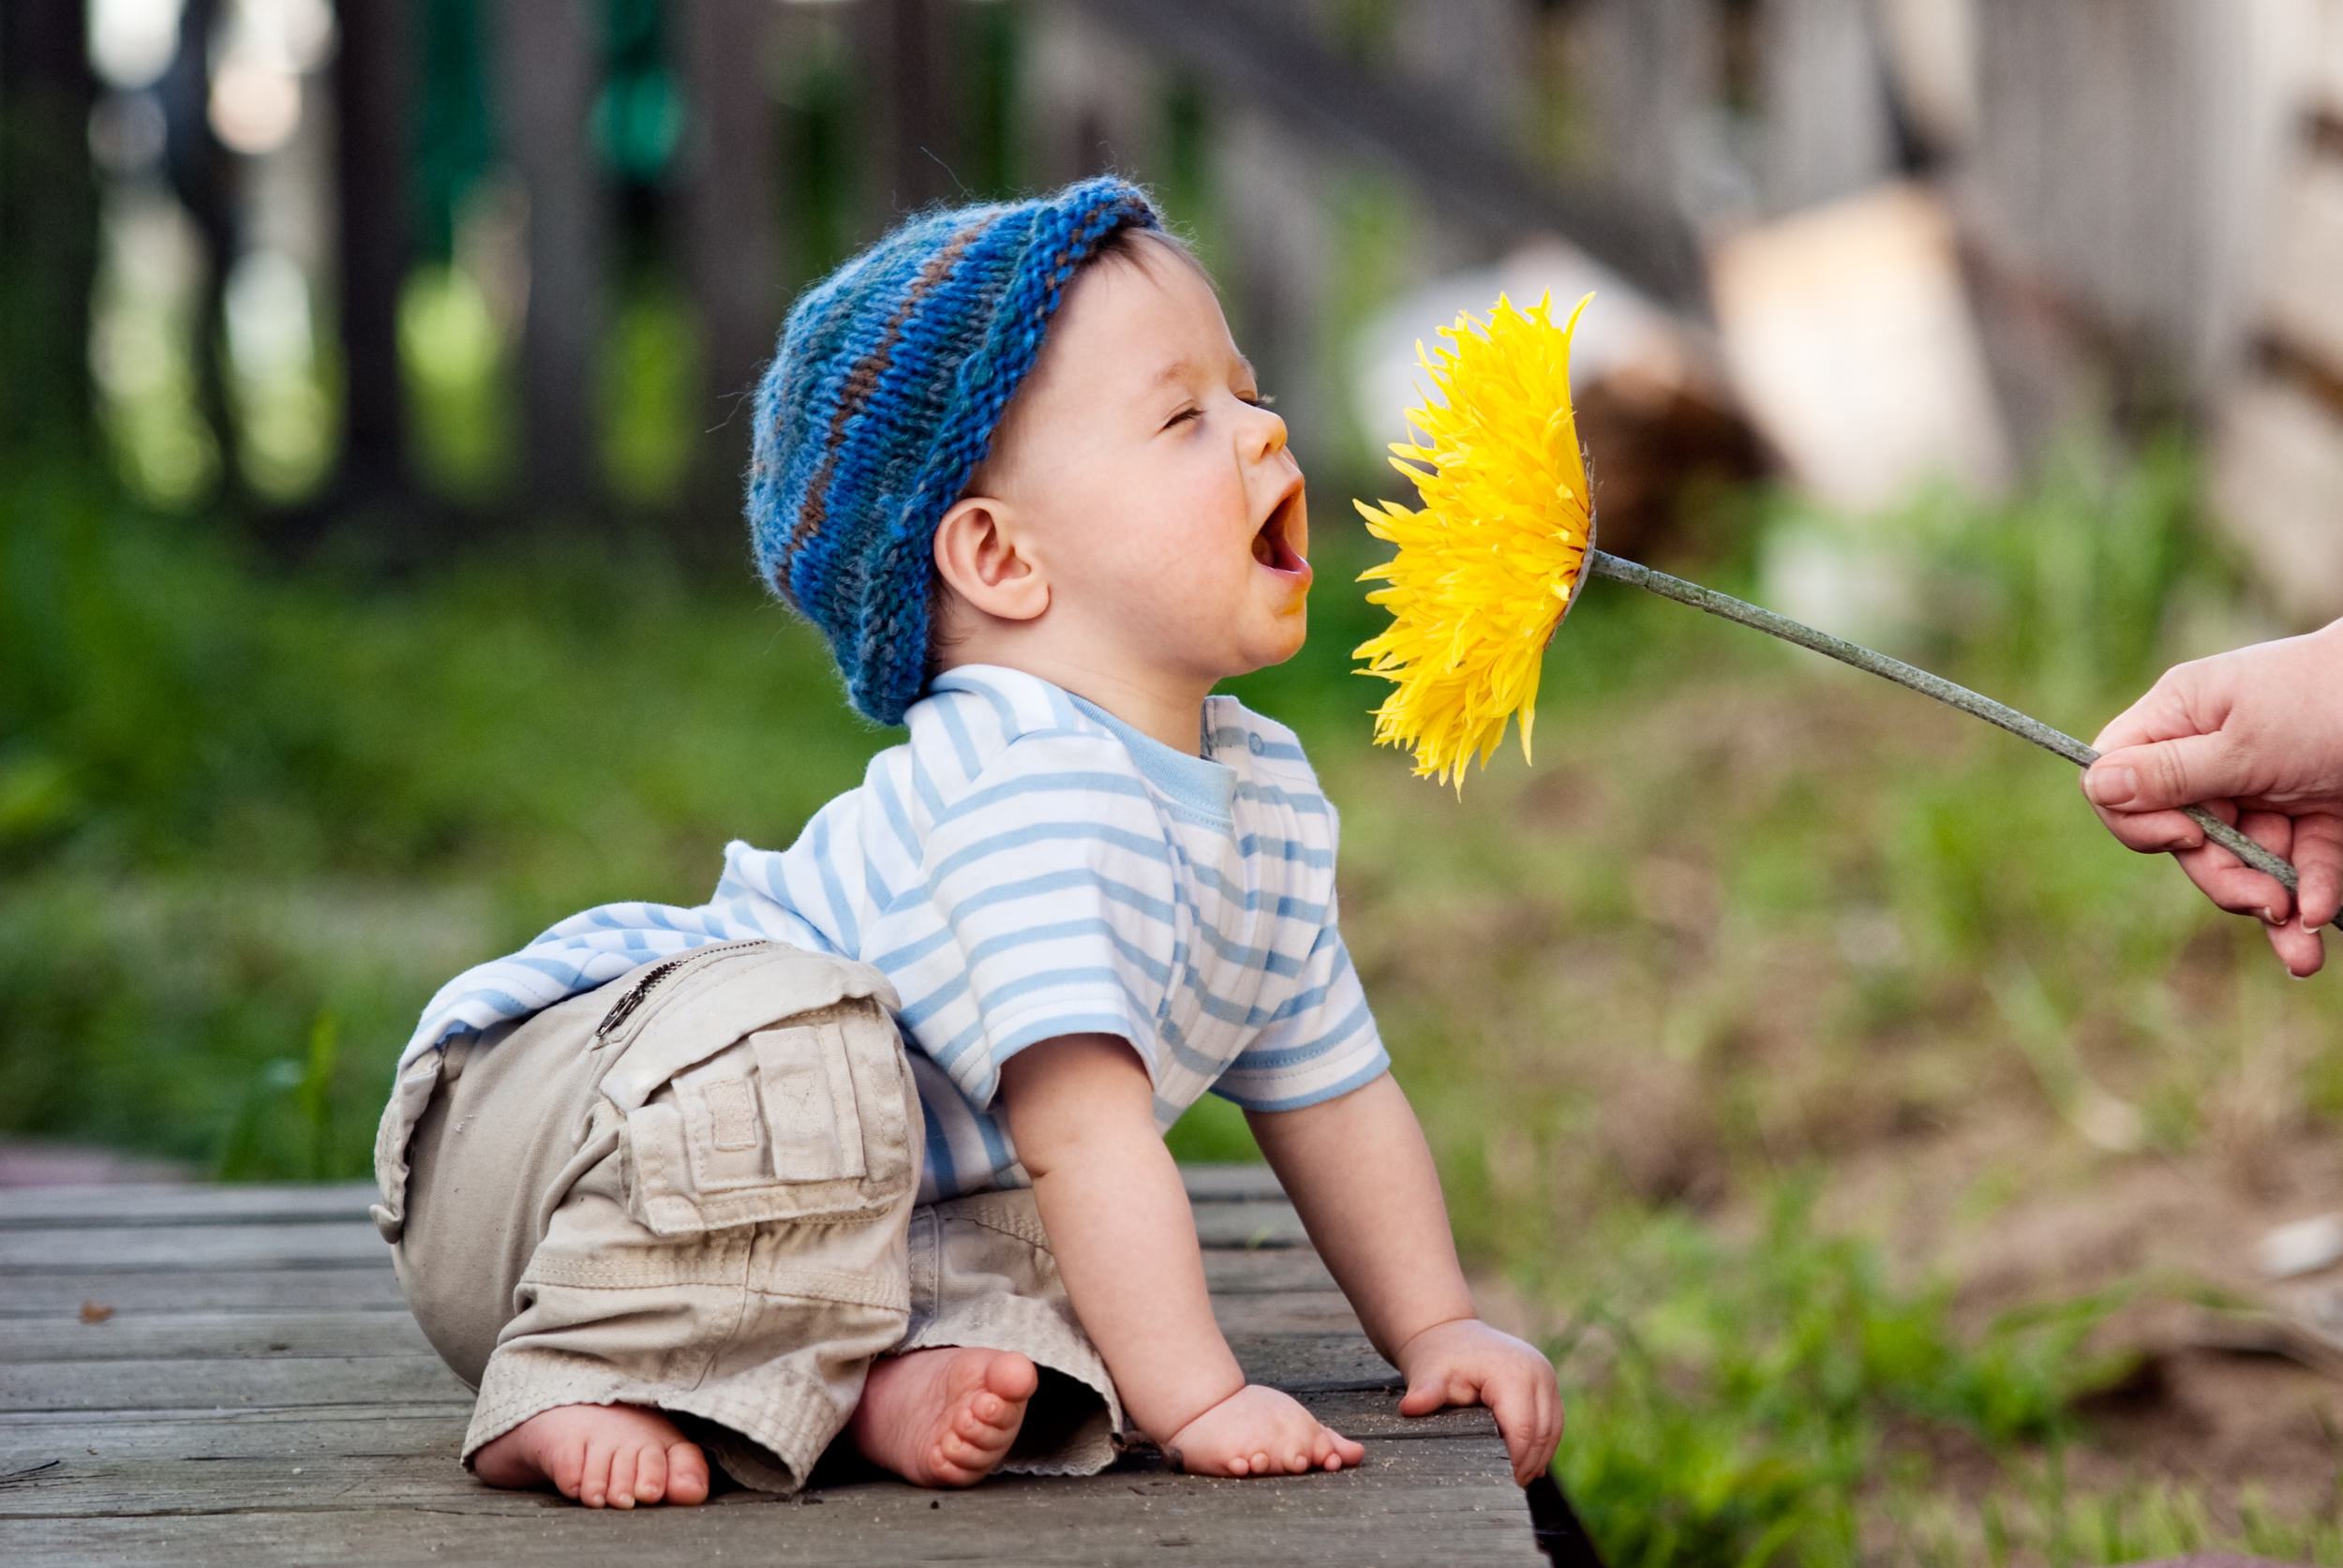
Camera: Nikon D200; Lens: Sigma 70-200 f/2.8; Exposure: ISO 100, 1/320 @ f/2.8
When I process photos I go through two main image processing software programs: Adobe Photoshop Lightroom 2![]() & Adobe Photoshop CS4. Lightroom is where I organize the images, pick the ones I want to use and do global RAW adjustments like white-balance and subtle tonal adjustments. After I export the image (as a .psd) I do a LOT of my processing in Photoshop. I thought it would be fun to show some before/after of my images along with a brief description of each of the steps I took to get to the final product.
& Adobe Photoshop CS4. Lightroom is where I organize the images, pick the ones I want to use and do global RAW adjustments like white-balance and subtle tonal adjustments. After I export the image (as a .psd) I do a LOT of my processing in Photoshop. I thought it would be fun to show some before/after of my images along with a brief description of each of the steps I took to get to the final product.
So, to begin, here is the straight-out-of-camera RAW file I started with:
As you can see, the white balance is way off and it’s slightly underexposed. I also wanted to do some cropping to push the focus onto the baby. Here’s what I ended up with after doing some adjustments in Lightroom:
To get to the final image I used several layers in Photoshop. (The image at the top of this post shows each step, or you can click here to see the image on Flickr with notes added to describe each layer.) Here are the steps I took in Photoshop to process this image, starting with the bottom (background) layer moving upwards:
- I started with a DUPLICATE layer of the background to clone out the logo on the pants (necessary for stock images).
- Next is a BLANK layer to do some additional non-destructive cloning.
- There are two LEVELS adjustment layers. The first one is for RGB tonal adjustmens (brightness/contrast), and I did some masking of the shirt area so it wasn’t too bright in the final image.
- The second LEVELS adjustment layer is to tweak the color balance in the image.
- After that was a BLACK & WHITE adjustment layer that I blended using the SOFT LIGHT blending-mode to add some drama to the image. I masked out some of the areas of the flower to balance out the look of the image.
- For the top and final layer I merged of all the layers below it while still keeping them intact (Mac keyboard shortcut: CMD+OPT+SHIFT+E) and added a HIGH-PASS filter to give it some sharpening. I then changed the blend-mode to OVERLAY and used the mask to selectively sharpen certain areas of the image.
Here is the fully-processed photo:
Camera: Nikon D200; Lens: Sigma 70-200 f/2.8; Exposure: ISO 100, 1/320 @ f/2.8

Nicole is a photographer, published author, and educator specializing in Lightroom, Photoshop, and photography. She is best known for her books on food photography but is widely versed in various photographic genres, including landscape, nature, stock, travel, and experimental imagery.


wow, thanks for the details. very insightful. White balance seems so controversial and subject to taste. I think I struggle with that the most in my photos.
For Cute!
I always struggle with trying to get that sort of pop without getting artifact rejections, you know? But this helps me see how I have to get in there and make more than global adjustments. It seems to get that high contrast look one has to make use of masks and do things here and there…a big swipe of the contrast slider doesn’t cut it. ;)
Great edit.
Thanks for all the great detailed info.
Saw on twitter that you are thinking of getting the “RS-4 R-Strap”. Can’t wait to hear how you like it..hope you twitter us and let us know. Would love to find out how you feel about it after using it.
Thanks again for sharing all your information and talent.
I have learned to love that BLACK & WHITE adjustment layer! Cute pic!
Pretty cool post. I just came by your site and wanted to say
that I’ve really enjoyed reading your posts. Anyway
I’ll be subscribing to your blog and I hope you post again soon!
Beautiful work Nicole!!
Color me different… But I prefer the warmth of color in the original photo to the processed images. The reflection of the flower on the baby’s chin and nose look better, to me, and the background colors are more spring-like. The processed images look more like a fall image. Interesting mood changes…
Thanks for sharing the photography tips. It’s a great service to people trying to learn how to edit their photos. This makes for greater photographers and I hope more people will enjoy not only taking photographs but editing them as well!
Great tutorial.
Thanks.